Feature Friday- Ukrainian Egg Tutorial
Ukrainian Eggs are a beautiful addition to your Easter decorations. In fact, I keep them around the house all year round. I wanted to take a moment and give you a brief tutorial on the actual process of creating these eggs with bees wax and dyes.
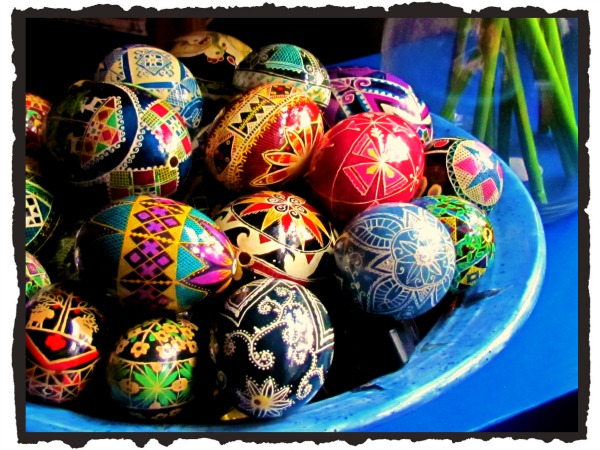
My starter kit consisted of three sizes of kistka, 10 different colored dyes, bees wax and some patterns and instructions. That was enough to get me off and running. My oldest daughter showed up the first evening that I tried it and she and I both learned how to do it together. In other words, we both made mistakes and learned from each other. She has an entirely different style than I do and our mix of egg designs compliment each other.
Are you new to the Sitcom? Be sure to check out my Frequently Asked Questions Page!
My designs originally came from ideas off the internet, but now my daughter and I come up with our own designs. Unlike a traditional pysanky egg, our designs do not tell a story. A traditional pysanky egg uses symbols throughout the design that can mean anything from fertility to eternal knowledge, to wealth and prosperity.
We do a twist on the traditional egg by incorporating our own designs and patterns. I tend to go with a structured pattern, while my daughter’s patterns are more free flowing.So for those of you that might be interested, here is the basic run down on how to make Ukrainian eggs:
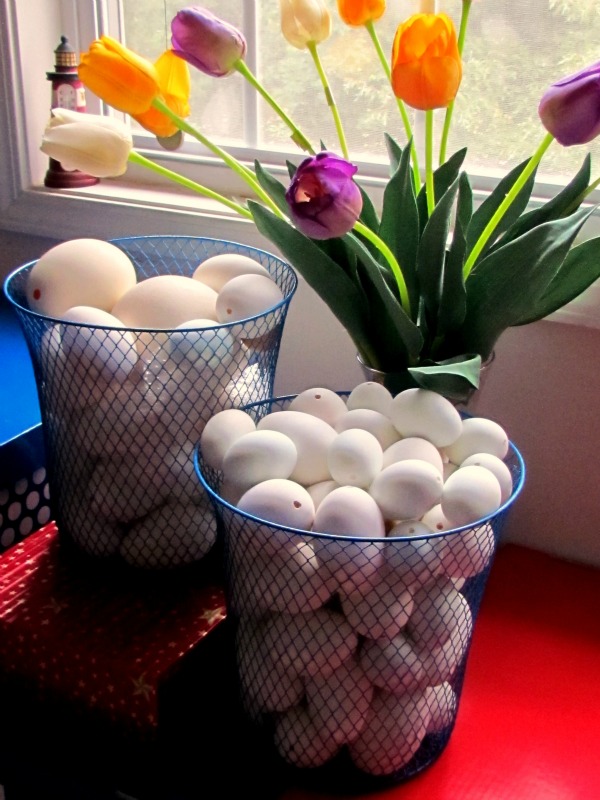
Start with fresh eggs. Preferably those that have never seen the inside of the grocery store. Commercial eggs have thin shells and are cleaned with chemicals. The chemicals will affect the dyes and nobody wants to put five hours into a design just to have the stupid egg crack. Believe me, I know.
You will need to blow the inside of the egg out and then clean the outside shell with a mix of white vinegar and water. (Traditional pysanky is done with an unblown egg and the inside of the egg then disinegrates over the years). I live in Georgia. I would end up with stinky, rotten eggs. So I do not do this.
These are goose eggs from my sisters geese and chicken eggs from my Mom’s chickens. If you do not have access to fresh eggs, you can order blown ones over the internet. Check the links at the end of this tutorial.
Using a pencil, lightly draw your design on the egg. I start by sectioning the egg into even sections and then work in my design. (Note the rubber glove- oils from your skin can also affect the dyes).
Once all areas are covered that you would like to be white, use a small plug of bees wax to seal the hole in the bottom of the egg that you used to blow it out. That way, the dye will not get inside the egg.
The dyes used for Ukrainian eggs are very strong dyes. I am super careful because I have white carpet in my workroom and really do not want a divorce. Ha! They are also toxic, so if you decide to try this art, keep them away from children and animals.
The next step is to dip your egg in the dye just like you would to color an Easter egg. But you will have to hold the egg down due to the fact it is hollow. In this case, my first color that I’m using is pink. Generally, you work from lighter colors to darker ones when dying Ukrainian eggs.
Now I use the kistka to draw lines and fill in any spots that I want to be pink.
Dip the egg into the next color. In this case- blue.
Draw and color in all places that you want to be blue.
Dip into the next color- in this case Purple.
Color and draw in all places that you would like to remain purple.
Here, I have dipped it into my final color- black. Kinda ugly isn’t it?
But now for the magic. Hold the egg to the side of the candle flame and begin melting off the beeswax, wiping it with tissue as you go.
See, our little ugly duckling is coming to life!
And there you have it! It just needs a good coat of clear varnish and it is set to go! Totally worth the time and effort!
My advice for new pysanky artists. Well, we learned a few things the hard way. Always use fresh eggs. Not the kind from the grocery store. Use plastic gloves to handle your egg- you don’t want to leave natural oils on your egg. Always blow the eggs out before dyeing them or you will actually end up with egg in your dyes. Never hold the egg directly over the flame of the candle. It will cause charcoal stains on your egg and possibly your egg to crack.
And be careful not to drop the egg. That totally ruins your day. Ask me how I know…
__________________________________________________________

Enjoyed this tutorial? Be sure to check out my tutorial page for many more!
For other egg art check out: 3D Panoramic Egg Tutorial, or my Beaded Faberge Eggs Tutorial


Thank you Lisa! This particular technique only works on real eggs. You could probably paint artificial eggs with a similar look, but would need to use something other than the dyes and bees wax.
suzy
These are beautiful. Do you think an artificial egg (not plastic) available in the hobby stores or with Easter supplies work?
My grandparents came from the Ukraine. Your tutorial is exactly the way that the way my family and i do it. Every year we each do one or two eggs. The eggs that are not blown out must be sealed when finished with shellac or we have used clear fingernail polish. This will prevent them from smelling over the years.
This is an awesome tutorial that I will definitely try! I started decorating, with nail polish, special no-run markers, colored threads, a couple of years ago. I try to do 6-12 every year, it’s a wonderful hobby.. thank you.
Hi!
Thank you for your evaluation of my work)))
Dima
In the 1990’s, I worked with a woman from the Ukraine and she would bring these eggs to work to decorate her cubicle. I commented how pretty they were, and she said she made them. Of course I had to ask how it was done and I was fascinated by the process. I tried my hand at making some, though I free-handed my own designs and they weren’t as intricate as these. It’s a great project to take your mind off things since it’s a little time-consuming and fun! Melting off the wax at the end is like opening Christmas presents, the anxious feeling and excitement makes you feel like a kid again LOL
Hi!
Your pysanki is beautiful! And yes, I agree. It is more of a hobby than a business. I find creating pysanki very calming and enjoyable. Thank you for sharing your work!
suzy
I make pysanki from a tree. I buy wooden preparations in Zakarpattya, Ukraine (the ancient place of production of Easter eggs in Ukraine) and paint them. This is a long, but very exciting activity. Unfortunately, it is not possible to do a lot of pysanky for business. This is more of a hobby). A small amount exhibited at ETSI for viewing. You can view).
https://www.etsy.com/shop/MityaUA
Hi Cassie!
Thank you so much! Creating Ukrainian eggs is incredibly relaxing. Believe it or not, I actually have about 3 dozen goose eggs stored under my RV for future projects! LOL! Thanks so much for stopping by!
suzy
Hi Cindy!
Ukrainian eggs take some practice, but they are so much fun to make! If you ever decide to try and have any questions, just let me know!
suzy
These are beautiful! My mom has dyed Easter Eggs for 40+ years but I don’t know if she has heard of this. I think she would love to try this art and I know I would!! 🙂
Oh my gosh! I learned how to make ukranian eggs when I was in high school but I haven’t done it in years. Yours are so beautiful, it’s really making me want to get back to it! Thanks for linking up with us at The DIY Collective, I hope you come back and join us again next thursday! xoxo, Cassie @ Little Red Window
This is so amazing. I have never seen this done and love the affect it gives! Thanks for linking up with #MerryMonday link party!
Wow, this is amazing and so beautiful. I always wondered how these were done. Thanks for sharing this great tutorial.
WOW, these are just stunning! The amount of work that goes into each one is really mind blowing!!! If I didn’t have such terrible arthritis in my hands I would have to make some. Sharing on Pinterest, Twitter, Google+, and Stumbling!! Thank you so much for linking up to Inspire Me Monday!! Have a blessed week!!
Seriously, how beautiful! That is quite a skill and an art. Thanks for sharing!
Hi!
Most of my designs are my own or a combination of ideas that I found on the internet. Do a search for Ukrainian eggs and you will have lots of inspiration!
Would love to see what you come up with!
suzy
i loved your tutorial, but may i ask where you got your designs? I would love to make these but just need to find the designs
I LOVE these they are so beautiful and awesome I would of really loved to do these a few years back when I had more patience. I really enjoyed learning how to do them though, thank you so much!
Hi Valerie,
Well I definitely want to follow along on your journey too! Maybe we can even cross paths. Who knows? Stay in touch!
suzy
GORGEOUS egg Susy ! I just found your blog and am so pleased !:) I am also going to head out on the road in ? years…..I’m going to revamp a bus and take my children’s show on the road….and yes, there will be a blog so I’m super duper looking forward to your blogs about being in the motorhome….or should I say MOTORMANSION? all the best and happy trails, Valerie
With the younger set, try sharpie pens on blown eggs. They will have a blast!
suzy
These are really neat. I was thinking about making these with my daycare kiddos but think it might be over there heads at this time – but I’m toying with the idea of doing something similar using plastic (???) eggs or even blown eggs (in the past I found them pretty sturdy) and strongly encouraging the kids to be gentle with the eggs (which they will be).
A couple years ago I took a class on Amate Folk Art at the local city library with my daycare kids – and I might tweak your ukranian eggs artwork and teach them Amate instead. Thanks for an awesome idea!
I did a review and shared the class I took with the kiddos & you are welcome to see what we made @ http://familyliteracy2.blogspot.com/2012/07/amate-folk-art-of-mexico-craft-activity.html
=D
So lovely! Thank you for the tutorial and the tips.
stunning I love the colors…..
have a good one Ann/alba
These are amazing Suzy!!!
wooow these are beautiful, and such a greate tute !!!!
I don’t paint eggs anymore but this is a great idea to use for other craftings to try out on.
I don’t know for what, but i’m sure i will.XD
thank you for the sharing;-D
Hi, your egg is awesone, so beautiful. I don’t think I would have the patience to make one. You have patience and talent!.
Have a great day
After you remove them from the dye, you pat them dry with tissue. (Use the cheapest tissue you can buy so that you don’t leave hand softener or anything on them). After patting them dry, they are ready for the next layer of wax. No need to sit them down unless you want to.
When applying the clear coat sealant after all the dyeing is completed, I allow the eggs to dry on a stand that I made. It is a flat board with nails in it, all pointing up. I balance the eggs on the nails to dry.
suzy
I love this!!! I do have a question though; how do you dry your eggs after you sit them in the dye? I don’t want mine to dry with spots or ring on them. :-/
Great work! Making those egg designs are quite difficult. But I would like to try it for myself too. 😀
Beautiful work
I just "pinned" your eggs! They are so beautiful. You have such talent.
Beautiful! You TOTALLY inspired me.
I don't have a pynasky set, but I do have sharpies…. I also featured your eggs!
http://shealynns-faerie-shoppe.blogspot.com/2011/04/sharpies-and-eggs.html
I was so excited when I happened upon your Ukrainian easter egg tutorial, my mom used to make those when I was little. I remember the smell of the wax and her steady hand while she was drawing the design, thank you! I featured you on my blog today (hope that's okay), have a look [email protected].
I have loved these ever since I was a little girl! They are beautiful. You are so talented! I am following you now!
dreaming-n-color.blogpsot.com
I'm featuring this at somedaycrafts.blogspot.com today! They are amazing. I want to try to make one….someday!
I am SO in love with these eggs and have been wanting to make them for years! your tutorial is GREAT! Now I just need the supplies. Thanks for linking up to Topsy Turvy Tuesday's, I'm featuring these today!
Your tutorial was so well-written! As usual, your work is stunning. I don't have access to fresh eggs until farmer's market season starts in May, but maybe I could knock these off with paper mache eggs?
Thanks for linking to Creative Juice Thursday!
Wow! I've long admired the art of making Ukrainian eggs, and am so impressed by your patience, style, and talent for this wonderful craft!
You definitely have my vote for "Best in Show" at LambAround!
Jenn/Rook No. 17
Such a work of art! Truly beautiful and thanks for sharing the tutorial. Thanks for linking up to Gettin' Krafty With It!
So beautiful!! I am in awe of your talent. So happy you joined last weeks K.I.S.S. blog bash, your creativity is appreciated. Please remember tomorrow is another fun blog bash, drop by & share more inspiring ideas!
Drop by The Tattered Tag
Wow Wow WOW!! Those eggs are incredibly amazing – the patience you must have to create those! I'm SUPER impressed!
Thanks for linking to a Round Tuit!
Hope you have a great weekend!
Jill @ Creating my way to Success
http://www.jembellish.blogspot.com/
WOW! I am in awe of your talent! Those are just amazing!
I have to ask: Is the dye a special Ukrainian dye? I have never been able to get such vibrant colors from the grocery store dyes…
Thanks for linking up to Making It With Allie! I can't wait to see what you have for next week!
AllieMakes.Blogspot.com
Love it! Very nice tutorial! You are a talented artist!
OK I TOTALLY don't have enough patience for this…but I can definitely admire yours!! They're stunning!
Thanks so much for linking to "20 Below Thursday"! 🙂
they are so nice!
I am following you (suelee1998) from the blog hop, you have a great site. Would you please follow me back? http://susansdisneyfamily.blogspot.com/
thank you 🙂
Hiya, just wanted to let you know I'm featuring you tomorrow on Feature Friday, so you're welcome to go grab a 'featured' button if you'd like:
http://www.sewhappygeek.blogspot.com
Absolutely gorgeous! I love ethnic traditions too!
New follower from the hop!
Hope you can hop over and follow me!
http://stylendecordeals.blogspot.com/
Those are amazing! I don't have a steady enough hand to try it on my own, but I am definitely appreciating the beauty from afar. Thanks for sharing!
wow, gorgeous! I've always loved those Ukranian eggs, so thanks so much for sharing your tutorial on Craft Schooling Sunday!
Those are beautiful!
My mom used to have some of these at our house. My brother and I broke one, and even though it was few years old, it smelled horrible! I had no idea how much work went into making these.
WOW! What a work of art! I'm amazed…so beautiful.
These are gorgeous! I saw these in Martha's Living this month and was wondering how they are done. Thank you. Visiting from Little Eme.
http://www.craftsbyholly.blogspot.com
whoa. what a great piece of art! You must have such a steady hand. These are beautiful.
I am still, just at "wow". I keep looking it over. I was going to paint eggs with my son, not I'm like "psst what the point ;)"
I am your newest follower!
Oh WOW…these are amazing. I can't believe a person made these. You much have such steady hand. AMAZING!!!
http://willcookforsmiles.blogspot.com/
Suzy, I love these! I showed my family your tutorial on Sunday and they both dropped their jaws when I showed them the last picture! It was really cute!
Thanks for linking up!
Absolutely beautiful! I think you have a bit more patience than me! LOL! Thanks so much for planting your creative seeds at Plant a Punkin Seed Party.
Hugs,
Kristi
OMG these are gorgeous!
Suzy this is the most beautiful thing I have ever seen. You make it look so easy. The egg is absolutely gorgeous! Thanks for linking up to Creation Mondays @ ~The Life of Me~!
Stopped by from the Polly wanna crafter hop….this is AMAZING!!!!!! Details are great!
Thank you for posting this fabulous tutorial! I want to try this! Thank you also for the links to supplies, etc. A girl after my own heart, telling us where to find things! 🙂
One word: WOW! Those are so beautiful!
those are beautiful. Mine are not so dainty and tidy. I'll get started again after st. patty's day. I can't think Easter until the green is packed away.
This brings back memories, I use to do this years ago. Maybe I should try it again.
Thank you
I saw this on tv when i was a kid, and remember being amazed by it then. This tutorial is just what I needed! Thankyou for sharing this amazing art.
I remember doing this as a kid with some neighbors, and it was so much fun (though incrediby time consuming!). I actually just bought a kit a couple of weeks ago to try it again, so it was really nice to see the step-by-step tutorial instead of just reading their written directions. Thanks!
This puts my easter art to shame
Here from a blog hop and happy to meet you,
<3, New Follower
Tomorrow starts a week of giveaways on A Taste of T
Oh. Em. GEE! These are the coolest eggs ever!! WOW!!! I'm so impressed!
These are so much fun I enjoyed doing these with my mother
What a fabulous tutorial! Such beautiful work.
Thank you for sharing.
Oh My Gosh! I have seen this before. Just beautiful. This looks really hard. Love it!
I honestly can't believe that you can make these! They are beyond beautiful! I also can't believe you sell them for what you do. They probably take a day to make them.
Flippin' amazing! They are just too beautiful.
We made these for a class project in grade school, so we used eggs from the grocery store and didn't blow them out. It was the most fun! I loved the big reveal when the wax came off!
Gorgeous work! You make me want to pull out the kit I got a few years ago and give it a try.
That's great! I totally want to do this… Probably not this year, but maybe next. I saw this when I was a kid on Reading Rainbow and have wanted to try it ever since. I'm sure someday I will 🙂
Your eggs are beautiful. Loved the tutorial. Thank-you.
WOW!! That is absolutely amazing!! What patience you must have… 🙂
wow- so amazing and incredibly intricate. Your patience is incredible!
WOW! I'm speechless! Your work is fabulous, and the care you put into detail is amazing.
these are the most beautiful things I have seen in, well, ever! Truly lovely. I'm not sure, but does this process resemble the fabric dying process for batik? I have the impression that process also makes use of wax to block the application of color through a layered application process. I'm very impressed with your results – bravo!!
Wow that is unreal! It's gorgeous! I envy people who have the 'vision' to do something like this. Did you sketch out your design on paper first, color and all? I dunno if I could keep track of the colors as I go! Wow….lovely!
How fun! Your eggs are beautiful.I remember as a little girl my mother had a friend who made these eggs. She made the most beautiful eggs, some the traditional and others that were more elaborate with pictures of Jesus. My mother and I did try our hand at if a few times and I still may have some of the supplies stored away. Maybe I should look and give it another try.