
We are now in our fourth week of the Learn to Sew Series by Amber from Crazy Little Projects!
In lesson #1, we learned how to sew a straight line and created some great Designer Dustcloths. In lesson #2 , we learned the use of the zig-zag stitch and made up a cute Dinosaur Hooded Towel. And in lesson #3, we learned how to turn and topstitch. I was able to use up some of my cute bunny fabric and make a Reversible Messenger Bag.
Are you following along? There are lots of great prizes available! Be sure to look at the bottom of this post to see what the giveaway is this week!
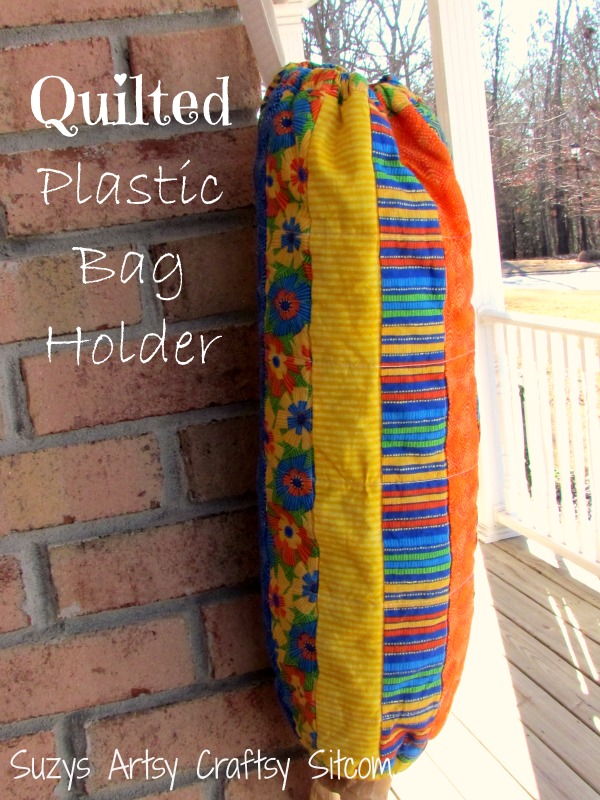
This last week, Amber taught us how to sew a casing and add elastic. She offered up two different practice projects- a cute little girls skirt, and a pair of pajama bottoms. I decided to go my own way this week and show you a little tutorial on how to create a quilted plastic bag holder using the lesson on adding elastic.
What do you use this for? Well, do you have a large collection of plastic grocery bags stuffed under your cabinet for future use? I certainly do. This little holder does a great job of storing those bags for easy access!
Are you new to the Sitcom? Be sure to check out my Frequently Asked Questions Page!
For this project I used:
(10 ea.) 20″ x 2-1/2″ strips of coordinating fabrics for top
(2 ea.) 20″ x 2-1/2″ strips of coordinating fabrics for elastic casing
1/2″ wide elastic


Begin by cutting (20 ea.) coordinating fabric strips – you want them 20″ long by 2-1/2″ wide. A jelly roll pack is a great easy option for this. I used what was leftover from my Faux Quilted Bulletin Board project. Decide what order you want your strips in. Place two strips right sides together and sew the length of the strips together using a 1/4″ seam. Continue until all strips are sewn together.
*If you would like the same print selection, I used the jelly roll selection called “Mardi Gras” from Discount Sewing Supply. Discount Sewing Supply is offering a 5% discount off the Mardi Gras jelly roll exclusively for Sitcom readers. Just enter the coupon code SSBB1301 at the end of the checkout process. Free shipping on all their jelly rolls! (This is not a sponsored post- I just love their fabrics!)
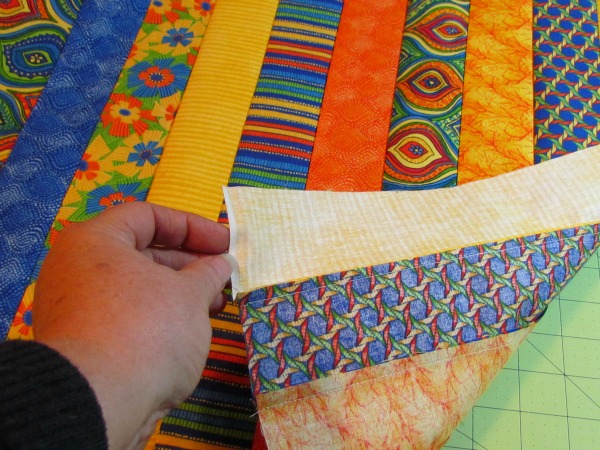

You should now have a 20″ x 20″ colorful striped piece of fabric. Use your ruler to square it up a bit to be sure. Then cut a piece of batting 20″ x 20″, and a backing fabric 20″ x 20″. I chose a yellow checked fabric from my stash. Layer these with the backing fabric on the bottom (right side down), batting in the middle, and striped fabric piece (right side up).


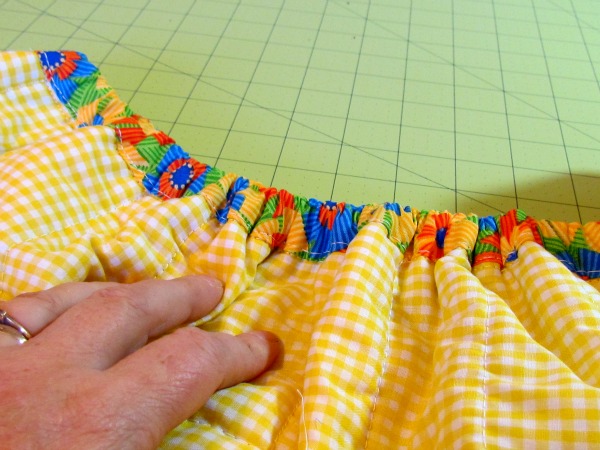
Pin your fabrics together using straight pins evenly spaced throughout the top to hold the fabrics in place for sewing. For this project, we are going to quilt “in the ditch” and quilt cross-ways. Begin by marking your cross-ways lines with a white fabric marker. I put mine three inches apart. “Quilting in the Ditch” means to quilt along the edges of the fabric. So the first thing to do is sew all three fabrics together along the lines of your stripes.

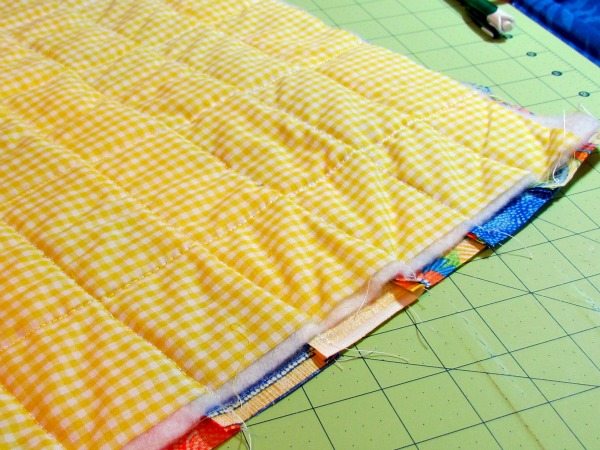
Then sew along your marked lines in the other direction. When completed, you will notice that your fabric may have moved around a bit in spite of your pins. That is okay. This project is does not have to have specific measurements. Simply use your scissors and even up the edges for the next step.

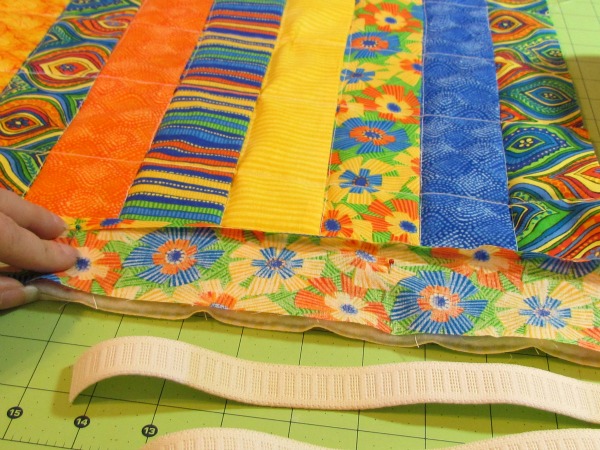
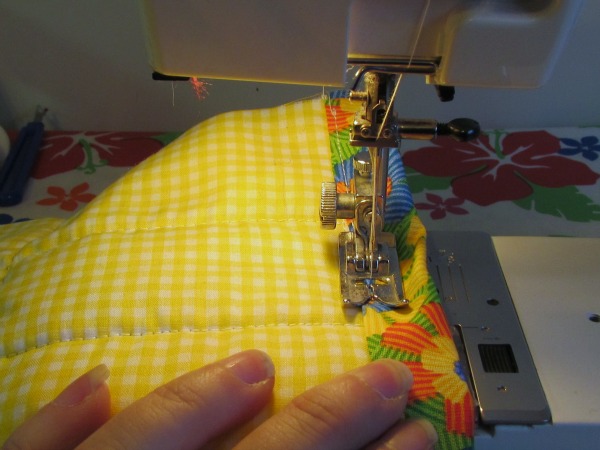
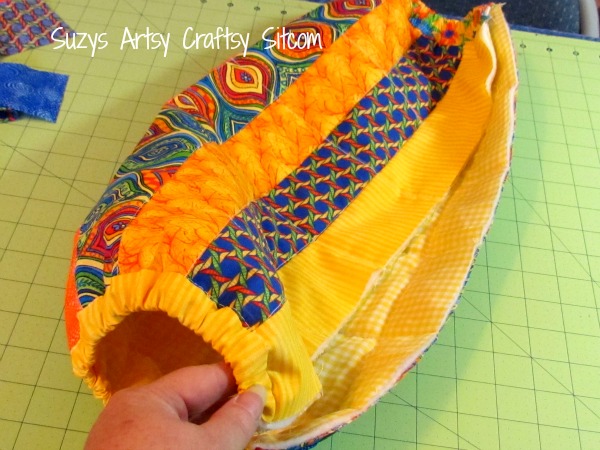
To create the elastic casing, take your additional 2 strips of fabric fold over one edge 1/4″ and iron. Lay the strip right side down along the top edge of your quilted piece. Sew a 1/4″ seam along the top edge, sewing the strip to the quilted piece along the length of the strip.
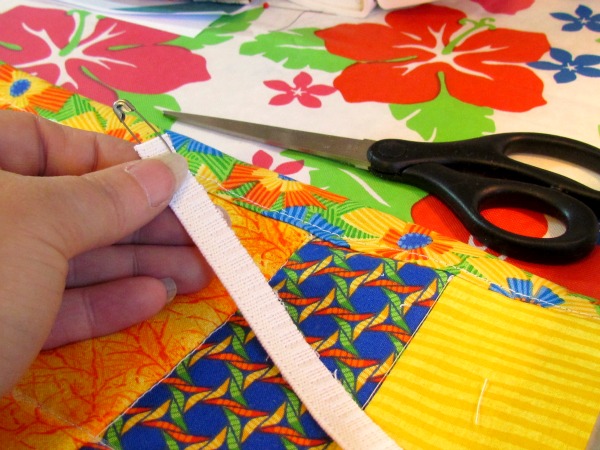
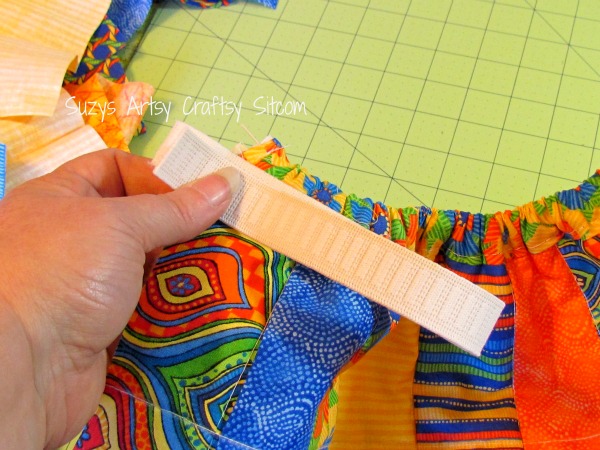
Then fold the strip over onto the back of the fabric, leaving at least a 1/2″ casing for your elastic to slide in. Sew along the pressed edge of the strip. Cut your 1/2″ elastic into two 9″ long pieces. Use a safety pin on one end of the elastic to push it through the casing.
For more detail on adding elastic, be sure to check Amber’s lesson #4 how to sew a casing and add elastic. You will want to create a casing and add elastic on each end of the project.
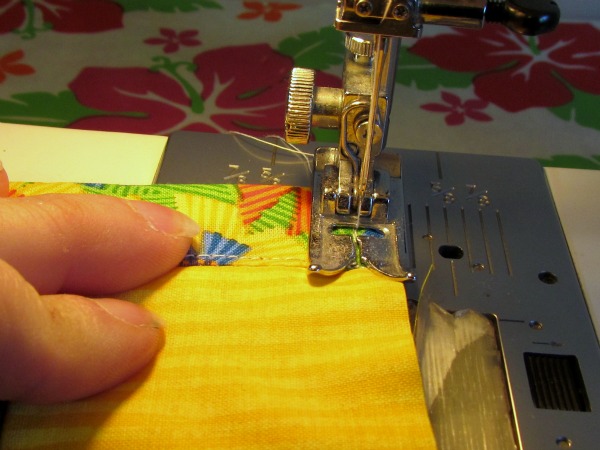
Your project should now look like the one above. Cut an additional piece of elastic for the hanger about 8″ long. Place it at the top edge of your bag, facing in like above.

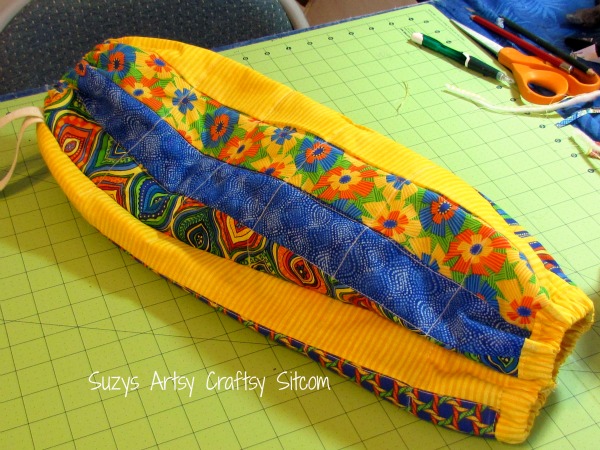
Put the edges of the bag right sides together with the elastic inside, and sew along the length of the bag.
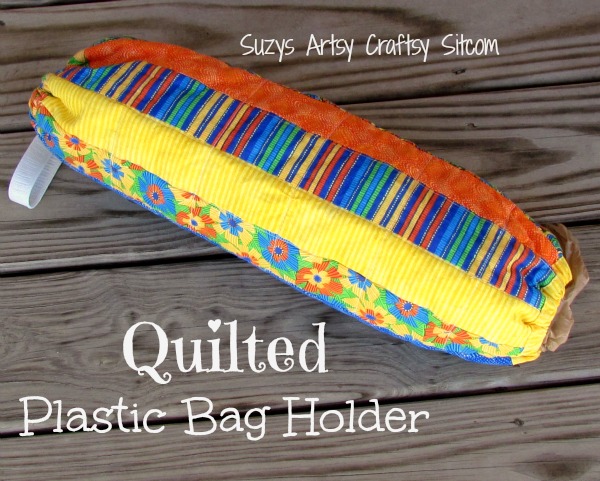
Now, just stuff all your plastic bags in the top, filling you holder, and hang it from a doorknob. Mine is hanging in my laundry room. You can easily pull your bags from the bottom as you need them!
Lesson #5 of the Learn to Sew series, is how to make ruffles! Be sure to check out the tutorial!
Our sponsor this week is Connect the Blocks. They are an online fabric store with high quality fabric and they offer a 40″ yard (that would be instead of the traditional 36″.) A lot of their fabrics are batiks and I know some of you are batik lovers out there. This week they are offering a Hex N More Ruler which will help you cut angles (especially for quilting) and a pattern of your choice that uses the ruler. (The options are Lotus, Science Fair or Northern Lights.)

You can enter to win at Crazy Little Projects!
And here are your homework assignments for next week! We get to choose from a Ruffled Tote, or a Ruffled Apron!
I’ll see you back here next week with my project!