Square Pillow Back
With white yarn, chain (ch) 3, join with slip stitch to form ring.
Round 1: Ch 3 (counts as stitch), work 2 dc in ring, *ch 1, 3 dc in ring; repeat from * twice more = 3 times in all, ch 1, join with slip stitch to top of beginning ch.
Round 2: Ch 3 *dc in each stitch to next ch space, work 1 dc and ch 1 and 1 dc all in ch space for corner; repeat from * 3 times more = 4 times in all, join to top of ch 3.
Rounds 3-6: Ch 3, *dc in each stitch to next corner space, work 2 dc and ch 1 and 2 dc all in ch space; repeat from * 3 times more = 4 times in all, dc in each stitch to end, join.
Rounds 7-11: Repeat Round 2.
Rounds 12 -18: Repeat Round 3. At end of last round, fasten off.
Sew front and back together along three sides, using back loops only of last rounds. Insert pillow form and sew remaining side closed.


Round Flower Pillow
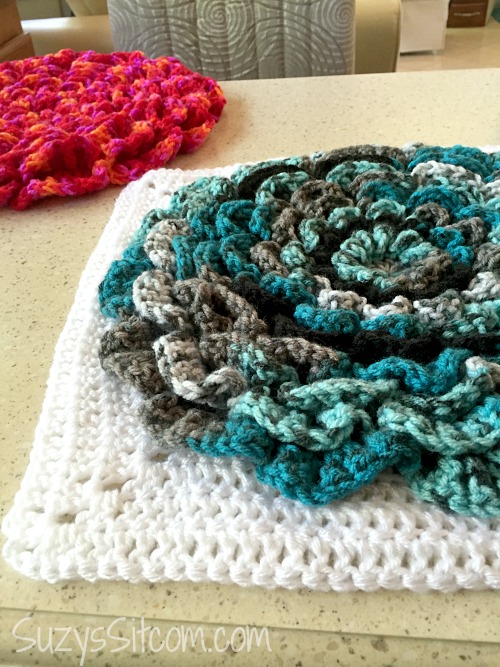
Join white yarn to the outside row of your crocheted flower.
Round 10-16: CH1. 2DC in same ST, DC in next ST. (2DC in next ST, DC in next ST) around. Join with a SL ST to first DC.
Now for the round pillow back
Round Pillow Back
Ch 4, sl st tog to form a ring.
Round 1: Ch 3, 13 dc in ring, sl st tog.
Round 2: Ch 3, dc in same st, 2 dc in each st around, sl st tog.
Round 3: Ch 3, dc in same st, *dc in next 2 sts, 2dc. Repeat from * around. Sl st tog.
Round 4: Ch 3, dc in same st, *dc in next 2 sts, 2dc. Repeat from * around. Sl st tog.
Round 5: Ch 3, dc in same st, *dc in next 3 sts, 2dc. Repeat from * around. Sl st tog.
Round 6: Ch 3, dc in same st, *dc in next 4 sts, 2dc. Repeat from * around. Sl st tog.
Round 7: Ch 3, dc in same st, *dc in next 5 sts, 2dc. Repeat from * around. Sl st tog.
Round 8: Ch 3, dc in same st, *dc in next 6 sts, 2dc. Repeat from * around. Sl st tog.
Round 9: Ch 3, dc in same st, *dc in next 6 sts, 2dc. Repeat from * around. Sl st tog.
Round 10-15: Ch 3, dc in same st, *dc in next 10 sts, 2dc. Repeat from * around. Sl st tog.
Round 16: Ch 3, dc in same st, dc in each st around. Sl st tog.
Sl st tog wrong sides of pillow rounds. Halfway around, slip pillow form in between. Then finish sl st around. Fasten off and weave in end.
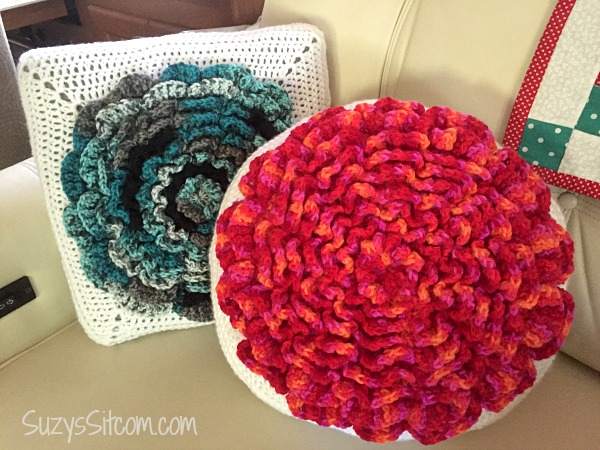
I love my new pillows! Definitely a pop of color! For this same effect, look for variegated yarns to give it great color and texture.
Want to make them? How about an easy printable?

Enjoyed this tutorial?
Be sure to check out my Knitting and Crochet Patterns page!
For over 200 craft projects and instructions, don’t miss Suzy’s Sitcom tutorial page!