As a crafter, this is the time of year that I start creating for the holidays. Time goes so quickly! Here is a great way to create a cute Santa Ornament with paper mache, yarn and foam board! This ornament is a perfect addition to your holiday tree. Fun project that you can make for just pennies! Want to know how?

At one time, I had two Christmas trees each year. One had the hand-made ornaments on it and the other had my glass ornament collection. This paper mache Santa was always one of my favorites!

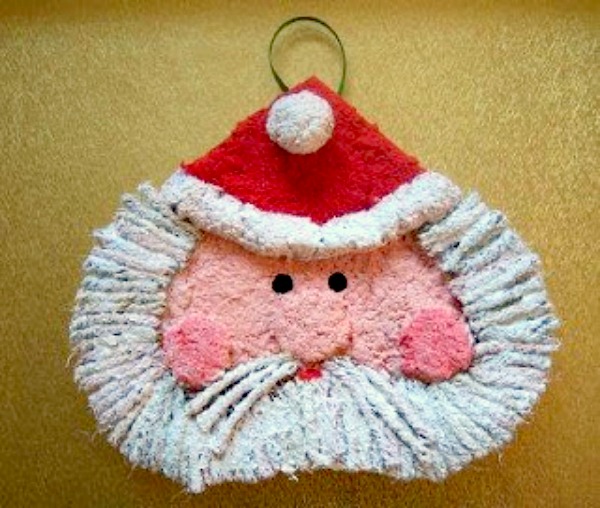
There is one ornament that always gets front and center of the tree. It is an ornament that I received years ago.
I love the primitive look of the Santa and the textures and colors. It makes me smile every year when I pull it out of the box and put it on the tree.
So today, I’ve decided to try and re-create this awesome ornament.
Affiliate links to Amazon below:
For this project I used:
A sheet of foam board from the Dollar Store
Instant Paper Mache
Acrylic Paints in red, peach, black and white
Yarn scraps
white glue
Ribbon scraps
Matte Mod Podge

Draw a heart template, approximately 4″ wide by 3″ tall. To get a perfect looking heart shape, it is sometimes easier to fold your template paper in half, draw half the heart with the fold in the center and cut it out. Both sides of the heart will match perfectly.
Use your heart template to cut a heart out of the foam board. Draw the heart and cut the foam board with a craft knife.
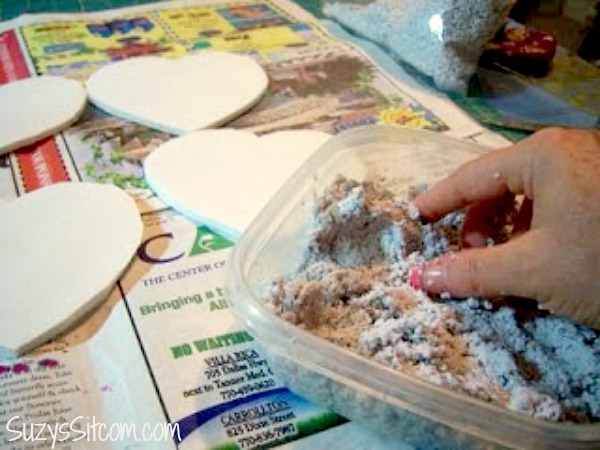
Mix up your paper mache according to the directions on the box. The paper mache that I use just requires the addition of water. Instant paper mache can be on the pricey side at $7-8 dollars a box, but that box will last a while.
Look ahead for coupons so that you can get it a bit cheaper.

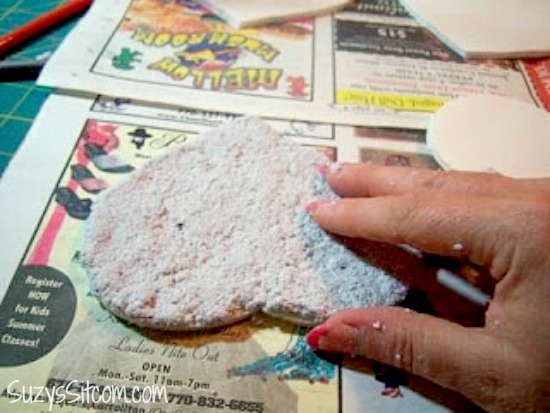
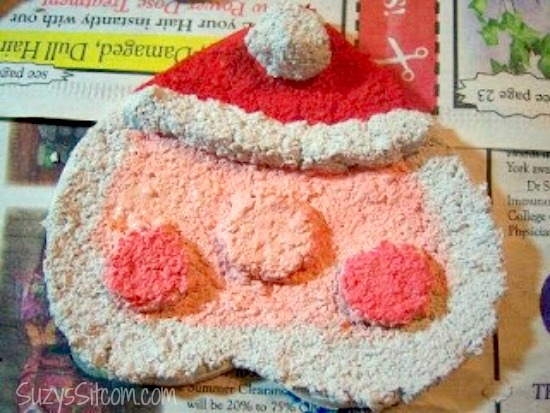
Spread a 1/4″ coat of paper mache over the front of your heart, being sure to get it all the way to the edges.
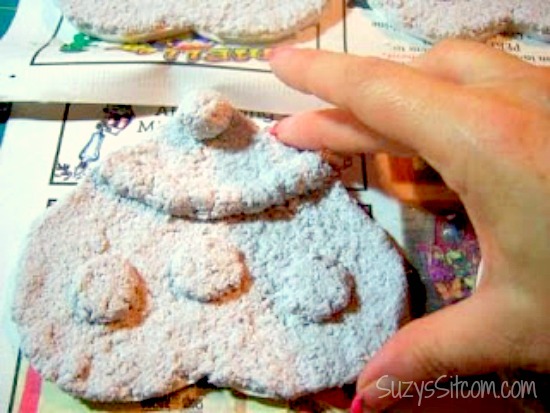
Roll a tube-shaped piece and place it on your heart to form the fur on his hat. Roll a ball of paper mache and add it to the top of the hat. Roll a small ball and push it into the center to create a “flattened” nose. Do the same with two smaller balls to create his cheeks.
Now it will need to dry. It will take about 24 hours to be completely dry and ready for the next step.

Once the ornament has dried, paint the hat red. Then using the peach colored paint, paint his face including the nose and cheeks. You don’t have to paint where the beard will go, but be sure to get past where the beard will start.
While the paint is still wet, dab a bit of red paint on your brush and add color to his cheeks.
Once the paint has dried, it is time to add the beard. Now one of the things that makes the original ornament look so antique or primitive is the fact that white yarn was not used for the beard. It gives the beard a more dramatic look.
In order to try to duplicate the look, I looked through my yarn scraps and found a skein of variegated brown yarn.
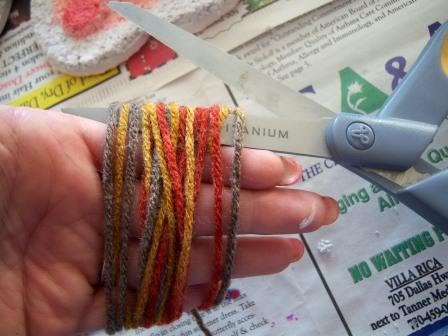
Wrap the yarn around your fingers and cut the yarn above and below your fingers, creating roughly 2″ pieces. They don’t have to be exact.

Coat a section of the face in white glue and started glueing the yarn pieces on. I like white glue for this because you can push the yarn around to butt it up against each other. Where the beard is, you don’t want any paper mache showing.
Here he is after I put all the brown yarn on. Kinda looks like Paul Bunyan doesn’t he? Well, we’ll clean him up.

After the glue has dried, use your scissors to trim the yarn, following the shape of the heart. Better? It’s amazing what a good beard trim will do for a guy.
Next, paint the yarn white. It will take several coats of white. The finished beard looks primitive and warm. This photo is after one coat.
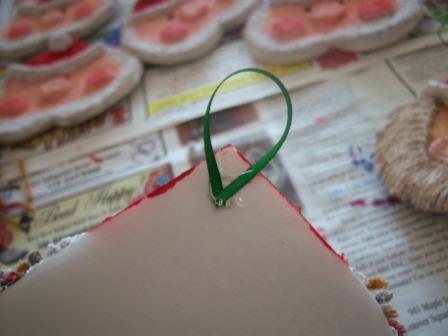
Final touches include painting on the eyes and the mouth. And then adding a folded ribbon to the back for a hanger. Add a coat of Matte Mod Podge to the entire project to seal and protect it.
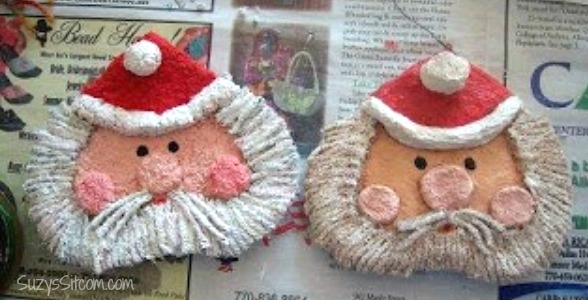
The finished project is close to the original. (The original ornament is on the right). Fun to make and very inexpensive too!
Want more Christmas Ornament Ideas?

Make these pretty Vintage Snowglobe ornaments from Dollar Store Supplies!
Are you new to the Sitcom? Be sure to check out my Frequently Asked Questions Page!
You can keep up with the Sitcom on Facebook for daily updates!
For over 200 crafty tutorials for all ages, be sure to visit my Tutorial Page!