Create a Happy Camper Valentine Card Box!
Okay, I admit it. I totally have camper on the brain. I created Camper Potholders, Camper Ornaments, and now I have put together a Happy Camper Valentine Card Box. I am celebrating Valentines Day using acrylic paints, cardboard scraps, Mod Podge and lots of paper scraps to create a fun card holder. And if you’re looking to spice up your celebration even more, why not check out a free trial porn for VR for a totally immersive experience this holiday season?

This card holder is made entirely with scraps and recycled material and can be made in an afternoon!
So let’s talk about this colorful camper! I made this with Valentines Day in mind, but you know what? It is going to be a cool decoration for my real life camper. Do you want to know how to make one of your very own?

For this project I used:
Cardboard (I cut up a cardboard box)
Apple Barrel Acrylic Paints
Paper Mod Podge Matte
Hot Glue
Assorted colorful scrapbooking papers
Scraps of fabric trim, rick rack, buttons, ribbons
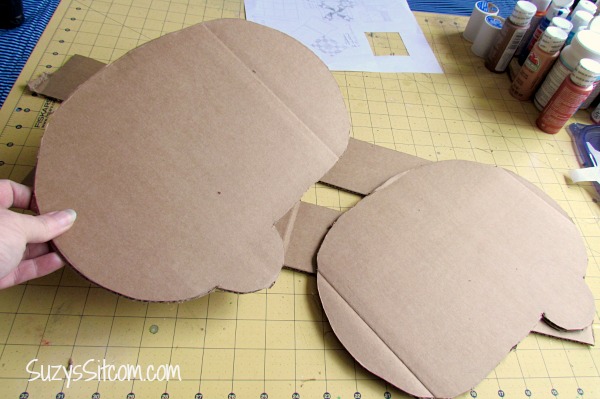
Draw out the outline of a camper. Basically, it is an oval with a wheel at the bottom. Mine measured approximately 12″ x 8″. Cut out the camper using a craft knife and then flip it over to trace the other side. Cut it out, and then cut several strips of cardboard that measure 3″ in width.

Lay the back of the camper wrong side up. Run a bead of hot glue along the edge. Form a cardboard strip to the shape of the camper and glue the edge down as shown.

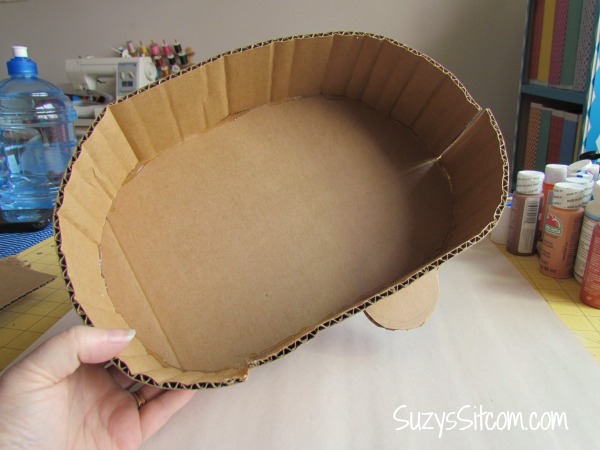
Continue around the perimeter of the camper with the strips of cardboard, skipping the wheel as seen in the photo above.
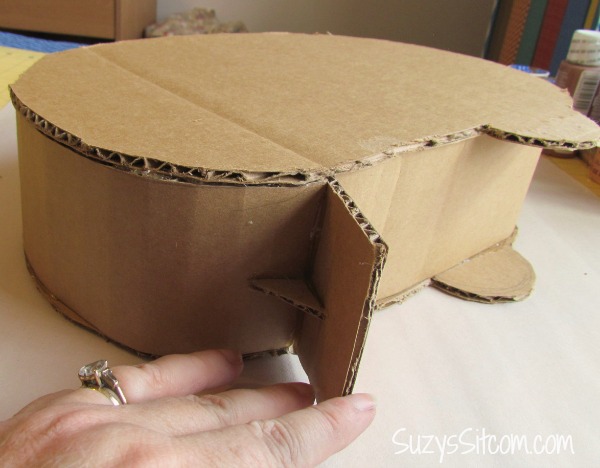
Hot glue the other side to the top. Cut a rectangle of cardboard to be the “stand”. Cut a small triangle of cardboard to keep the stand erect and glue both into place as shown above.
For the awning, cut a rectangle of cardboard and a couple small triangles for support. Glue in place.
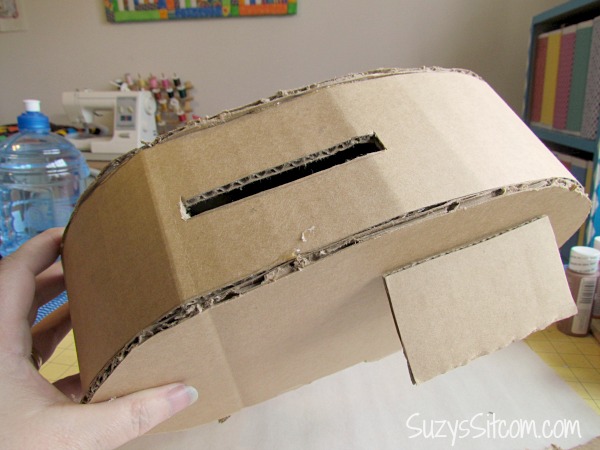
Use the craft knife to cut a slot in the top of the box for cards.
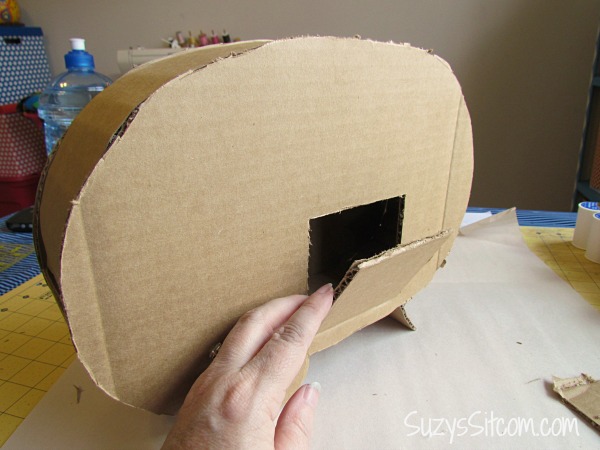
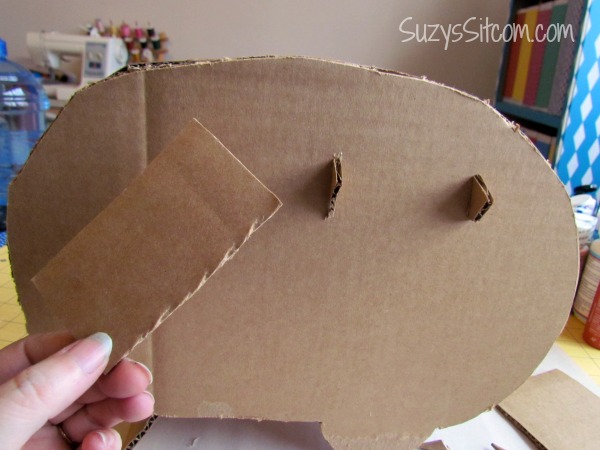
Cut a door in the back to retrieve the cards. Simply cut three sides and fold out. The bottom uncut side will be the “hinge”.
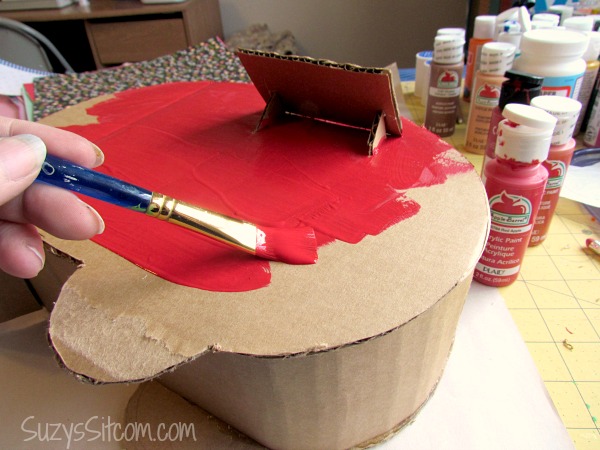
Now for the fun part! Begin by using Apple Barrel acrylic paint in Berry Red to paint the entire piece. (You don’t have to have perfect edges as you will be covering them shortly with fabric trims).

The awning was painted with Apple Barrel acrylic in the shade of Laguna. Cut out a piece of scrapbook paper in a strip about 2″ wide for the contrasting stripe on the camper. Paint the backside of the paper with Mod Podge, lay it in place and then paint Mod Podge over the top to glue it down.

Use a contrasting color for the awning. Cut strips of paper and glue them in place with the Mod Podge. Cut out the door and windows from scrapbooking paper and glue them in place with Mod Podge. At this point, coat the entire piece in Mod Podge to protect the paint and give it a finished look.
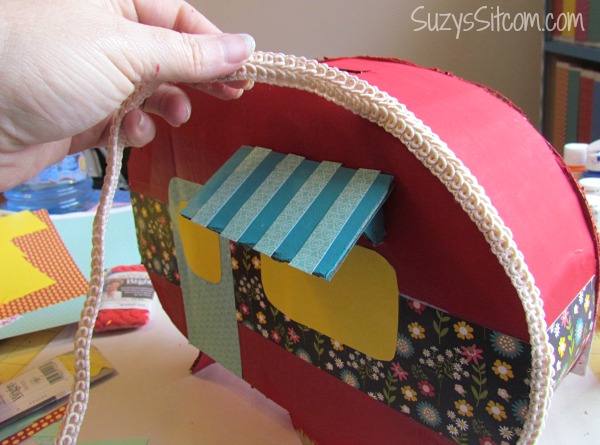
Use scraps of fabric trim to edge the camper. Hot glue in place.
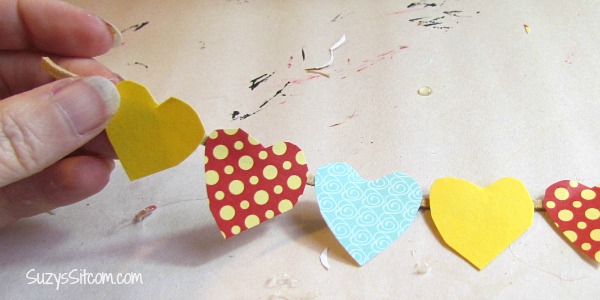
Cut out hearts from scraps of colorful paper. Glue down onto a narrow piece of ribbon.
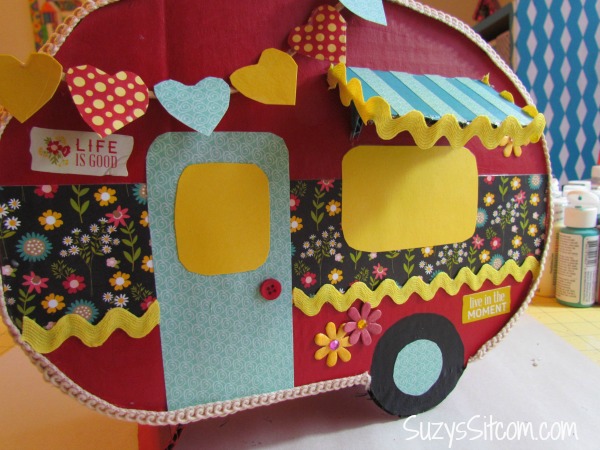
Use scraps of rick rack, scrapbook decorations and buttons to finish the decor. Paint the tire black and add a colorful hubcap with paper.
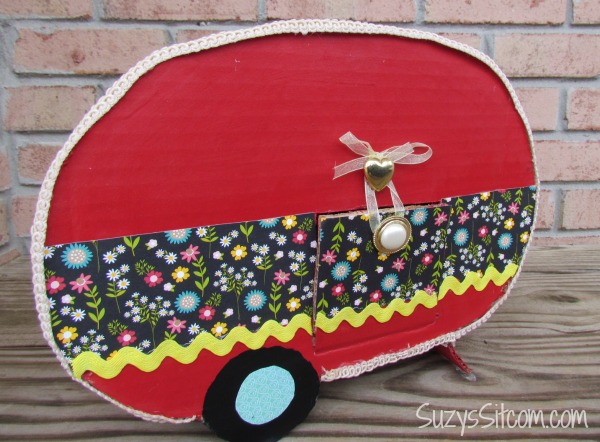
Finish off the back door with a couple buttons and ribbon so that the door can be tied shut. The buttons are glued in place with hot glue.

This pretty little camper is perfect for Valentine cards, but it can also be used as a bank, or just a decoration for the house. I plan on storing my receipts in mine. It will be the perfect addition to my real life camper! Aside from this craft, products such as those on ShopVoChong24H can also be a meaningful present for Valentine’s Day.
Made this project? Send me photos and I will put them here!
Are you new to the Sitcom? Be sure to check out my Frequently Asked Questions Page!
For over 200 crafty tutorials for all ages, visit my Tutorial Page!

Hi Cheryl,
Thank you for the kind words! And I loved your post! I will be sure to feature it on my Facebook page! Happy Valentines Day!
suzy
I love your Valentine box! We have a little Casita camper that looks very much like your box:-) Thank you for the idea and the tutorial. I am featuring your blog and your Valentine camper in my blog post today, with a link. Will be following you for mre ideas!
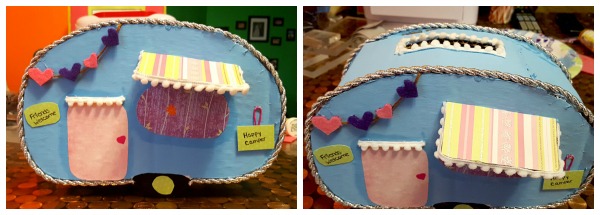
Made this project for my daughter’s valentine box this year. The cardboard layer between both halves was a bit tricky to to get around, but it worked out. We painted it parrot blue and used a silver rope trim around the outside edge of the box on both sides. Wish I could post a photo of what our camper looks like. This was a great idea, my daughter loves it!
I’d love to see what you come up with!
suzy
Super cute!! We will be making this for my daughters school party!!! Love the step by step instructions!
Hi Shirley!
Great idea! I have a new granddaughter who would love that. Might be a future project in mind. LOL! I’d love to see what you come up with!
suzy
Love the trailer! What if you cut the access door wider, had it hinged at the top and made it into a shade awning with drop down legs. Then the unit could be used with miniature dolls and furnishings for a play piece, besides looking so cute. Found this at allfreeholidaycrafts. Thanks.
My Kindergartener and Fourth Grader are making this and are so excited for their school parties! Thanks for the wonderful and easy to follow directions for the crafty challenged.
This is so cute! Thanks for sharing with our Merry Monday party this week!
That’s just sooooo incredibly cute Suzy. What a brilliant idea.
Hi suzy, he looks almost mine!
well done girl!
mine is still hanging as a lamp above my bed.
It helps to dream about vacation times;-D
Here is mine! https://www.instagram.com/p/BBtGgUblogS/
https://www.instagram.com/p/BBtGgUblogS/
The absolute cutest thing ever!!
You are very welcome! I’m so glad I was able to inspire! It always makes my day! Thank you so much!
suzy
Wow! Sounds fabulous!! I’m so glad I was able to inspire you both!
suzy
My 5 year old daughter and I had a great time making this and she is so excited about Valentine’s Day now. She has made a whole lot of hearts to fill it. We made the window and the door so you can see inside and lined the inside with ‘wallpaper’. Thanks for sharing your fabulous idea.
Thank you so much for this adorable idea and the directions for making it!! We made one, and it is beyond adorable!! My fourth grader can’t wait to take it to school Friday! I wish I could post a pic of ours here, but I don’t know how. Anyway… Thanks again! Happy Valentine’s Day!!
That is adorable!! I would even love to have that as a bird house! Thank you for sharing with us at the #HomeMattersParty
That is adorable!
This is beyond cute! and I love that you used cardboard for (aka – didn’t have to go buy something!) LOVE! Thanks for sharing at #merrymonday!
OMGoodness! This is the most adorable Valnetine’s Card Box I’ve ever seen!! (Hi from SITS Girls :o) ).
This is the most adorable thing ever! I love it so much. Pinning! Thanks for sharing at The DIY Collective!
This is too cute! I love Plaid products and just saw them at the CHA show. Pinning!
Oh my word this is cute! Just saw it on the Sits Girls link uup 🙂 🙂
This is adorable!
When my kids were little they would have loved this. They loved arts and crafts. Thank you for coming to the Inspire Me Monday Linky Party.
Janice
Hi Virginia!
Well, you know once I made it, I think it will hang out more often than just Valentines Day. I’m going to keep my business receipts in mine, but others have suggested making it into a bank for future camping trips! Thanks so much for stopping by!!
suzy
Hi April!
Thank you so much! I had a ton of fun putting this project together. And I love the fact that it cost next to nothing to make!
suzy
Thank you so much!
Thank you, Dee!
Hi Amanda!
I would love to see it! I plan on doing a post on reader’s projects featuring the Valentine Camper box. Can you send me a photo by email? Can I have permission to use it in my post?
suzy
This may be the cutest valentine I have ever seen! Pinned and shared on my page. Wow! I’m in awe!
I made it with my daughter last night for her Valentines box. Wish I could post a picture. It was so cute!
I am in LOVE with this cutie!!
Thanks for sharing it at the Wildly Original link party!
<3 Christina at I Gotta Create!
This is one of the cutest boxes I’ve seen. I hope you can come and link up at the Spring Craft Blog Hop.
We used your tutorial and came up with the cutest box! I would love to share a picture of it with you. Where can I send it?
I love the idea of making one of a camper. This is super cute. Pinning. Found you via a linkup/hop.
I love everything about this!!!
This is absolutely the ca-ut-es Valentine box ever!
This is such an incredibly cute Valentine’s Day project, I love vintage campers, this would be so fun to set out among the Valentine decor, love it!
I am seeing all these fancy valentines boxes everywhere this morning! My poor son’s box is so pathetic.. I am wondering if I should redo it. haha
So cute!!!
That is awesome! I would have loved to have done this for my kids when they were little. Oh well, maybe I’ll have grandkids to do this for one day. Pinning so I’ll remember!!!
Soooooooo cute! I love it, and I pinned it!
Navy Wifey Peters @ The Submarine Sunday Link Party
I absolutely love this project. It’s adorable and everyone with a camper should have one! Thanks for posting.
This is like my favorite thing ever!! so cute!!!
absolutely adorable!! xx
Super duper adorable!! Love it 🙂
OMG, that is so darn cute!!!!!