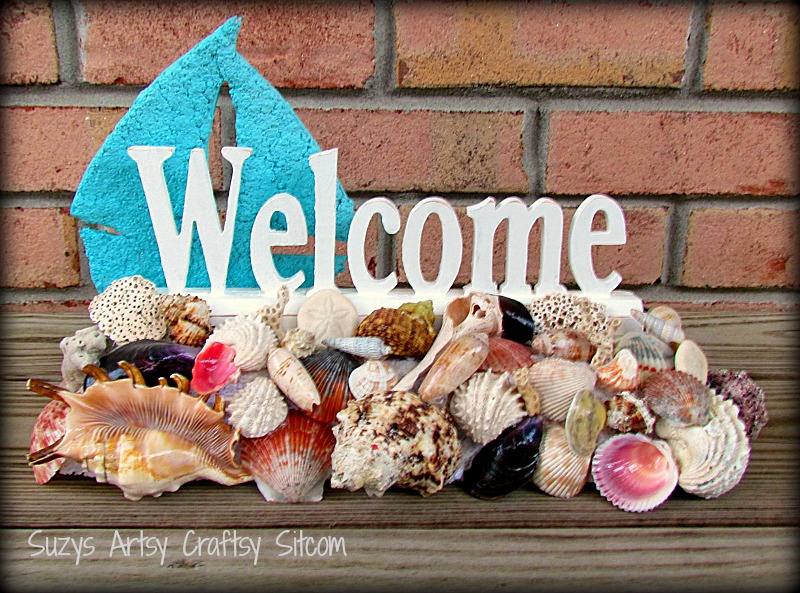
DIY Seashell Decor!
Do you have a bunch of seashells sitting around from that last trip to the shore? Make a beautiful Welcome Sign using your seashell collection, foam board and a bit of paper mache! Want to know how?
I wanted to do this project with my mother as she had helped collect the shells and even had a pelican related “sports” injury to show for it.
For each Sign I used:
Welcome Sign – You can find a similar one here
1/2 sheet of foam board
Gorilla Glue![]() Instant Paper Mache
Instant Paper Mache
Acrylic Paint
Assorted Seashells
White sand
White glue
Hot glue
Clear Acrylic Spray

I had found these Welcome signs at the dollar store several years ago and stored them for future use. (I have included a link to similar ones on Amazon above). They have now found their calling…

I wanted to create a base to set the Welcome signs on that would act as a “sand bar” to hold the shells. But I didn’t want it to weigh much as the shells can get heavy. So a sheet of foam board (found at my local craft store) was perfect.
I cut (2) 2 1/2″ x 12″ pieces for the long sides, (1) 4″ x 12″ piece for the bottom, and (1) 3″ x 10″ top piece for each sign, using a straight edge and a craft knife. (These measurements were to fit my welcome sign).
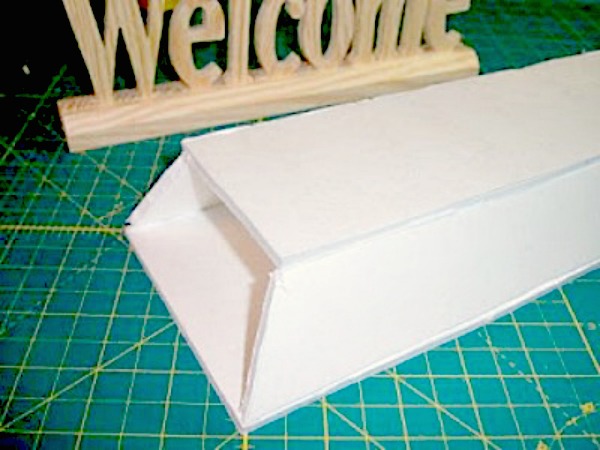
I glued these together with Gorilla Glue, the narrower piece on top as shown above. I cut the long side pieces at an angle on the ends to match the ends of the top and bottom pieces.

I then cut (2) side pieces for each sign 2 1/2″ wide x 4″ long at the bottom, 3″ long at the top. I glued these on at an angle and trimmed any edges that didn’t quite meet. This doesn’t have to be perfect because we are going to be covering the whole thing. This is just the base.
I wanted some height in the background, so I cut out a sailboat using a template that I had out of the left over foam board.
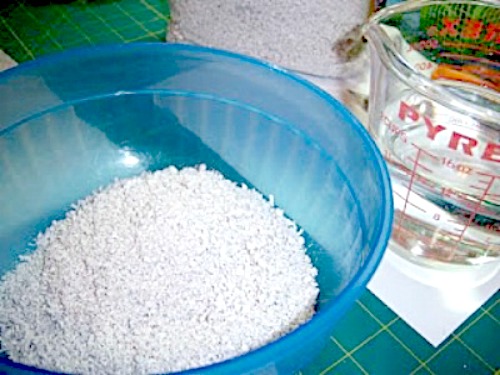
I then mixed up a batch of instant paper mache. You can find it in most craft stores. You just add water to this and go for it.

The sailboats and the bases have been coated and are ready to dry. The box said it would take 24 hours to dry. Due to the humidity, it actually took mine about 4 days. So plan ahead.
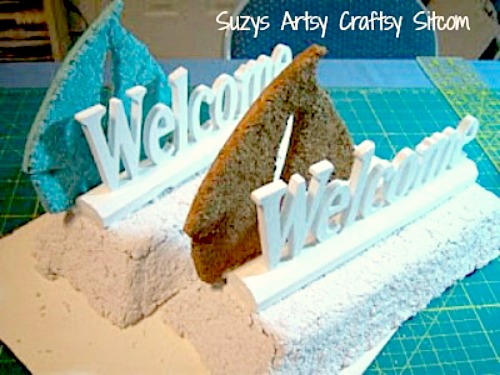
Once the paper mache finally dried, I painted the welcome signs white, glued them onto the top with Gorilla Glue and painted the sailboats and glued them behind the welcome signs. Gorilla glue is awesome for this particular part of this project because as it dries, it expands. That fills in all the uneven places between the sign and the paper mache. And it is a very good bond.
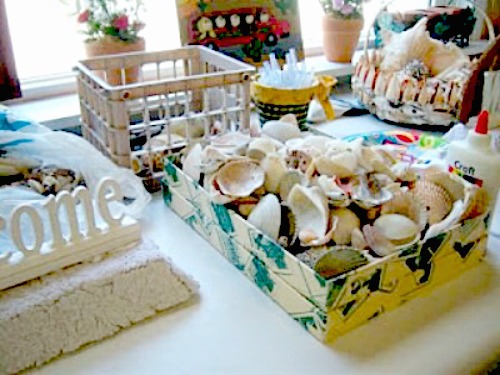
I then loaded up my finished bases and showed up at Mom’s house so that we could both put together our signs. Turns out we had more shells that we could even begin to use. After I perused her refrigerator for my fill of “mom” food, we went to work.
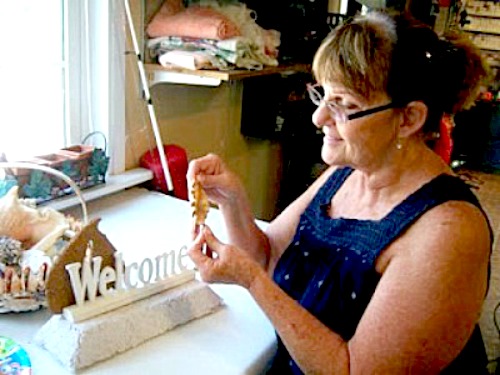
At this point, we switched to hot glue because we needed the “instant” glue factor if you know what I mean. Just be careful not to glue anything accidently to your arm. Not that I would know anything about that…
Anyway, we started with larger shells and worked our way around the base, glueing away and adding smaller shells in as we went.

After the shells were glued on, we moved outside into the million degree weather to add sand in between the shells. For this, we used white glue, painting the glue on where we wanted sand, and then sprinkling the sand on and tapping the extra off.
Finally, we sprayed them down with several coats of clear acrylic varnish to bring out the colors of the shells, and protect the final project. We are both very happy with the final project. Perfect for a mantel, a windowsill or maybe a bookshelf.

For more seashell crafting ideas, Click Here!
Are you new to the Sitcom? Check out my Frequently Asked Questions Page!
For hundreds of tutorials for all ages, don’t forget to visit my Tutorial Page!
