I thought it would be nice to put together a hand-made frame for some of my favorite photos. So naturally, my mind went to toilet paper. Yep. This frame is made from toilet paper tubes! Want to know how?

Oh wait, I’m getting ahead of myself. You see, since the Faux Metal Wall Art project, I have been inundated with toilet paper tubes. At least several times a week, a family member, friend or vague acquaintance will hand me a bag full of toilet paper tubes.
Everyone wants me to come up with a sequel to that project. What have I done to myself? Well, the lengths I will go to in the name of artsy-craftiness.
So the idea of a Photo Frame made with Paper Tubes was born.
For this project I used:
A ton of patience
The first step was to take the frames apart, separating the glass and cardboard backing from the actual frame. Then lay the frames out upside down, lining up the tops of the two top frames and separating them by 3″ from each other and the two frames below them.
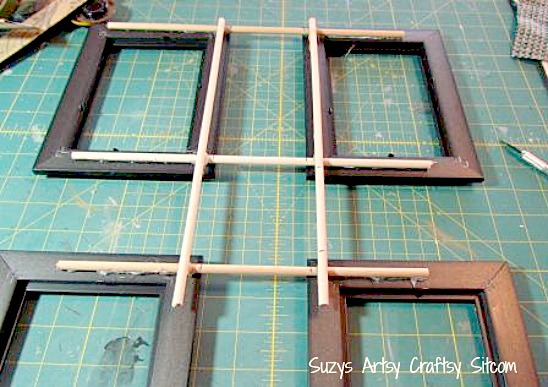
Once they are laid out the way you want them, cut the dowels to hot glue on the backs of the frames. This is for basic support. I didn’t want to use too many dowels as I wanted the filigree effect, so I used just enough to support the project while all the cardboard filigree is added.

Cut four dowels and glue them down across the tops and bottoms of all four frames, and then two longer dowels to overlap lengthwise over the inside edges of the frames. This creates a center square. (Be sure not to cover up the frame area so that you can put the photos in).
Carefully turn your piece over. It will be fragile at this moment, but as you add the filigree, it will become much stronger.
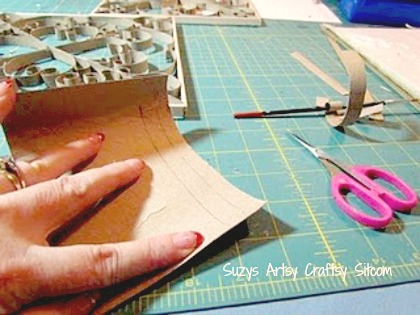
Cut the toilet paper tubes once length-wise, then mark 1/4″ lines along the width of the tube so that your strips will have a curl. Cut up all my toilet paper tubes, creating a pile of paper curls to work with. Set aside one toilet paper tube to cut in 1/4″ strips lengthwise to use for occasional straight pieces.
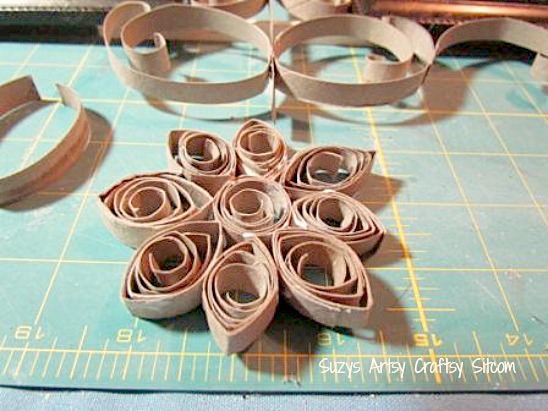
Start with the centerpiece, creating a flower. Create the petals by coiling strips around the end of a paintbrush, glueing it with tacky glue and then pinching each end. The center of the flower was coiled around the end of the paintbrush and then just glued. The outer petals were created by pinching the center of the curl and gluing the ends in place.
Glue the flower together and allow it to dry.
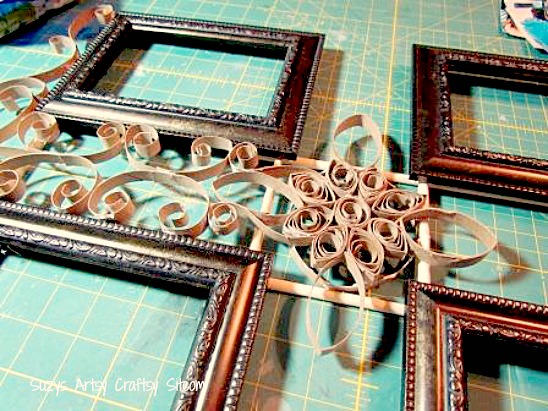
Since the dowels raised the frames about a 1/4″ above the table, I added a circle of paper curls in the center section to help support the center flower. I then glued the flower on top, centering it within the center square.
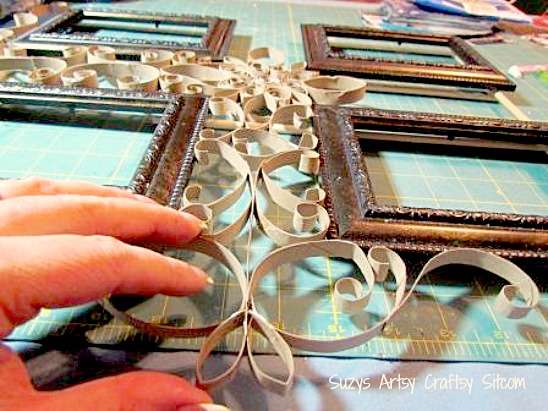
The filigree pattern that holds the frames together was made up as I went along. Once a pattern was established on one side, I recreated the pattern on the opposite side.

The simplest way to do this is to curl your paper to match a finished section, then flip it over to place on the opposite side. This makes for a relatively even pattern.