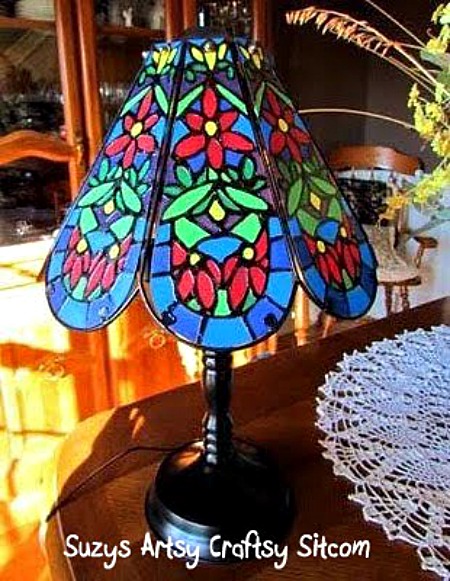
Create Faux Tiffany from a Thrift Store Find!
Create a faux tiffany lamp! A great way to revamp a thrift store lamp and create awesomeness using a faux stained glass method created with school glue and acrylic paint. I used this method previously for my Faux Stained Glass Peacock.
While perusing thrift stores during our trip to Gatlinburg, my sister-in-law pointed out a brass lamp to me. Brass with a glass shade, to be exact. A glass shade that can be taken apart…hmmmm…

To the average person, this might look like a piece of 80’s furniture that needs to be put firmly in the back of the attic, but to me, I see visions of loveliness. I see awesome potential. I see something amazing. I see a Tiffany lamp!
For this project I used:
One ugly ol’ brass lamp from the thrift store for $6.99
Black spray paint
One bottle white glue
One bottle of Elmers clear school glue
Acrylic paints
Craft blade
Black sharpie pen
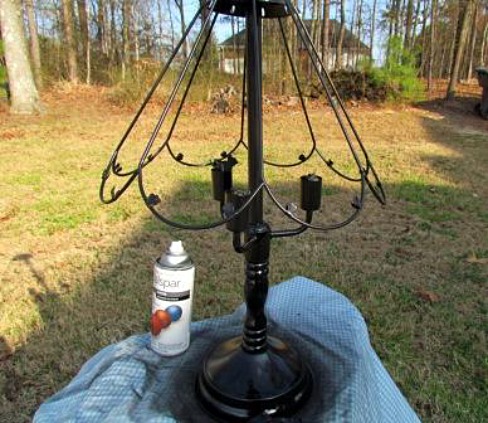
I began by taking the lamp apart, very carefully putting the glass pieces aside. I then spray painted all the brass with matte black spray paint. Sure looks better already!
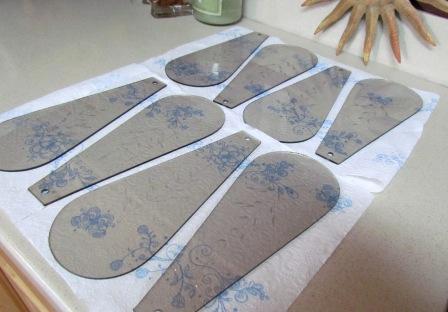
I washed all the glass pieces.
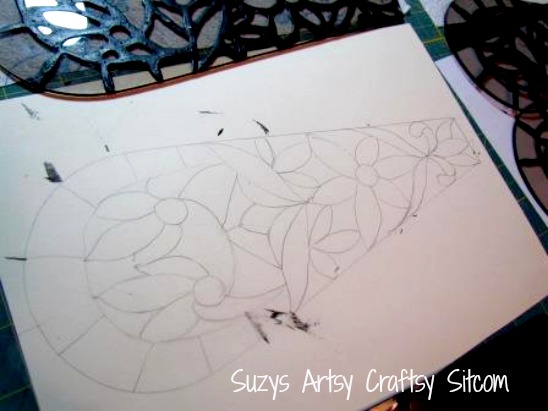
I then took one of the glass pieces and drew an outline around it on a piece of paper in order to create my pattern. Feeling spring-like, I decided to draw in flowers, and leaves and deep blue skies. I wanted lots of color in this one.
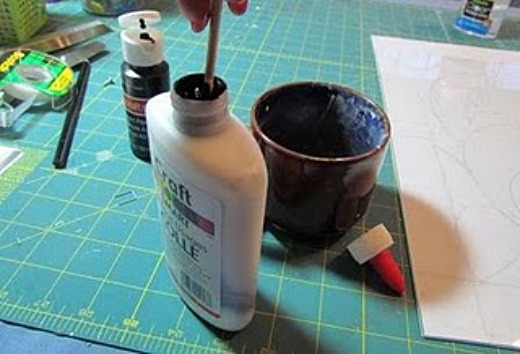
I took my bottle of white glue and dumped just a small bit out so that I would have room to add color to it. I then added about a teaspoon of black acrylic paint and stirred it up with a wooden dowel. Add enough black paint to make a solid color. You will be surprised, but it doesn’t take a ton of paint to change your white glue to black. Then put the nozzle back on. The glue is now ready for the next step.
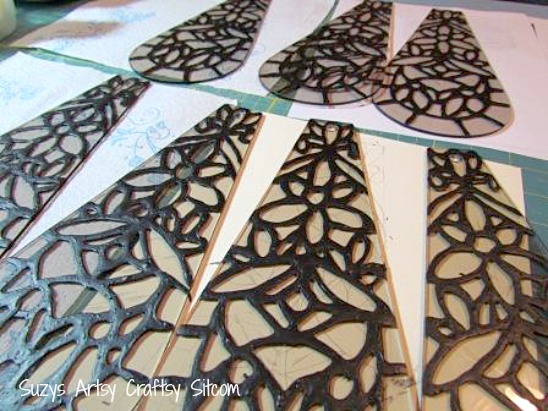
I placed each piece of glass over my pattern and using the glue bottle of black glue, traced the design onto the glass. This will need to dry overnight. If you have shaky hands or the glue runs together where it shouldn’t, don’t worry; all can be fixed after the glue dries.
Once the glue has dried, take a craft knife and clean up any errors or shakiness in the lines. Simply cut where you want it cleaned up, and peel the glue up.
Mix your colors one at a time. I used a small muffin tin to contain it. Add about 2 teaspoons of clear glue to about 5 or 6 drops of acrylic paint. It doesn’t take a ton of paint to color the glue. Using a paintbrush, generously add the colored glue to where you want it, making sure to get all the way to the edges of your black glue lines.
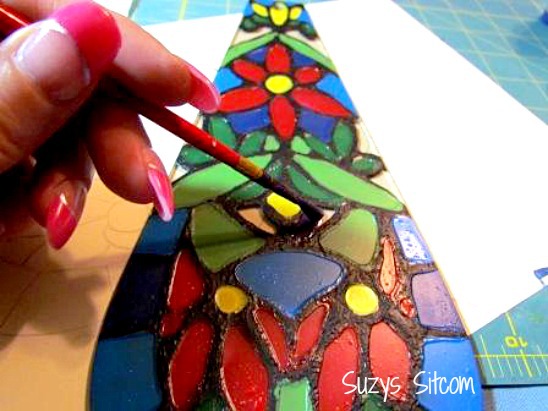
I found it helped to periodically hold it up to the light to be sure I didn’t miss spots. Use a generous hand with the colored glue.
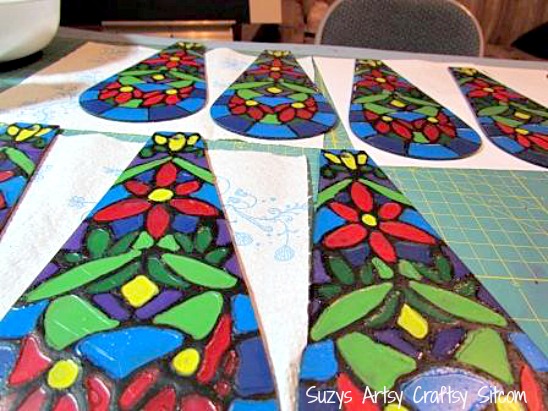
Once all the areas are filled in, allow it to dry for about an hour.

The final touch is to go back over your black glue lines with a black sharpie pen to cover up any areas that got colored paint overlapped onto the black.

Then I assembled the lamp. And there you go! A poor man’s Tiffany Lamp! Now I just have to find a place for it.
If you enjoyed this tutorial and the faux stained glass technique, please take a moment to check out my Faux Stained Glass Tutorial where I create a peacock stained glass picture out of an old frame and glass.
Or you might enjoy faux techniques, check out my Faux Textured Chair Rail tutorial. A great way to add style to a room on a tight budget.
Are you new to the Sitcom? Be sure to check out my Frequently Asked Questions Page!
For over 200 crafty tutorials for all ages, visit my Tutorial Page!

Wonderful post! We are linking to this particularly great content on our website.
Keep up the good writing.
Does the glue get squishy from the heat when burning the lamp?
This is so great! I am a glass freak and this looks so easy! Great job!
I would recommend clear glue over white glue simply because the white glue is much more opaque and will not give the stained glass look. You can find clear school glue at most craft stores and sometimes even at the grocery store.
Hope that helps.
suzy
hi, i was wondering if i can't find clear glue, is it still okay to use elmers white glue and change the color of that to something else instead? does it still work the same?
now that is brilliantly beautiful,superb,love it 🙂
I'm crafty and creative but you are crafty and creative AND imaginative
i like veri much ,ispiking portugues??please ,i sori ,bad,i don´t ispiking inglis.i love you this blog
fANTASTICA BELLISSIMA,DOMANI AL MERCATINO DEL RICICLO CERCO LAMPADA DA 5 EURO E PROVO A FARLA.GRAZIE SEI BRAVISSIMA UN BACIO DALL'ITALIA.
ELEONORA.
I had no idea you could color glue like that! We have a great project now for the upcoming weekend with the family. Thanks, I find your projects doable and very pretty. Another great project! Louella
Suzy-
Your ideas are truly unique. First the paper towels rolls, now this???
Wow.
Thanks for sharing at creative juice…
Wow!! Happy to see your creative idea linked up last week at my K.I.S.S. blog bash. Looking forward to seeing what great project you share this week, remember the link is open until tonight @ midnight {CST}.
Drop by The Tattered Tag
I followed your tutorial for the faux stained glass peacock picture to make a gift for my sister. She loves it! Check it out at http://www.blundersnblessings.blogspot.com/. I just decluttered my bedroom and was planning to get rid of the brassy touch lamp till I saw this post! Looks like I'll be keeping it for a future project! :o)
Suzy – I LOVE this! Everything you make comes out great! And it's so much better than the original! Thanks for linking up to Creation Mondays @ ~The Life of Me~!
Seriously? That's it? That is a;ll you need to make a lamp for the by gone days and make it spectacular, I cannot believe it. Way too cool! Thank you for linking to the beagle.
Incredible transformation! I have seen so many of those brassy "touch" lamps in thrift shops and always passed them over- not anymore! Thanks for sharing this week!
you're so tricky! It looks great 🙂
Thanks so much for linking to "20 Below Thursday"! 🙂
p.s. I have a button for you as well but I didn't see an email – if you would like you can email me at amandablogs(at)yahoo and I will get it sent to you!
You are in the top 10 at Today's Top 20 for Blogger of the month! Congrats! Time to get your vote on! 🙂 Good luck!
Amanda
http://www.todaystoptwenty.blogspot.com
This is so awesome. I found you at the Gluesticks linky party. I am a new follower.
Fabulous! What a great transformation! I really need to try colouring glue and using it like this – so effective and simple!!
Thanks for linking to a Round Tuit!
Hope you have a great weekend!
Jill @ Creating my way to Success
http://www.jembellish.blogspot.com/
That is amazing. Thanks so much for sharing over at Tuesday Tell All.
Melissa
MyCraftieLife.Blogspot.com
You are very talented!
You know, I knew this was you the minute I saw it. You're too freakin' talented I swear. Awesome, great tips. and how frugal!
This is beautiful! Love the colors! Thanks for sharing with the Pink Hippo Party! Can't wait to see what you come up with next week!
wow! I'm amazed! first of the technique, and at your artistry!
very cool!
gail
ps "catching" you this week!
wonderful! I did something similar many years ago on a "piano" window in my old house. I didn't want to move out because I enjoyed that window so very much — that lamp would be moveable and would make me happy!
very pretty
That's absolutely gorgeous! It looks flawless! Really beautiful!
Hi Laura,
Once the glue has dried, it doesn't appear to be water soluble. I have other pieces that I've made using this technique years ago that I just wipe clean.
A suggestion, if you want to add a clear coat of acrylic spray as a protectant, it would seal it permanently.
suzy
I love the look! I do have one question, though: school glue is water-soluble, and lamps get dusty. I wonder if the dust would stick right into the glue, especially on humid days. How do you clean it?
Wow that is so cool! So happy I stumbled across this, it look simple enough for me to try! Thanks for sharing. 🙂
I love this idea!!
FYI – I'm a real Tiffany. No fake here! 😀
This lamp is gorgeous!!! Makes me want to scour my second hand store for a similar lamp. Thanks for sharing your tutorial.
Too cool!!!
This looks GREAT!
Megan
http://www.CutTheCraft.com
that is a dramatic transformation!!! Great job!
april
incredible. from an ugly duckling to a swan
come link it up with our DIY CRAFT TUTORIAL TUTORIAL PARTY. we love it!
I adore this idea. I would love to spruce up my windows with some lovely faux stained glass. Can't wait to go hunt down the supplies.
Hi Bradford!
I work with one color at a time. The glue dries quickly.
I think metallic paint might look awesome! I would be interested in seeing what you come up with!
suzy
hey Suzy it's Bradford again…when you mix your glue and paint together do you just work with one color at a time before you mix a new color? I was also wondering if you think acrylic metallic paint would work as well or do you think it would be too opaque than ordinary acrylic paint? I envision a peacock done in metallics mixed with the glue….
Bradford,
A video adds 10 pounds and I certainly cannot spare that! Ha! Seriously, if I ever figure out how to do it, you may see one some day.
suzy
ok Suzy yet again I'm so jealous of your stained glass painting LOL…You REALLY NEED to video yourself doing these stained glass paintings and post them on youtube.com so we can all watch you do them from start to finish..your work is beautiful!
wow! what a great idea, it looks great!
wow, amazing job! I knew from the thumbnail photo that ths just has to be yours, and sure enough! You're truly a one of a kind crafter and I'm so happy to have you sharing on Craft Schooling Sunday!
Oh wow that's a great idea! You did a beautiful job!
I used Elmers clear school glue. It costs about $1.75 and it dries totally clear as opposed to white glue's opaque-ness. It gives a better stained glass effect and costs next to nothing compared to the commercial glass paints available.
suzy
I love when we can make something look so rich on a poor man's budget.
What clear glue did you use? the only thing that comes to my mind is E6000. Why not just use the white glue?
Very nice project; I would use window color (or other paint for glass); it's a bit more transparent than the acrylic paint. Your design is beautiful.
that is beautiful. My mother loves this style. I will have to forward her this link. http://www.mylifeunzipped.blogspot.com
This is such a great idea! The design possibilities are endless…I'm going to feature this on my blog…thanks!
VERY cool, Suzy. Thanks for the idea!
I totally wouldn't have seen the potential. Neat Idea!
The lamp is lovely! Great job! My friends USED to laugh at me because I haunt Thrift Stores – now they're all out there with me!! Love this Blog!!!
OMG, next girls night out we have to go to the thrift store!!!!!!!! I WANT ONE NOW!!!!!
Amazing!
Looks even better than I thought it would. You did a great job on that! So do I need to keep an eye out for it's twin so you have a pair?
Turned out really nice!
ok – now we will never find a lamp like that at Goodwill thanks to you. Everyone will be buying them up! Great job.
You are totally amazing!
WOW!! It turned out prettier than I could imagine. I think it would look nice in your computer room.
Oh, I love your faux stained glass. I'm totaly going to try this. Soon.
unbelievably awesome..i have a similar lamp in my trash,i will get time someday & then i will follow your tutorial..thnxx so much for the nice tuto
Ooo that's so fun! My grandparents had s lamp like thet next to their bed. They would get do mad when we would play with it….. Cause all the metal turned it on and off. Hehe. We would do it all the time!