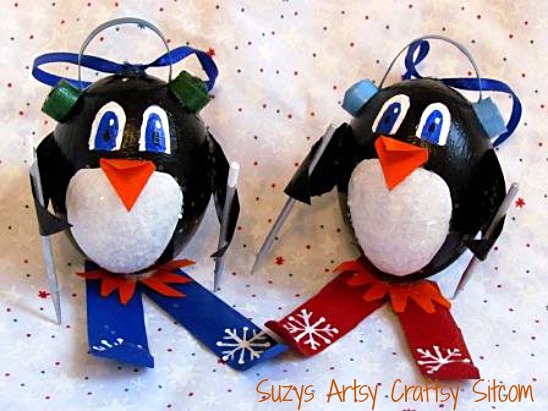
Create a cute penguin ornament from a blown egg, a toilet paper tube and a bit of paint! A great kids craft or even adult-type project and looks incredibly cute on the tree or for holiday decorating! Want to know how to make them?
I’m quite covered up at the moment trying to get my ornaments completed for our club meeting next weekend. As usual, I pick something difficult and time-consuming and I’m struggling at the last moment to complete them. I will reveal them to you next week. Hopefully, they will all be done. In the meantime, I wanted to take a small break and put together some quick little ornaments based on one that I received several years ago.
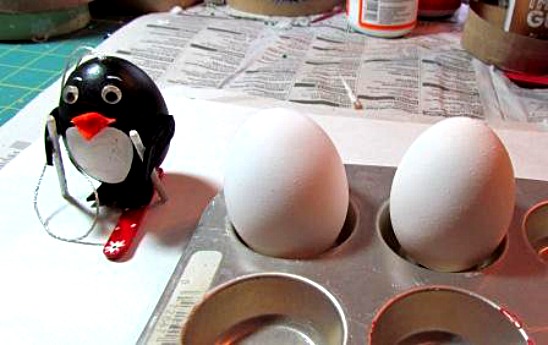
This poor little penguin has lost his ski. Considering he is made out of an egg, I guess he’s lucky that is all he has lost. But I will find his little ski when I pull out the rest of my ornaments and put him back together. And I will make him some little friends!
For this project I used:
Blown chicken eggs
Acrylic Paint
One toilet paper roll
Colored Card Stock
Round toothpicks
Tacky Glue
Hot glue
Ribbon
Mod Podge
Clear Glitter
Edited to add: These chicken eggs were blown first. You can use the old fashioned method of punching holes in the top and bottom of the egg, stir the yolk with a toothpick and blow the contents out. Or there are tools on the market that actually make it quite easy- see my Faberge Egg Tutorial.
I used my little muffin pan as a drying station. It keeps the eggs from doing what they tend to do- roll around. I began by painting each egg black. Sit them aside to allow them to dry.
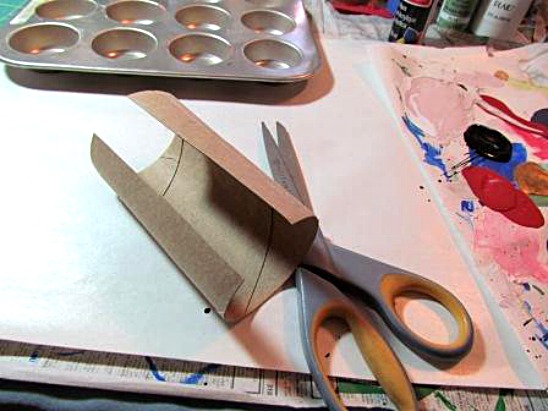
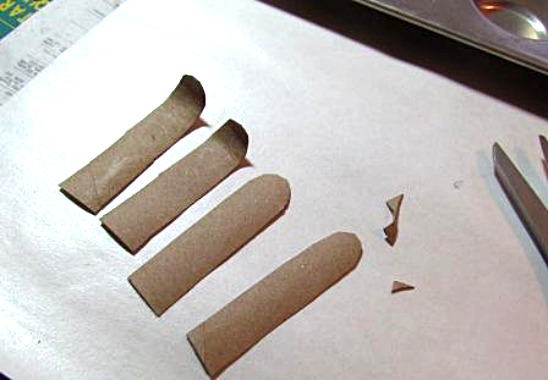
I then cut two sets of skis from the toilet paper tube. I have to tell you that it is amazing what you can do with these things. I have been collecting them for a while and they come in very handy every time I need a scrap of cardboard or two. I cut the skis about three inches long and about 3/8″ wide and rounded the top end of each. Then I curved the rounded end up and painted them with acrylic paint on both sides.
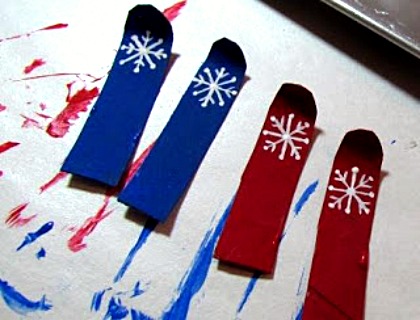
Using a tiny brush and white acrylic paint, I then painted a snowflake on each ski. Set them aside to dry.
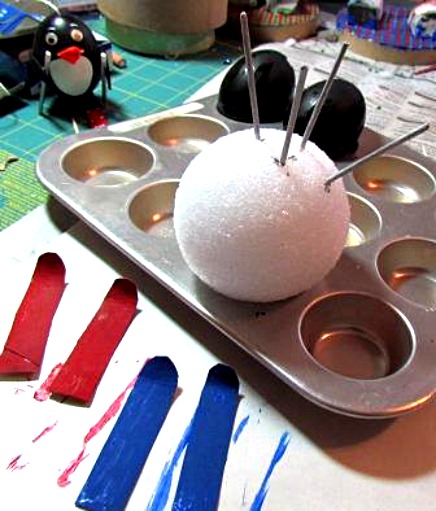
For the ski poles, I cut one of the pointed ends off of round toothpicks and painted them silver. An easy way to paint them without making a huge mess is to stick them into a styrofoam ball, then when one end is dry, reverse them and paint the other end.
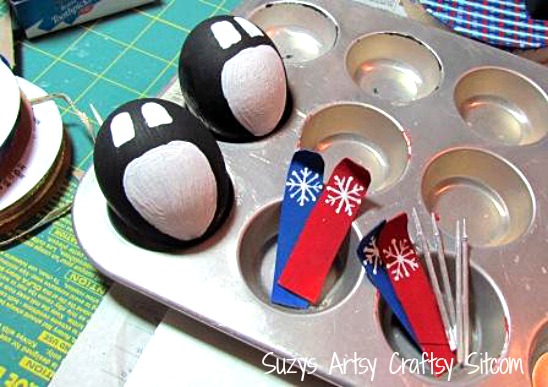
Paint a white belly on each egg, and two white eyes. When dry, paint in the pupils.
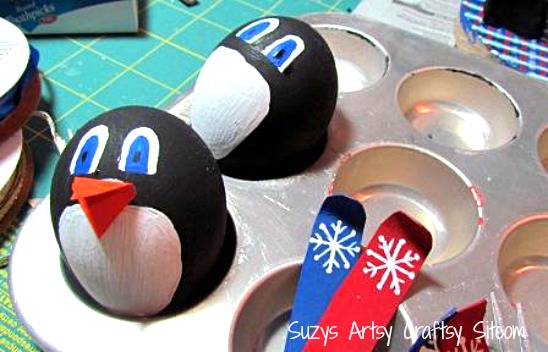
Cut a diamond shaped piece of orange cardstock, fold it in half for the beak and glue on with tacky glue.
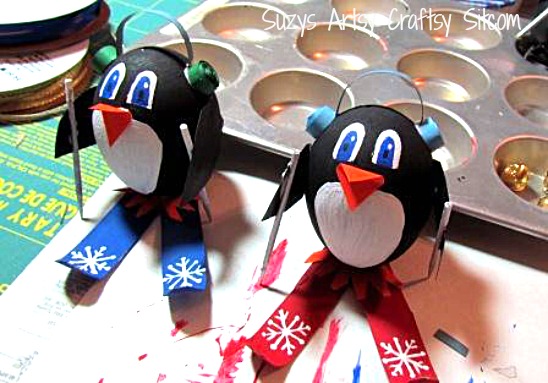
Cut feet out of the orange cardstock, and wings out of black cardstock. Glue them on using hot glue. Glue the skis onto the feet with hot glue and glue the pole into his “hands” with tacky glue. Make earmuffs by quilling a 1/4″ strip of cardstock into a tight quill and glue. You can find some easy quilling instructions in this tutorial. Cut a 1/8″ strip for the earmuff band and glue down at each earmuff with tacky glue.
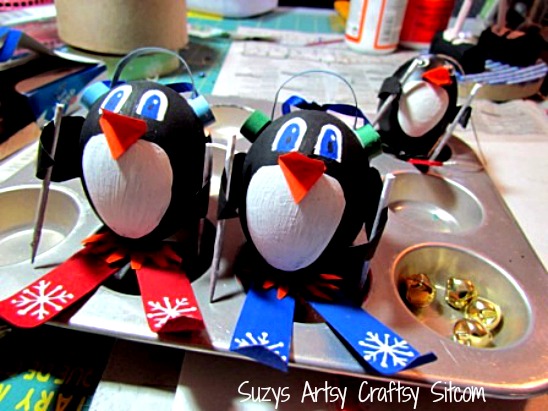
Finally, make a loop with ribbon and glue to his head with hot glue. This will be for hanging him on the tree. If you just want him for a shelf sitter- skip this step.
Now coat the entire thing with a good coating of Mod Podge. This will add a finished shine to him and stiffen all the cardstock. Be sure to coat everything. Once this has dried, add more Mod Podge to the white belly and sprinkle some clear glitter on for a bit of sparkle.
And there they are… ready to hit the slopes!
—
Are you new to the Sitcom? Be sure to check out my Frequently Asked Questions Page!
For over 100 more tutorials for all ages, be sure to visit my Tutorial Page!