Feature Friday- How to make Monkey Bread!
 PLUS
PLUS 
Traditionally, it is served hot so that the pieces of bread can be easily torn away with the fingers and eaten by hand. Sounds messy, but delicious. And totally unrelated to monkeys, but I will allow the discrepancy as it is a cute name.
So take it away, Lynda!
You know how you go to the grocery store thinking you are only going to buy milk and you end up in there for half an hour and 68 dollars later you have a buggy full of all those deals you couldn’t pass up? Ok, yes, I needed to stock up on the chocolate covered turkish delight because let’s face it……they might stop carrying it……then what would I do?
So there I am in the baking aisle and I get this great idea that I’m going to make homemade bread for my family! Yeah!! I’m gonna be like those pioneer women of the past who ground their own wheat and made their own clothes!
Yeahhh……..Noooooooo, it turns out I needed four hours to make it and it was already 9 pm at night. I didn’t think it would be such a great idea to get my homemade bread into the oven and then fall asleep on the couch, so, dejected I pushed my bread flour and packets of yeast to the side and opted for the four cans of Pillsbury biscuit dough. I was going to give Monkey Bread a try!
So, I go on to my trusty laptop computer and look on the internet for a good recipe. Turns out Pillsbury has their own right on the can but I decided to use another that I found on allrecipes.com it used more sugar and we can all use a little more sugar in our lives. Now, on to the tutorial:
Here’s what you’re going to need:

1 cup of white sugar
1 stick of margarine
1 cup of packed brown sugar
2 tsps. of ground cinnamon
A bundt pan or large round deep cake pan
One large ziplock bag
Open up a can of biscuit dough and spread them out on a cutting board. Cut each piece into quarters. Put the one cup of white sugar and the two tsp. of cinnamon into the ziplock bag and shake it up to mix it.


Add the packed brown sugar and mix with a wisk or spoon constantly until bubbling. Once bubbling you want to cook it for one minute while stirring constantly and rapidly. This is the tricky part because you don’t want it to burn or cook too long and become unpourable.


Once it’s done. Take it out of the oven and let it sit in the pan for 10 more minutes. You’re probably going to need to stand guard over it or else they are going to be sticking forks into it trying to eat. I don’t know why but it seems like a man can eat a piece of cake straight out of the oven and not burn his mouth.
Place a plate over the top of the pan and turn it over. There’s your yummy monkey bread!

For more recipes by Lynda, check out:
Canning Pickled Beets
Homemade Blackberry Jam

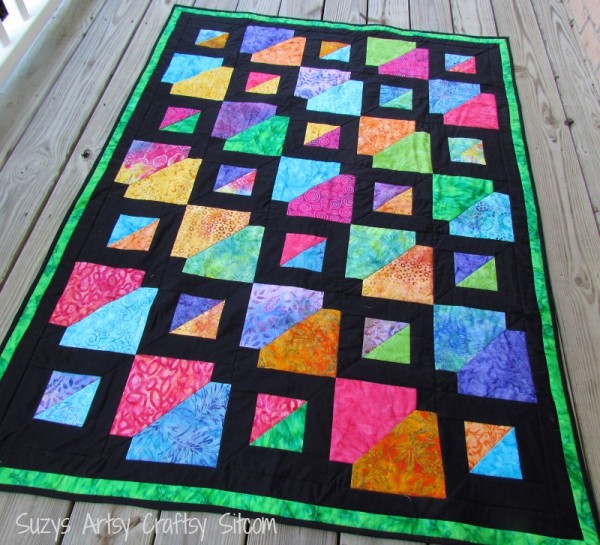
Want to try your hand at quilting? My newest quilt Pattern- Batiks Gone Wild! A great gift!
Are you new to the Sitcom? Be sure to check out my Frequently Asked Questions Page!
For over 150 crafty tutorials for all ages, visit my Tutorial Page!

Hi Debbie,
If you have to make the dough from scratch, I’d use any recipe for cinnamon roll biscuit dough. Bet that would even taste better!
The recipe sounds great, but I have a problem. I live in the Netherlands and ready made dough like that is not sold here. What kind of bread or biscuit recipe could I use to replace the store bought with?
I put crushed pineapple in mine! Yummy!!
Oh my gosh, I love Monkey Bread and kind of forgot about it! You can bet I'll be making some now! Thank you so much for the reminder and linking to It's a Party!
YUM! I love monkey bread . . . and I love the idea of adding nuts and raisins! I will totally do that next time! 🙂 Thanks so much for linking up to Strut Your Stuff last weekend! We would LOVE to have you come back and link up more of your great projects tomorrow!
Camille @
SixSistersStuff.blogspot.com
That looks quite tasty!!! Love seeing the hubs help out! Thanks for sharing on Fancy This Fridays!!!
wow this does sound delicious! thanks so much for sharing on Craft Schooling Sunday!
yummy! I'll be right over! {just joking!} those look so yummy! I started a link party at my blog and I'd love for you to link this up. I also have an awesome digital scrapbooking giveaway going on. If you're interested it's http://caribbeanmissionarywife.blogspot.com/
Yum Yum Yum! I love monkey bread, but have never tried it this way before! This looks delicious!
Thank you so much for this. In high school a friends mom used to make this almost every time I spent the night. I miss waking up to the wonderful smell of it baking. If you get a chance I would love you to link your monkey bread up to More the Merrier Monday. It lasts through Wednesday so you have plenty of time to stop by. See you there. http://diyhshp.blogspot.com/
SOoo glad you don't really need the monkeys for this bread! It does look yummy!
Thanks for linking to a Round Tuit!
Hope you have a great week!
Jill @ Creating my way to Success
http://www.jembellish.blogspot.com/
Yum! this looks fabulous! and so DELICIOUS!
I would love it if you would share this and/or any other projects you have been up to at Tuesday Talent Show at Chef In Training Tomorrow! Plus there is going to be a fun giveaway too! Thanks so much and I hope to see you there!
-Nikki
http://chef-n-training.blogspot.com/
OMG, I'm drooling. Thanks for the tutorial and thanks so much for linking up to Finished for Friday!
Ok, now I'm super hungry. This looks amazing!
What a yummy looking dessert! I think I will try that for our next family get together. Thanks.
Sounds like its going to go striaght to my thieghs… but it would be worth it! lol Nice tutorial. 🙂
India @ afro-indy.blogspot.com