Pretty Peacock Journal Cover- easy DIY with free pattern!
A few weeks ago, I showed you how to create your own Bullet Journal. It is a great way to keep yourself organized and be creative at the same time. This week, I want to show you how to make your own cover for your journal.
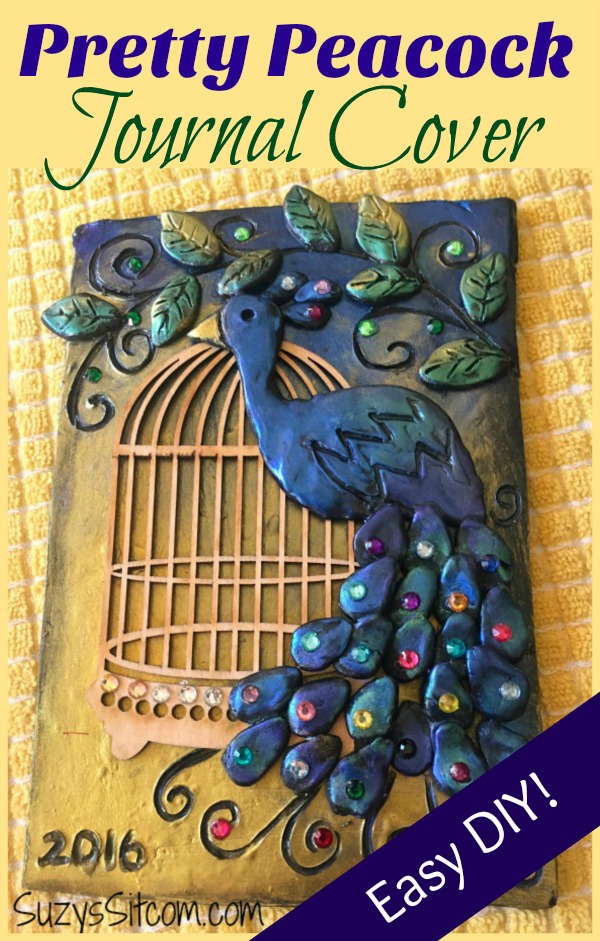
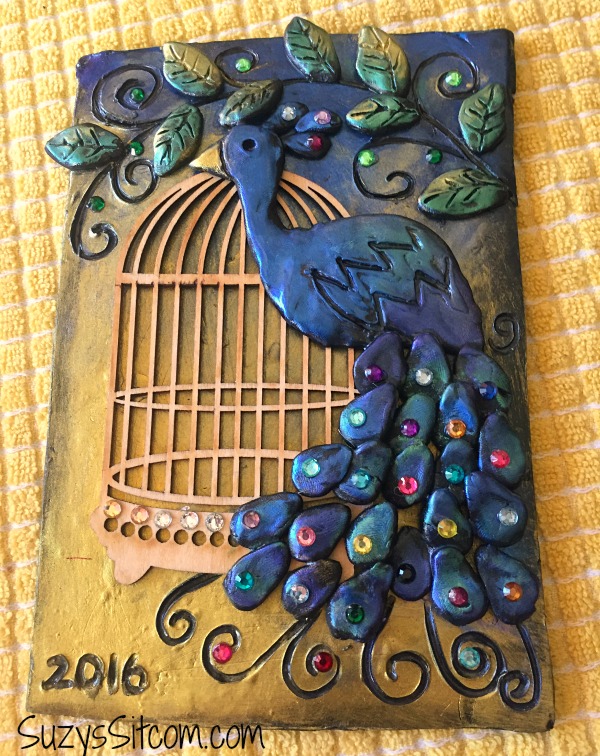
This unique cover made with polymer clay is not only fun and easy to make, but it will make your journal all the more unique to you! Polymer clay is an easy to use oven baked clay that is incredibly versatile. It can be used to create not only book covers, but ornaments, jewelry, art and much more. It is limited only by your imagination!
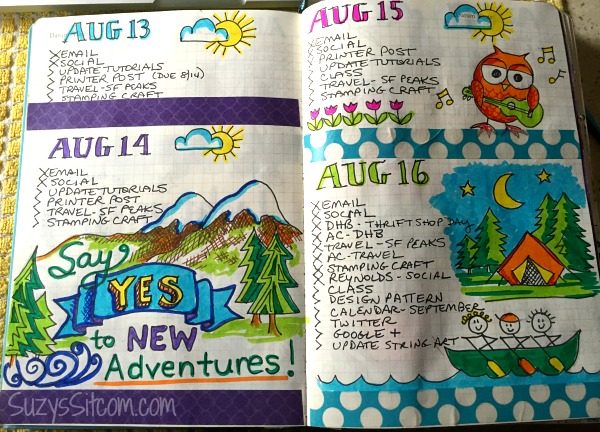
My journal not only includes daily tasks, but doodles and craft ideas for future posts. Since creativity is throughout the journal, it seemed right to continue onto the front cover. So with that in mind, I created a fun peacock cover using polymer clay.
And I am including a free pattern for you!
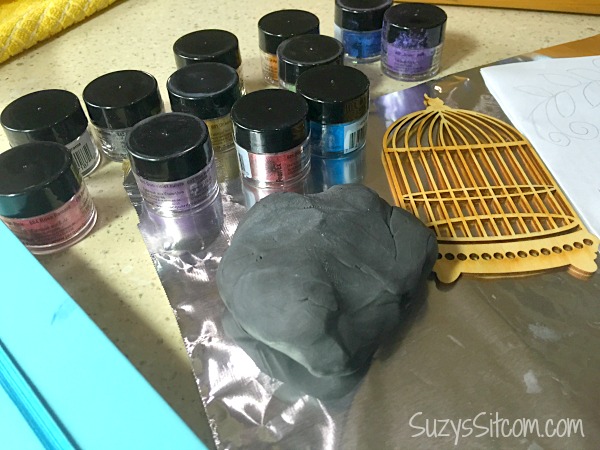
For this project I used:
8 oz. Polymer Clay (Black)
Laser Cut Wood Birdcage
Powdered Pigments
E6000 Craft Glue
Flat Back Rhinestones
Sculpey Glaze- Satin Finish
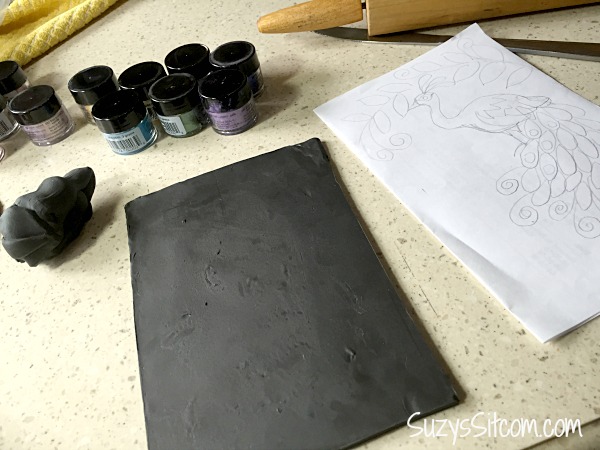
Soften the polymer clay in your hands and then roll it out on a flat surface about 1/4″ thick. Use a ruler and knife to cut to the size of your book cover. (Make it about a little smaller than your cover to allow for easy opening of your journal).

Place the flat piece of clay onto a piece of aluminum foil. Use a brush or your finger to add the powdered pigments to the clay, creating the background colors. I used bright gold and blue, mixing in the middle for a bit of movement.
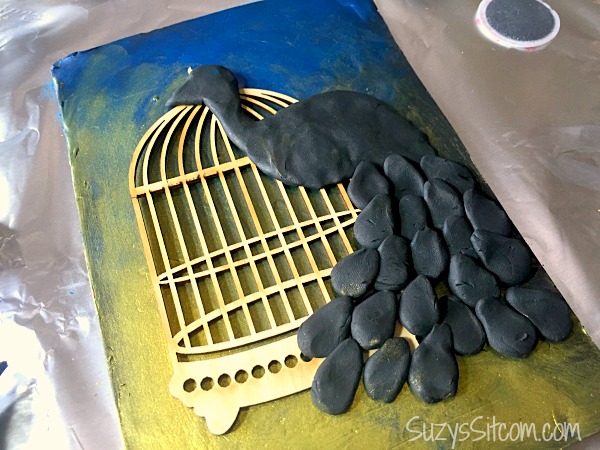
Using the peacock pattern as a guide, place the bird cage in place and then begin to form the peacock using bits of polymer clay pressed into the cage and background.
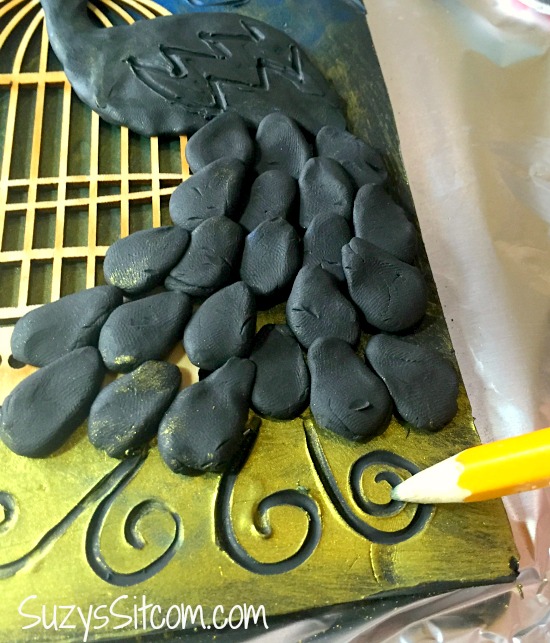
Use a pencil or sharp point to add details around the bird.
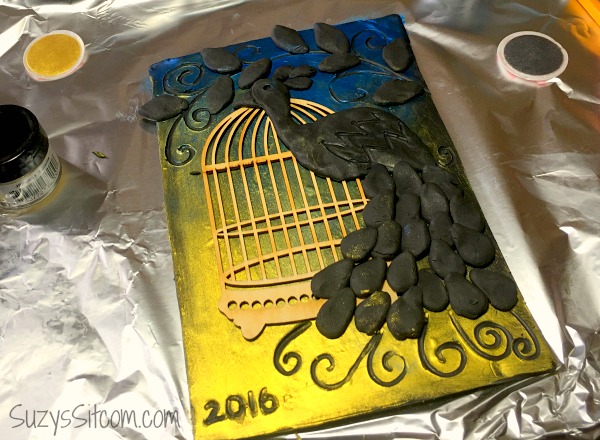
Use the pencil to also draw in the tree branch. Add polymer clay leaves, pressing them into the background.
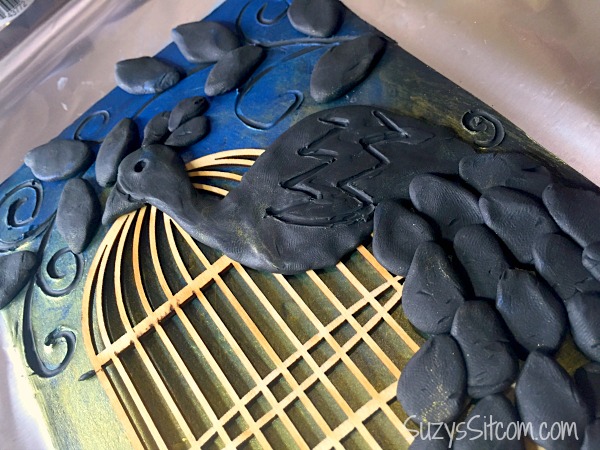
Use the pencil or sharp point to draw in details on the bird and veins in the leaves.
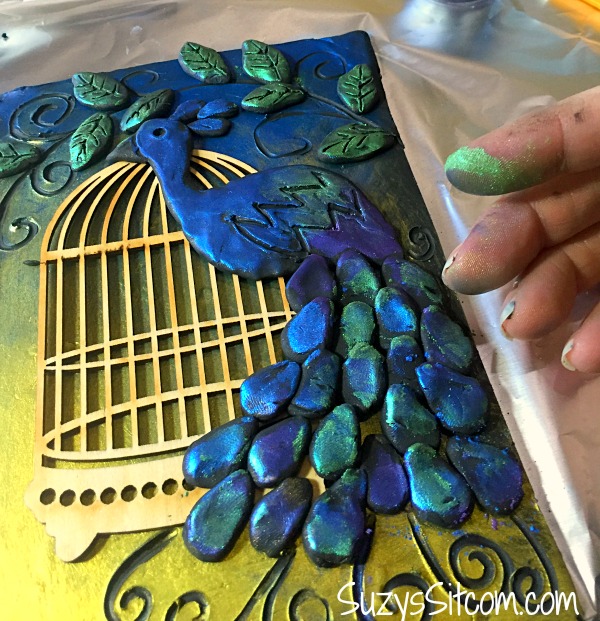
Use your fingers or a brush to add pigment colors to the bird and leaves. I found that fingers work best to push the color into the clay and leave the details the color of the black clay. For the bird, I used blue, purple and green pigment colors. The leaves are green and gold pigment.
Once all the color is added, move the entire project and foil that it is sitting on to a cookie sheet. Bake at 250 degrees for about 45 minutes. Remove from the oven and allow to cool completely before going to the next step.
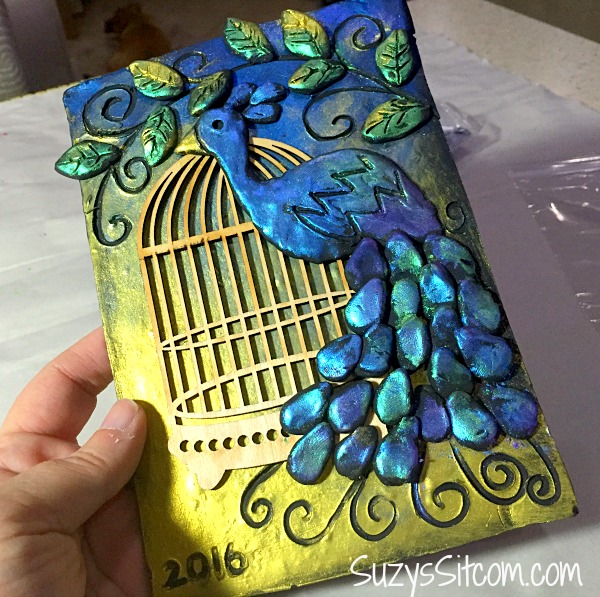
Now that the piece is completely cool, it is time to go to the next step.
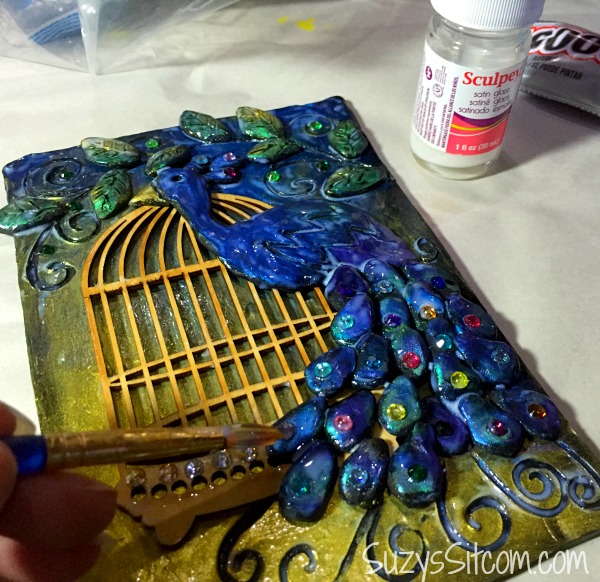
Using E6000 glue, add rhinestones. Check for any loose pieces and glue in place. I had to add a bit of glue to the left side of the birdcage and to a few of the feathers. The final step is to brush on a protective coating of Sculpey Glaze.
The peacock can be used a a pretty piece of art, perched in an easel frame.

Or… it makes a fabulous journal cover! Use E6000 glue to adhere the clay piece to the cover of your journal.
Your journal is now uniquely yours!
Are you new to the Sitcom? Be sure to check out my Frequently Asked Questions Page!
For over 100 more tutorials and recipes for all ages, be sure to visit my Tutorial Page!

Ahh I love this! Thanks for this tutorial (and all your other ones!). I’ve been dying to make a clay journal cover and now I just need the nice pigment powders!
That is so cool!!! Now I have to look at all your patterns to see what else I can use on this journal cover.
Can’t wait to make this for Scarlett’s journal. Happy Halloween Boo
Hugs, Grambo
I’m brand new to your blog (a newbie) and I am enjoying it so much. that 1st evening I think I spent about 4 hours exploring and reading and laughing, love to laugh anytime anywhere, well except funerals.
You my dear are very talented and creative, but what I can’t figure out is where in the world do you put all your supplies. I know you have them in containers in every nook and cranny, but you do so many different crafts, you just have to have a ton of supplies.
Do you hand stitch your quilts or do you use a machine and are you quilting on the road.
I have wanted to learn how to quilt for the longest time, a friend of mine was going to do on line video classes, but it didn’t work out for her.
I have a love affair for every quilt I see, I have I think 6 and three are over a hundred years old and in mint condition and believe me they have been used, but well cared for and I treasure them.
I love doing crafts and that is why I am so excited to have found you, I love painting and I have done a few things with clay, I love making ornaments. I have a feeling I am going to learn how to do a lot of wonderful new crafts that I learn from you.
This craft is adorable. I want to make one. Suzy, you are so creative. I’m glad I stumbled onto your site a few months ago.
Keep on craftin’