
The week I was snowed in, I got very adventurous and decided to finally do something about the little sewing table that sits in my hallway. It is one of those tables that folds up and hides a Singer Sewing machine. Not what you would exactly call antique, but definitely an older model. The top of the table is marred and for the past 20 years, I’ve kept a doily on top of it to disguise it. Out of sight, out of mind.
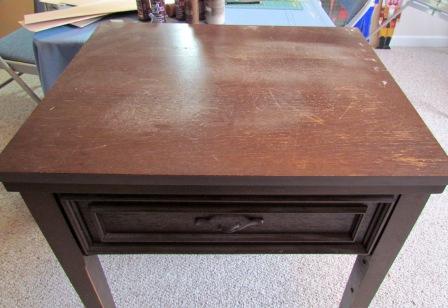
But here I had some time to kill and I looked at that table and decided I would do a little faux wood inlay work on it. And I have to tell you that this particular project kicked my butt. I started it over numerous times before I finally found a system that worked for me. In the end, everything finally came together.
For this project I used:
1/16″ thick sheets of balsa wood (enough to cover table top)
Elmers Glue
Polyurethane (clear gloss)
Acrylic paints
Sandpaper
Craft Knife
Knitting Needle
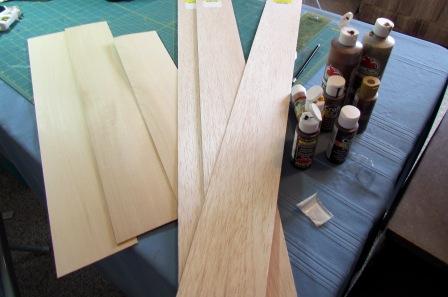
I began by laying the balsa wood across the table and gluing them down, butting them up as closely as possible with each other. (You can find these thin sheets of balsa wood at most craft supply stores for about $3.00 a piece).
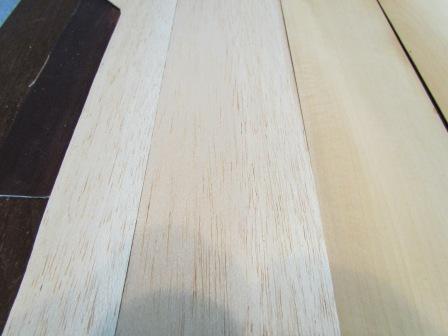
Here, I discovered that not only is balsa wood thin and pliable, but it soaks up glue like a bandit. It became necessary to place heavy objects on top of the table in order to keep the balsa wood from warping. So have heavy objects available. Allow this to dry overnight.
To prepare the wood for the next step, neatly trim it to meet the edge of the table top and then sand it all down with medium grit sandpaper.
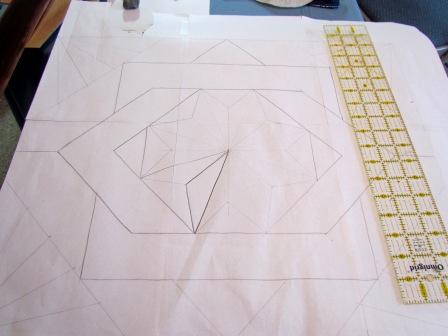
Draw out your inlay pattern on a piece of paper the same size as your tabletop. I looked around on the internet and found a few inlay ideas that I combined in order to fit the size of my table top.
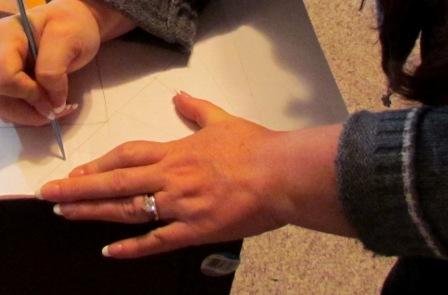
Now lay the pattern on top of the table and use a knitting needle to draw along your pattern lines, pressing into the soft balsa wood underneath. You don’t have to press incredibly hard here, just enough to put the pattern on the wood.
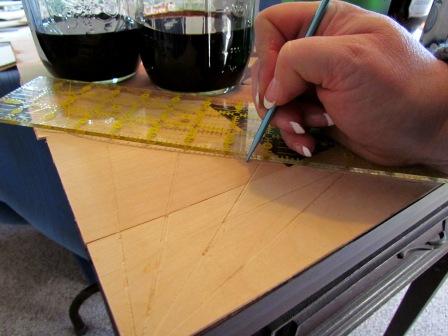
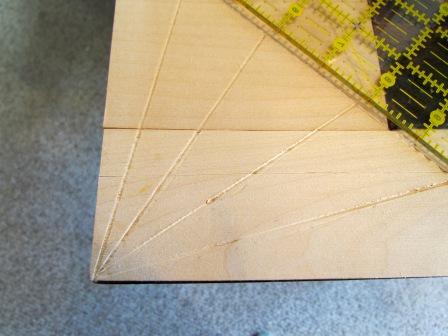
Once the pattern has been transferred to the wood, use a ruler and your knitting needle to press harder along the lines to create a good groove. Sand everything down once again and then wipe any dust off with a dry towel.
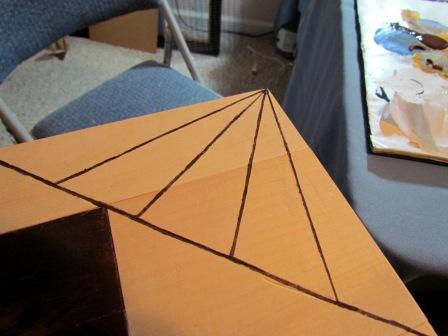
I used dark brown acrylic paint and a small brush to paint in the grooves, creating a look of joined wood.
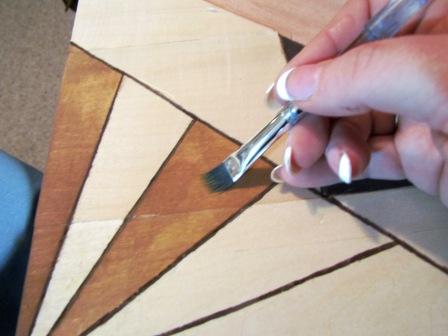
Then use various browns to paint the different sections. I found that if I add water to my acrylic paint, it gives the effect of wood stain.

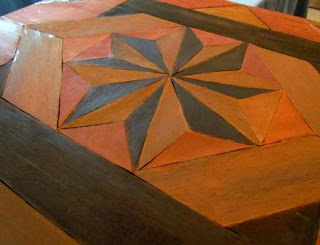


Paint each section separately and in a different direction from the one next to it, to give the look of inlayed sections of wood.
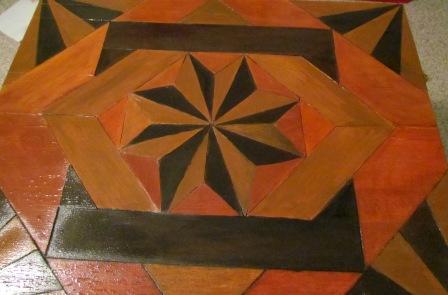
The final step is to coat the top in several thick coats of clear gloss polyurethane. Allow it to thoroughly dry in between coats, lightly sand it and add another coat of polyurethane. This step is necessary in order to protect and harden the soft wood below.

My little table has a whole new look!
If you enjoyed this tutorial, you might like some of my other faux look tutorials:
Faux Carved Wainscoting– Using textured wallpaper and trim to create a carved look.
Faux Stained Glass– Using white glue and acrylic paint to create a stained glass work of art for pennies.
Faux Metal Wall Art– Everyone will be totally surprised when you tell them what this project is made of…


