Compensation and products for review were provided by Glidden via MomTrends. The opinions expressed herein are my own and are not indicative of the opinions of Glidden.
As you know from Part 1 of this series, I had decided to use the unique paint colors offered by Disney Paint and their Ready, Set, Glow! specialty finish to revamp a plain guest bedroom. The goal is to create a glowing Disney fairy atmosphere and infuse a bit of color and excitement into that bland room.

Disney Paint is a new line of paints available only at Walmart that captures the magic and inspiration of Disney with 112 exclusive colors and five innovative specialty finishes that are easy to use and apply.
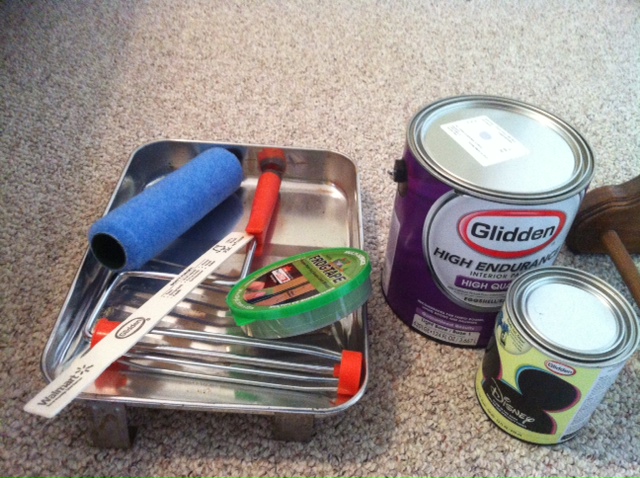
For this project I used:
Disney Paint in Enchanted Violet
Disney Specialty Paint – Ready, Set, Glow!
Painters Tape
Yard Stick
Assorted butterfly and flower stick-on stencils
Paint Roller and Paint Pan
Paint brush for details
If you are nervous about tackling this kind of project, be sure to watch the “how to” videos and use the virtual room painter to preview different finishes and paint colors offered at DisneyPaint.com.
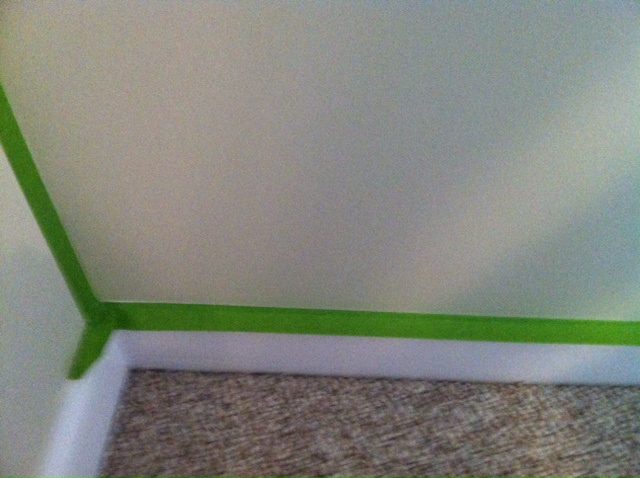
To begin, I used painters tape to tape around the edge of the window, and the top of the baseboard.
Tip:
When putting painters tape over baseboards, just attached one edge of the tape along the top of the baseboard, against the wall. Leave the other edge sticking out over the baseboard. This will help catch errant drops of paint.
Since I am only adding the Enchanted Violet to one focus wall, I also put painters tape on the two corners of the room where the violet would meet the green walls. This will help maintain a clean line where the two colors meet.
Remove covers from outlets and cover the outlets with painters tape. (Do not allow children or animals near the outlets while painting just to be on the safe side). Oh, and do not lose the screws to the outlet cover.
Don’t ask…
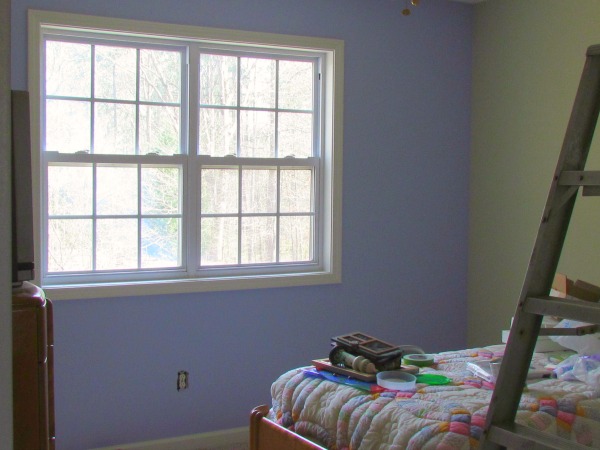
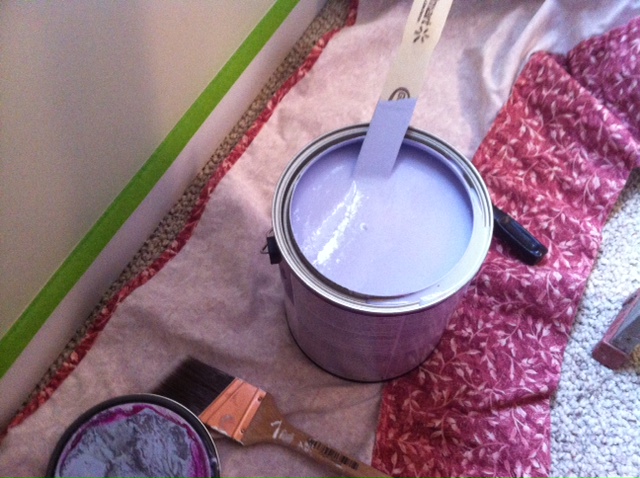
I then used my paint pan and roller to paint the Enchanted Violet onto my chosen wall. Be sure to stir the paint well before using. I was thrilled to note that the paint has nearly no odor, and went on smoothly. And best of all, needed only one coat to fully cover the walls beautifully!
Once the paint was dry, I removed the painter’s tape and I was now ready for the next step- Ready, Set, Glow! Disney Paint!

For this step, the paint has to be completely dry, so allow 24 hours before placing painters tape on the fresh paint or any type of stickers on your wall. I began by adding my large fairy sticker onto one wall. I found her in the Disney Paint section. She looks beautiful on the wall. Finally the room is getting some character.
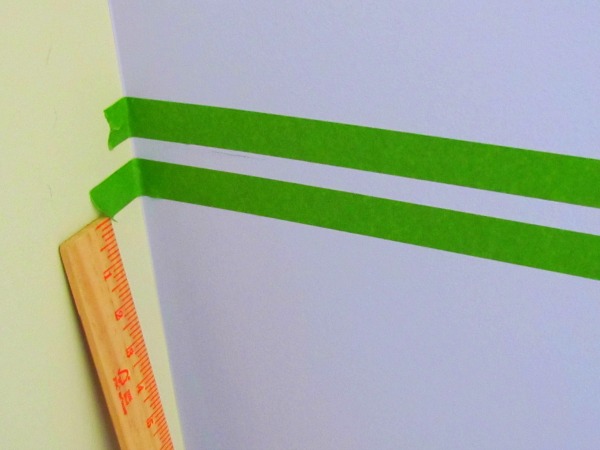
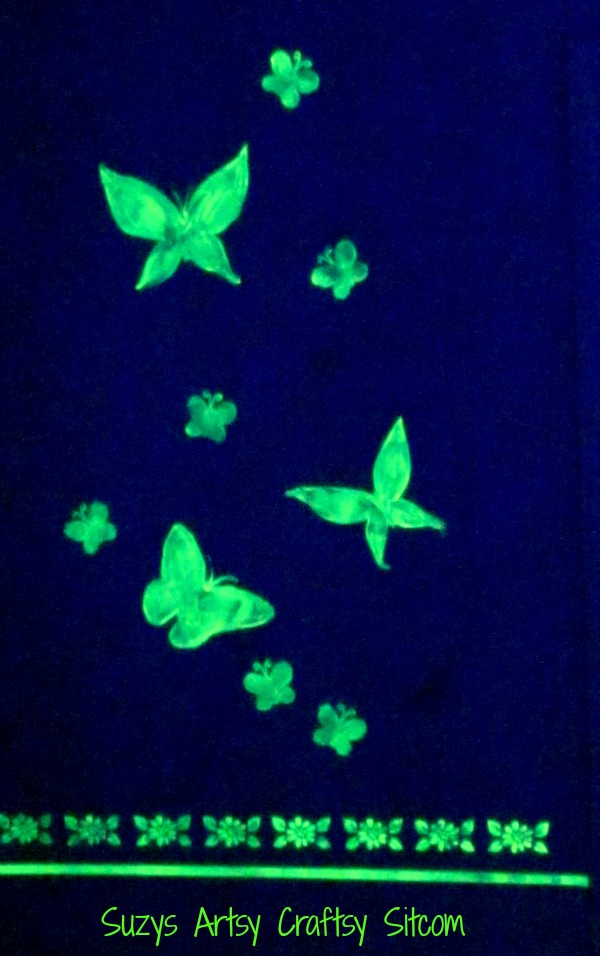
I wanted to create a pretty “chair rail” using my flower templates and the Ready, Set, Glow! Paint. I used my yard stick to mark where I wanted the rail to begin and placed painters tape so that I could paint a straight line with the glow paint.
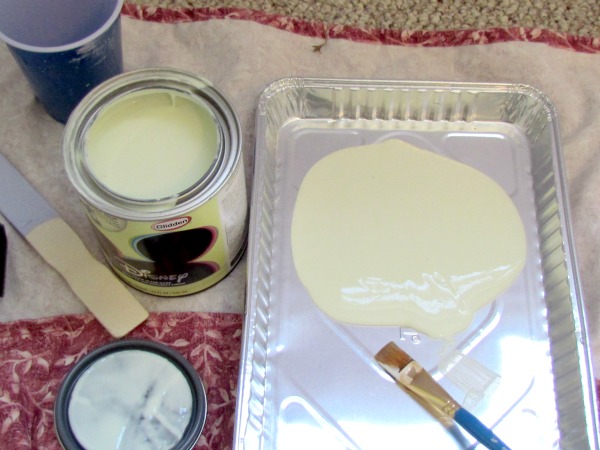
I used a disposable cake pan to pour a bit of the Ready, Set, Glow! Paint into, and then used a smaller brush to paint the lines between the painters tape.

The paint goes on smoothly, has no noticeable odor, and dries to near invisibility. In fact, I wasn’t sure how thick it needed to be, so I added two coats.

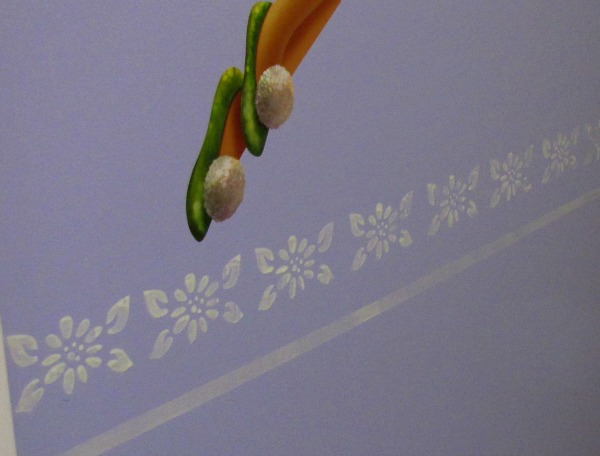
The flower and butterfly stencils were easy enough. Just stick them where you want them and paint over the design with the glow paint. Unpeel the sticker and stick it to the next area. You can use them over and over again.
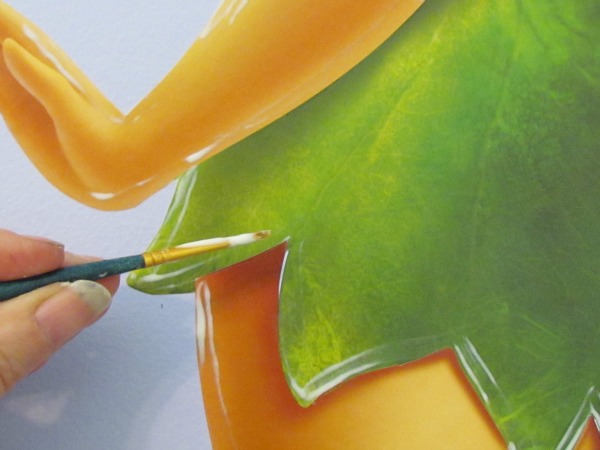
I also took the brush and painted an outline around the large fairy.
And then we waited for the sun to go down….
The lights have to be on in the room for a few minutes in order to give the Ready, Set, Glow! paint a “charge”.
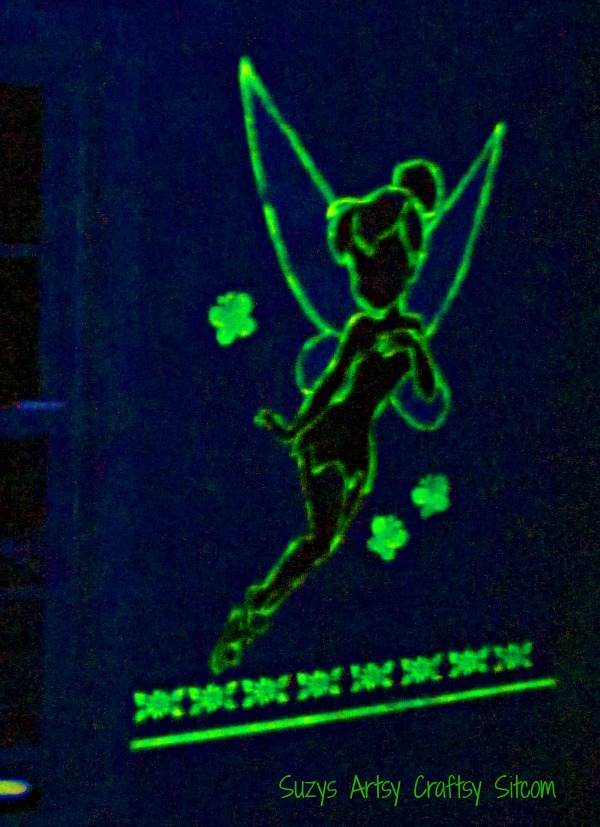
Then, flip them off and there you go!! Wow! The wall came out amazing! I can’t wait to decorate the rest of the room to go along with the fabulous paint job!
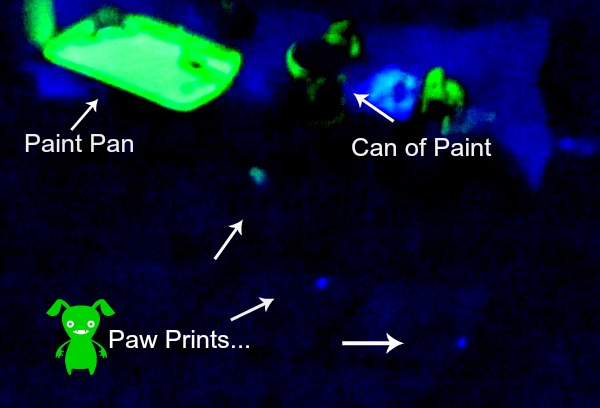
Ooops. Looks like I should have kept a closer eye on the dogs…Ha! Good thing the paint is virtually invisible in the daylight!
Next week, I will show you how I decided to decorate the room, show you a couple of cool crafty projects that I created to go along with this glowy theme, and show you what happens when we have actual children here to see the room! So stay tuned for part three of this series! You can find the final room reveal here!
Compensation and products for review were provided by Glidden via MomTrends. The opinions expressed herein are those of the author and are not indicative of the opinions of Glidden.