Christmas Bear Magnets
Oh yes. The holidays will be here soon! Just heard on the radio a reminder that we just have 2 months until Christmas Day! That’s eight weeks, folks! As a crafty person, this is my busy time of year! So let’s get crackin’!
Today, I’m going to show you how to make some cute Christmas Bear Magnets!

For this project I used:
Bread Dough:
2 cups of flour
1/2 cup of salt
Water
Other supplies:
Acrylic Paint
Clear coat varnish or Mod Podge
1″ x 2″ wood pieces (3)
glitter in red and green
Stencil
Magnets
Hot glue, white glue
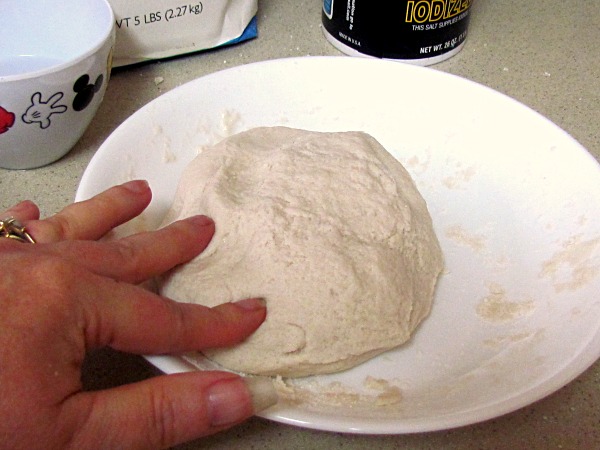
Mix flour and salt together in a bowl and add water gradually, mixing with your hands until you have a dough consistency. It should not be sticky. If so, add a bit of flour.

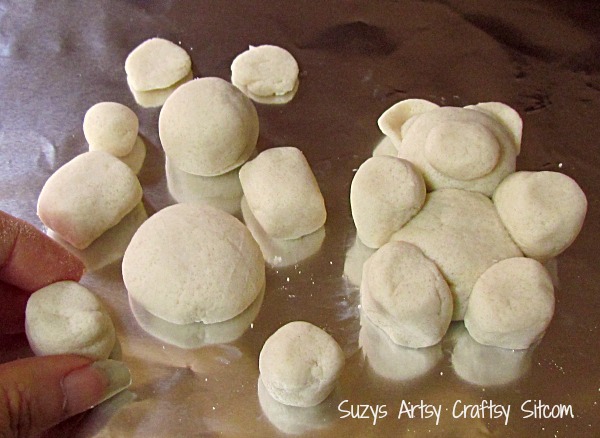
Now for the fun part. Make an 1 -1/2″ diameter ball, and top it with a 1″ ball. Roll out the legs. Attach the legs to the body using a drop of water to adhere the two pieces. Add the arms the same way. Create ears and a nose by forming smaller balls, shaping them and adding with a drop of water. The girl bear needs a bow for her hair. Of course.
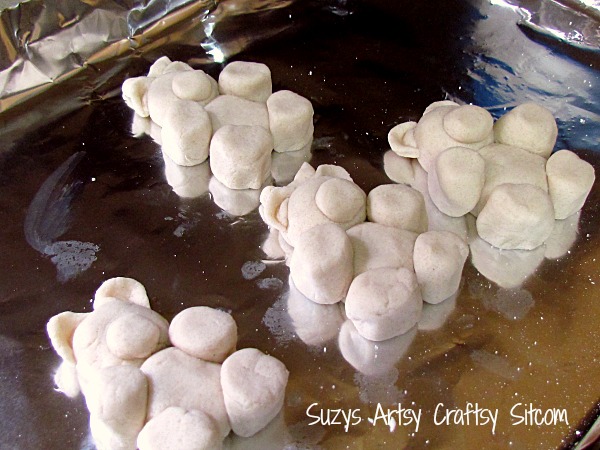
All pieces are then put on a pan that is covered with aluminum foil and baked in a 300 degree oven for about 3 hours. Be sure to turn the pieces over when they are about half way done to ensure that the bottom cooks all the way.
Your house will smell pretty darn awesome by the way.
Allow pieces to cool completely before painting. Unfortunately, I allowed mine to cool at “dog level” and by the time I realized it, my dog Ralph ate one of my bears.
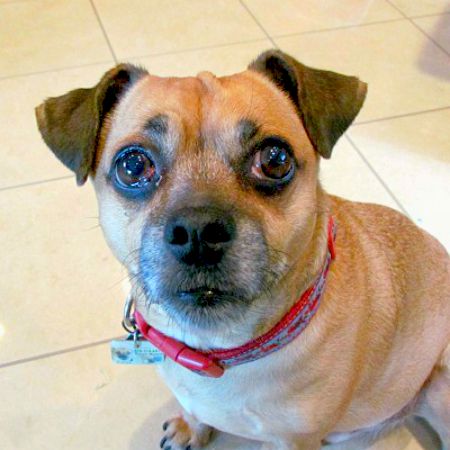
Looking pretty guilty there, Ralph…
But I’m nothing but resilient. My original plan of having the bears spell out “NOEL” was going to have to change due to Ralph’s appetite. We will just have to go with “JOY”!

Omgosh that’s too funny that your dog ate one of your bears. At least you were still able to make “JOY” 🙂 Thanks for sharing your fun holiday craft on Merry Monday.
Hi Suzy, wooow these bears are cute. I love them.
i have found out that using the same recipe you can use the microweave as well.
It will be tricky, but it work well, when you have found out the time by the thikness or the measure of the figure wich time you must use.
But the baking proces will be much quickly. In use an microweave for the normale microweave heating for just a minute or less then 4minutes.
But baking in the normal stove is okay as well.
ii only thought to mention this for other projects of yours.
thank you any way for sharing your idea of those cutty ones of yours and the great tute you have made.
I’m still trying to adjust to the fall season. It’s here windy and stormy and the leave of my tree are allready collored and falling down.
Living nearby the seashore this is going far to quick.
But that’s as well okay by me.
he have a nice fun weekend
jet
Oh these little bears are so cute Suzy. Ralph is looking so innocent. Are you sure he was the culprit ? LOL