More Book Cover Patterns for school!
It’s almost school time again and I wanted to show you a way to spruce up those boring book covers and turn it into something amazing that are perfect for those CollegeBooks! After all, a long school day could certainly use some sunshine! I created fun book covers using the technique called Iris Folding!
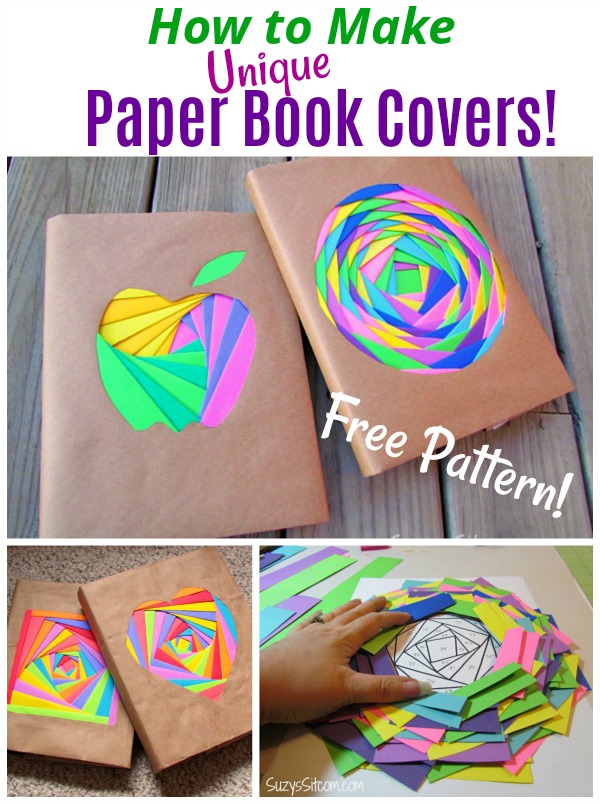
The plan was to revamp the old version of the book cover. You know, the one that is made from a grocery bag? I used to make them all the time for my kids when they were in school. Anyway, I decided to use a technique called Iris Folding with bright colored papers to make those boring bookcovers exciting.
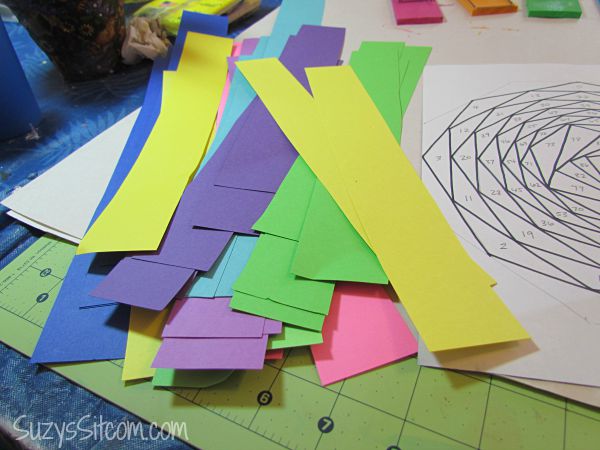
For this project I used:
Several sheets of different colors of bright colored cardstock
A paper grocery bag
Glue Stick
Tacky Glue
Scissors
Free Pattern: Rounded Iris Fold
Free Pattern: Iris Folding Pattern2
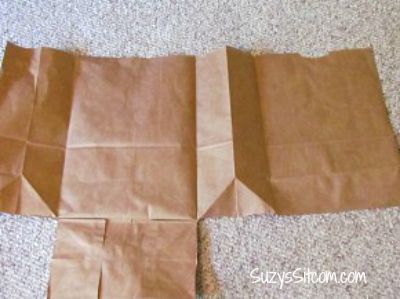
Begin by cutting your paper bag open as shown, and then cut off the bottom flap, so that you have one large sheet of paper.
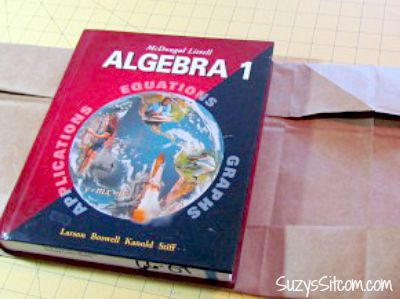
With printed side of the grocery bag up, place the book on top and fold down the top and bottom edges of the paper to match the top and bottom of the book.
Fold one end of the paper and slide the front cover of the book into the open end until the edge of the cover meets your fold.

Close the book and crease the other end of the paper where the edge of back cover meets it. Slide the back cover into the open fold. Your book cover is now complete. Well, your boring bookcover is complete.

This is the Iris Folding Pattern that I am using for this project.

Choose a color and cut a strip of paper that is wider than your numbered section when folded.

Fold it lengthwise and place over the section, starting with section number one. Be sure the fold is towards the center and is facing up. (We are working from the backside of the project).
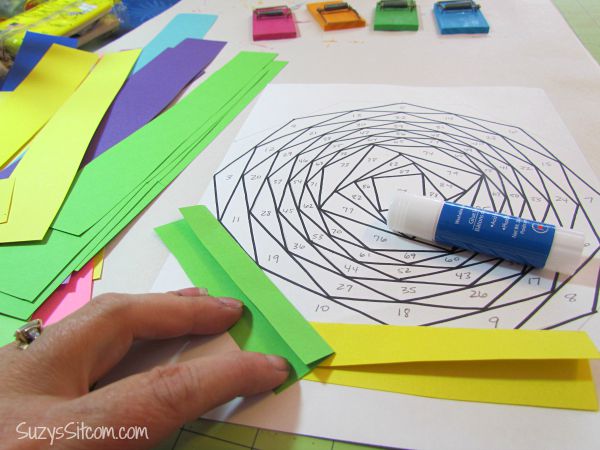
Cut another color strip and fold lengthwise, placing it over section number two, tacking the two strips together with glue stick.
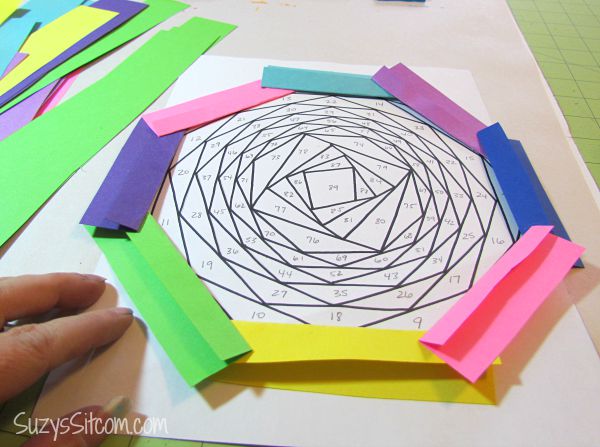
Repeat this process going around, being sure to do the sections in numerical order.
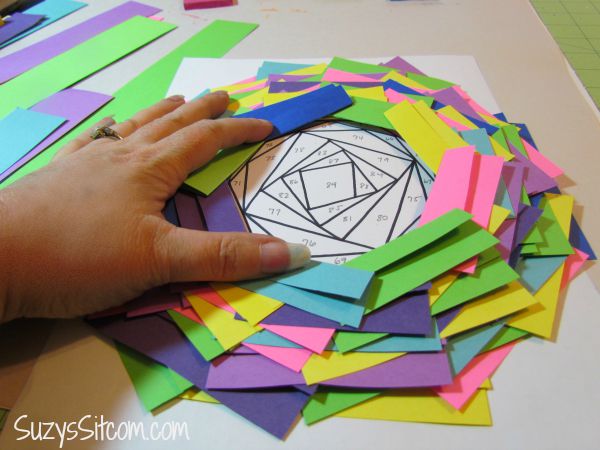
Continue around, in numerical order, using a glue stick to glue each strip in place.

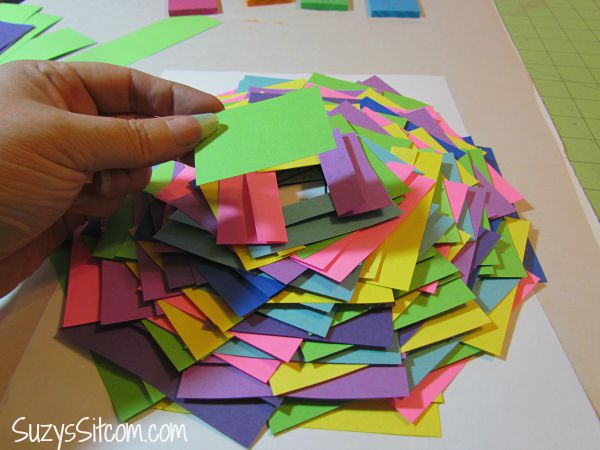
The final piece is a simple square glued to cover the center.

Flip your project over and you will be thrilled at the effect!
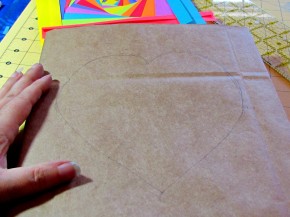
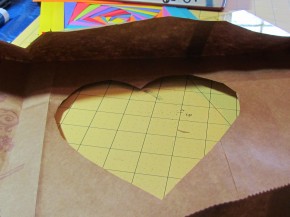
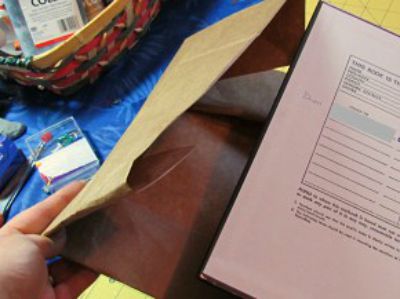
For any of the patterns, draw an opening (apple, square, circle, heart shape) that is just a bit smaller than the finished Iris Fold. Unwrap the book and cut the shape out of the cover.


Glue the Iris Fold onto the inside of the cover using tacky glue with the front side of the Iris Fold against the inside of the front cover.

Not so boring now, is it? Let your colorful creative ideas go wild!
For other fun Back to School Crafts- click here!
For a full listing of the Sitcom’s Paper Crafts – click here!
Are you new to the Sitcom? Be sure to check out my Frequently Asked Questions Page!
For over 200 crafty tutorials for all ages, visit my Tutorial Page!

Hi there what a lovely pattern they are so so very cute and I have also subscribed thank you so much
Jan
Hi Shannell!
I’m so glad that you and your daughter enjoyed the tutorial! Thank you so much for the kind words!
suzy
Thanks for being so creative and sharing your talent with us. My daughter and I enjoyed making these book covers… Cheers to you and your gift.
Looks like a fun idea!! Love how bright and colorful they look.Thank you for sharing with us at #HomeMattersParty. We would love to have you again next week.
These are SO fun! Thanks for sharing your crafty inspiration on this week’s Monday Funday Party!
These are gorgeous!
amazing we love them and you
Oh wow, I forgot how we all use to cover books at school. Nothing as elaborate as this though. Looks amazing. Stopping by from Idea Box :
These look incredible. And they look like so much fun to make, maybe even a little soothings or hypnotizing.