How to Applique with Wool Blend Felt
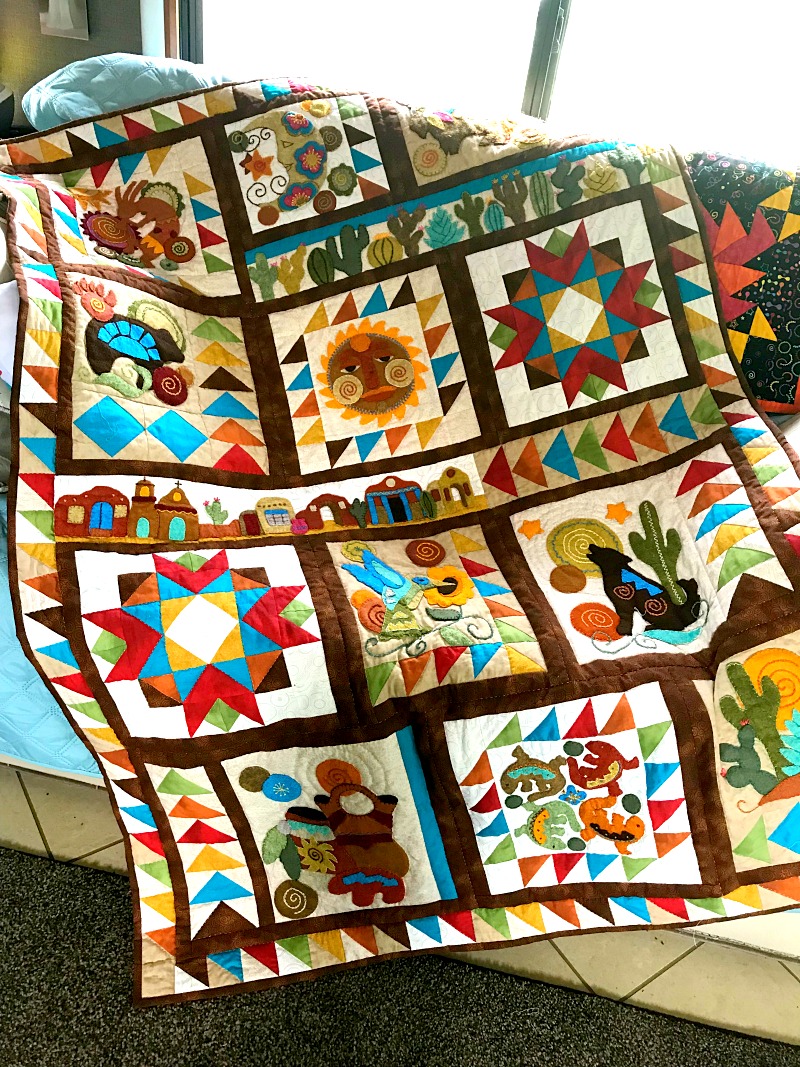
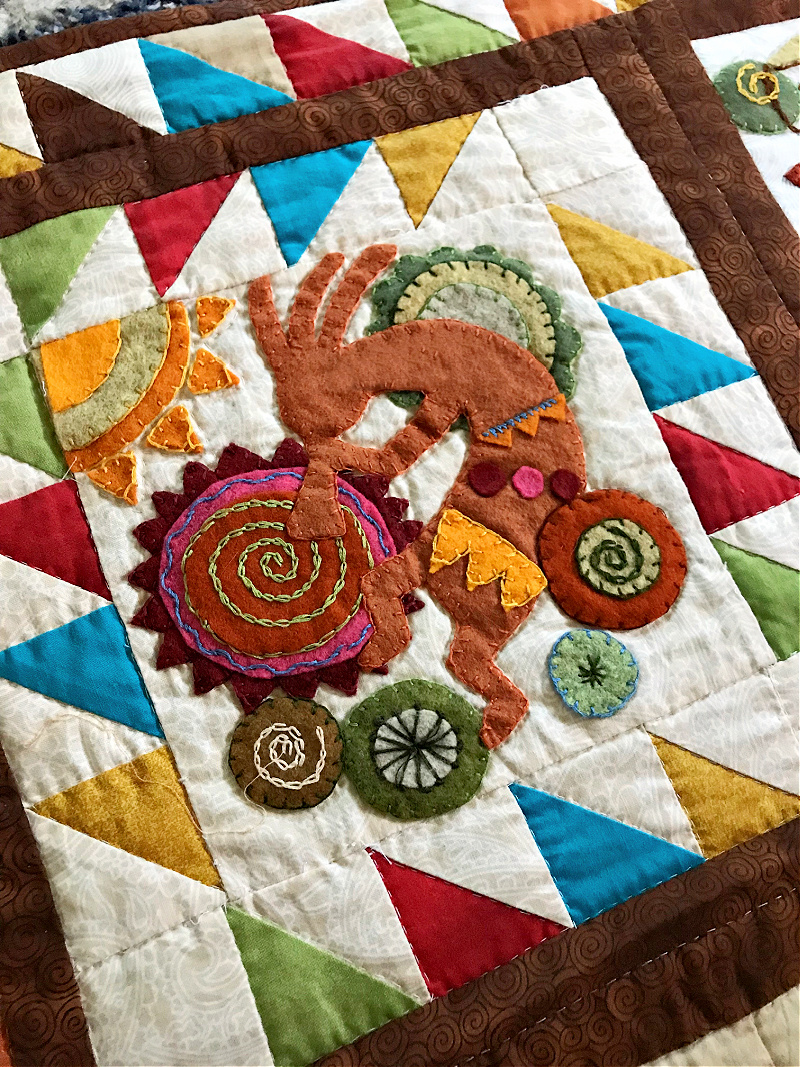
Recently, I released the pattern called Sonoran Trail. This particular quilt pattern is done in wool blend applique sewn onto 100% cotton fabric. I wanted to share a few tips and trips on the technique of mixing wool blend felt with cotton fabrics.
Please note that while my instructions are for the technique of combining wool blend applique with cotton, you can always create this beautiful pattern with traditional applique instead. You can find my tutorial for my technique of tradition needle turned applique HERE.
How to Applique with Wool Blend Felt
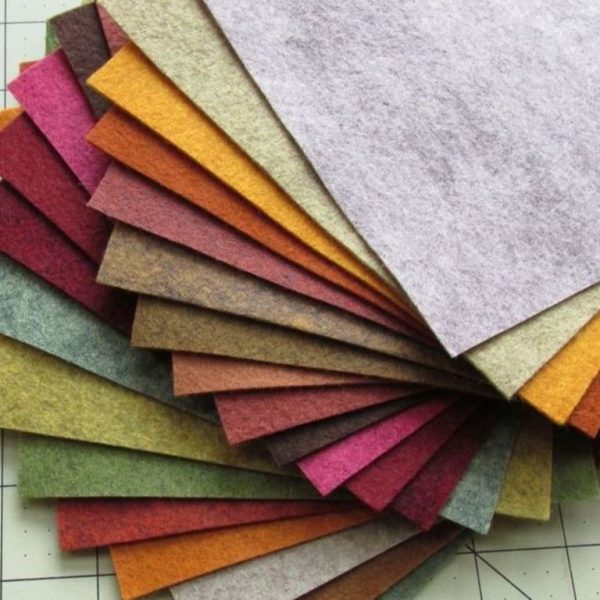
For a quilt that can be hand washed successfully and will be durable to use, you need to be sure to use high quality wool blend felt.
The applique and color choices in Sonoran Trail are based off of the Sonoran Trail Collection from Over the River Felt. For Sonoran Trail, I used the (23 piece pack with 12″ x 12″ wool blend felt)
Begin by Pre-Washing the Felt
Here is a short video from Over the River Felt that shows how to prewash your felt before starting the project. This will help prevent shrinkage and color bleeding.

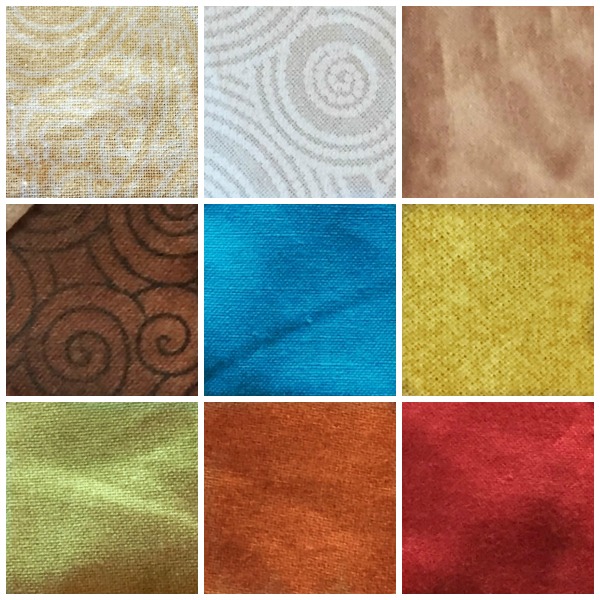
Fabric Requirements
Inspired by the color selection in the Sonoran Trail Collection from Over the River Felt, I chose six bright colors and three background colors of 100% cotton fabric.
For more info on amounts of fabric needed and some beginning tips on how each block is created, be sure to click on the link below!
Sonoran Trail Fabric Requirements

How to Applique with Wool Blend Felt
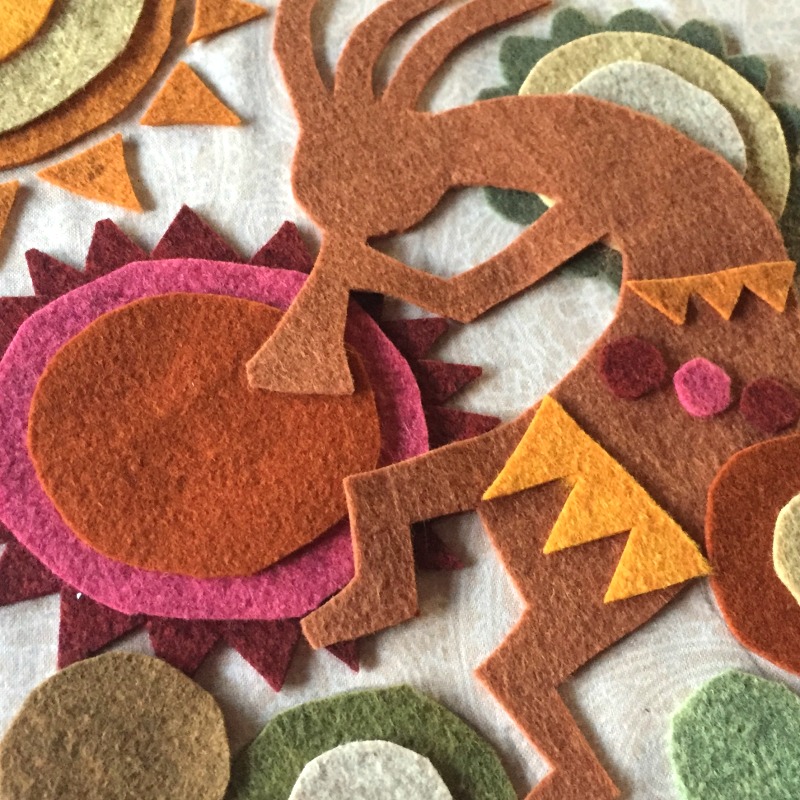
Once your wool blend felt pieces have been washed and prepared for applique, the fun begins!

Each block will have full sized templates to use. Choose a color that you would like to go with in the wool blend, cut out the template, pin it down and cut out the wool blend fabric using the template as a guide line.
If you are doing wool blend applique, or fused traditional applique, the applique piece and template will be the exact same size. (If you decide to do needle turn applique, you will need to add a 1/4″ seam allowance around each shape).
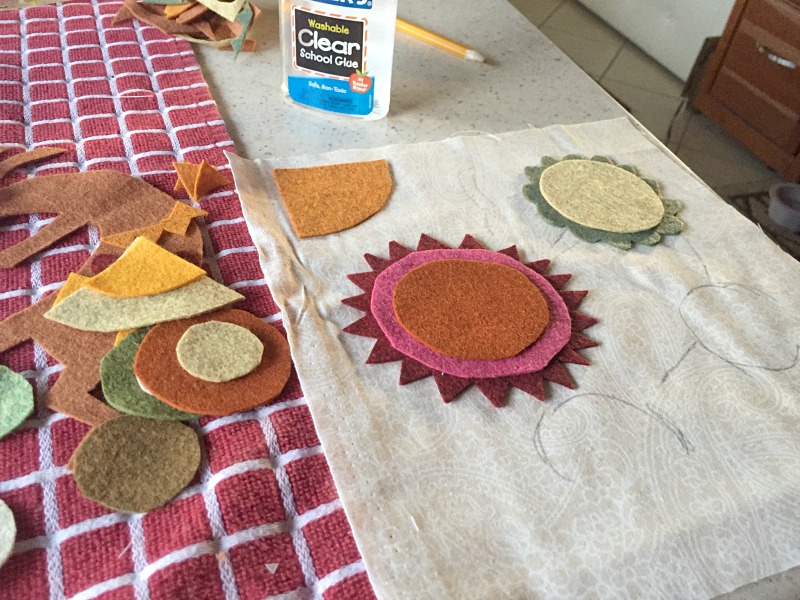
Cut the background fabric about 2″ larger around than the finished background fabric would be. Use a pencil and ruler to lightly draw the borders of your block. For instance, the Kokopelli block is 8″ x 8″ minus the 1/4″ seam allowance. For the Kokopelli block, lightly draw an 8″ x 8″ square onto your fabric. You will use this to line up your template pieces.
Using the block guideline, begin to place your cut pieces on your fabric block. Once you have them where you like them, use a tiny couple drops of washable clear glue on the back of each piece and glue them onto the fabric. (Use the glue very sparingly- just enough to tack in place for embroidery).
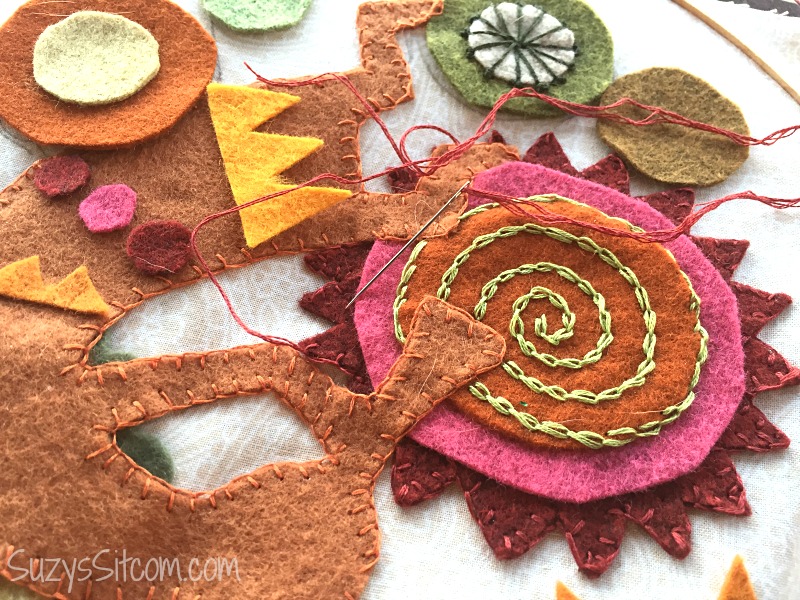
Once everything is in place, begin to sew it down. I used two strands of DMC embroidery floss in colors that matched my wool blend felt. All of my edges were sewn down using the blanket stitch.
The block guide in the pattern will also give you suggestions for other embroidery embellishments.
It is fun to experiment with different embroidery stitches, adding lots of texture to your beautiful applique.
Caring for your Finished Quilt
Since your wool blend felt pieces have already been washed and preshrunk, you do not have to worry about more shrinking when washed. Be sure to hand wash your finished quilt when it needs it, use color catchers in case of any fabric bleed, and hang to dry.
If you would like to try these techniques out on the Sonoran Trail pattern, you can find it in my shop!
Ready to start a beautiful heirloom quilt? Stay tuned!
Create something amazing and be sure to share it with us! I’d love to see what you come up with!