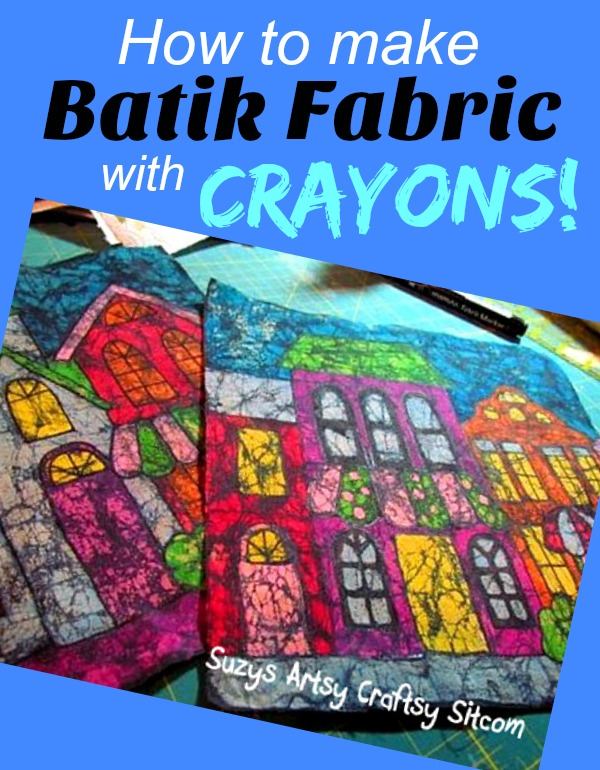
How to make Batik Fabric with Crayons
This is a great way to make your own brightly colored batik fabric using crayons! A vintage craft come to life!
I’m always looking through my vintage craft magazines for fresh ideas, and every now and then I pick one and run with it. As a quilter, I’ve always had a preference for batik fabrics. I love the vibrant colors! Well, if you have been following my blog for any time, you probably already know that I love me some color. And the idea of using a resist to block color in areas is something that I love doing with my Ukrainian eggs. So, a mix of color and resist dyeing with crayons just seemed right up my alley.
Now before I go any further, I’m betting there was probably an easier way to do this. But I will tell you how I did it, using my instructions that came from a 1956 Workbasket magazine and a few edits thrown in from me when I ran across some minor roadblocks.
For this project I used:
Crayons
100% Cotton fabric (light color)
Fabric Spray Paint Color: Ashpalt![]()
Black Fabric Pen
Cheap paintbrushes
Muffin Tin
Deep Dish Griddle
Newspaper
Iron
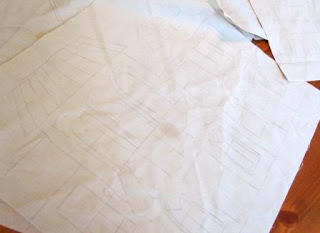
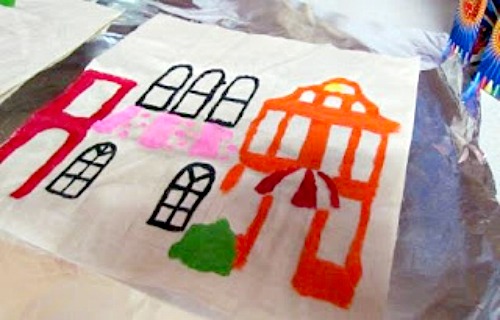
Cut the light fabric into two 12” squares. I wanted a colorful town street scene, so I drew in pencil the basic design that I wanted. You could also use a coloring book page or other fun design.

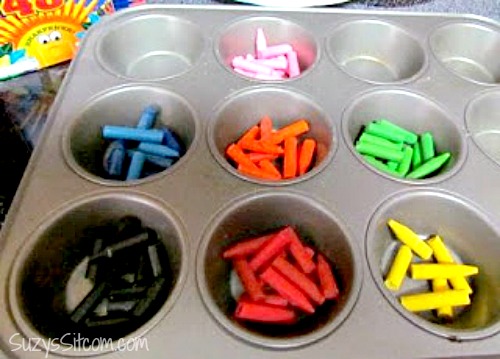
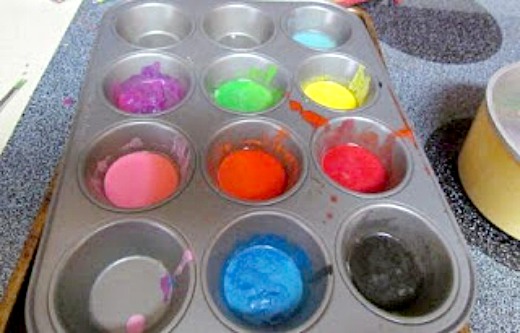
Add crayon pieces to the muffin tin. To melt the crayons, use a deep dish griddle, add water to it and float the muffin tin in it. Keep the water at a simmer, and it allows the crayons to stay melted in this make-shift double boiler.
The crayons should take about 5 minutes to melt. Don’t worry- it doesn’t stink up the kitchen. Actually, this part was rather easy to do.
Edit: One of my readers suggested using candle melting plates which might work even better to keep the wax melted while painting.
Lay your fabric on aluminum foil to prevent the wax from going through to your counter. Start a small pan of boiling water to use to clean your brushes as you go. I used very inexpensive brushes for this project as I was planning to throw them away afterward.
Dip your brush in the melted wax and then start painting away! (Suggested clean up for this part of the project- I threw away the brushes, and the hardened wax was easy to pop out of the muffin tin for future use.
Any residue in the pan can be re-melted in the oven for a minute or two and then wiped away). Do not pour hot wax down your drain!
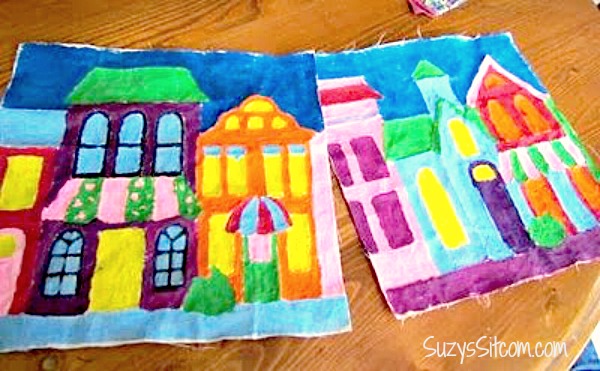
Once the entire piece of fabric is covered with colored wax, it is ready for the next step- adding dye. Take each piece of wax covered fabric and wad them up in a ball, creating many tiny cracks in the wax.

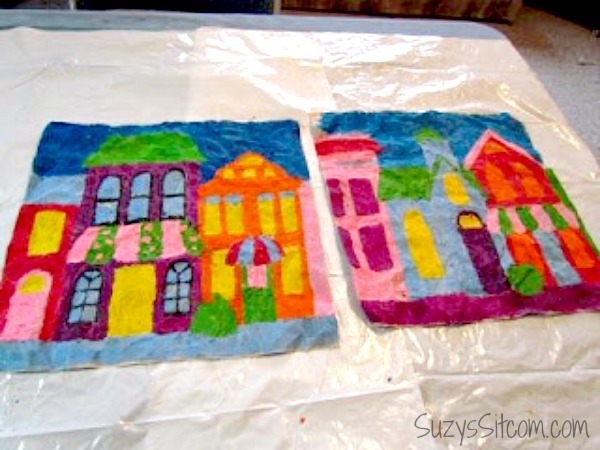
The instructions called for cold water dye with good reason. If you added this to hot water- all your wax would melt! Unfortunately, the only dye that I could find that did not call for hot water was spray dye that I found at my local craft store. No problem. I simply laid the pieces of fabric out on trash bags and then sprayed the crap out of them with the spray dye. I then patted them down with paper towels to get off the extra dye and let them dry overnight.
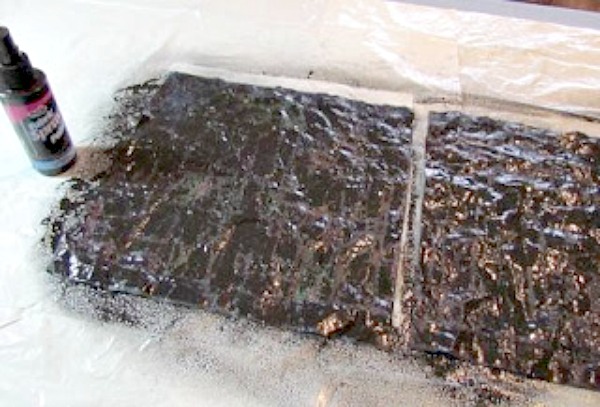
They looked terrible at this point and I was a bit worried. But I had faith.
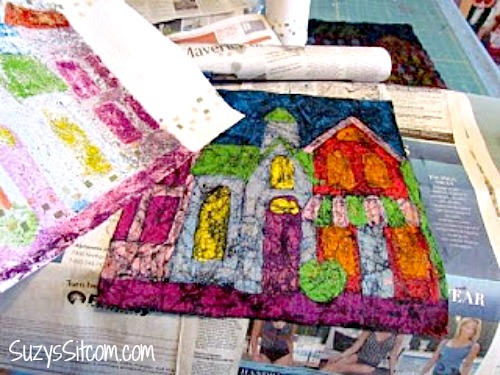
The next step is to lay them between two pieces of newspaper and using an iron set at the highest setting, begin to iron out the wax. You will have to change the newspaper quite often, and I’m not gonna lie, this took a while. I went through an entire Sunday paper on this project.
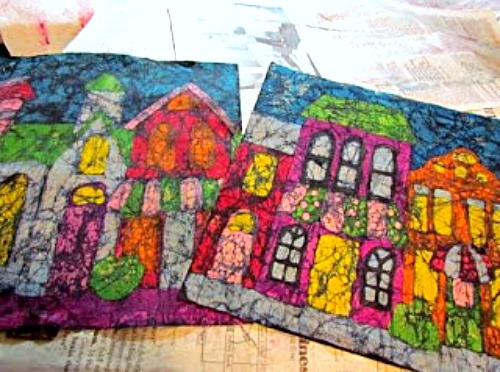

My final step on the batik design was to add a few details with a black fabric pen.
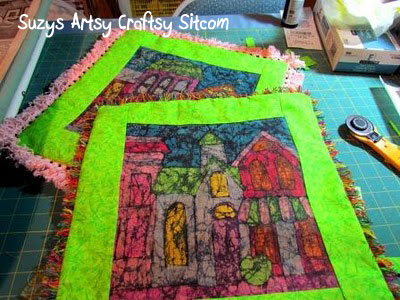
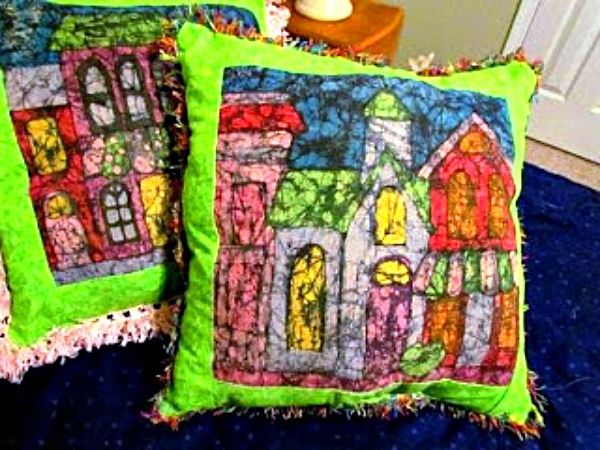
I made mine into pretty city pillows to put on my guest bed, but you can do anything with this batik fabric that you might do with regular fabric. Quilts, tablecloths, dresses, table runners, whatever. In fact, it would probably make awesome Christmas pillows using a Christmas design.
If you enjoyed this tutorial, you might enjoy my Flip Flop Pillow tutorial. How to create a whimsical pillow that will give a room a summery look.
Or check out my Ukrainian egg tutorial– another method of batik that creates a very detailed look, using beeswax as the resist and dye, you can create amazing egg art.
For more than 200 detailed craft tutorials for all ages, be sure to visit my tutorial page.

Hi Karen,
If the crayons didn’t even melt, then I would say the quality of crayon may be at fault. I used crayola crayons. They have lots of color in them. But I also have to say that it is important that the crayon wax melt into the fabric. This particular project was based on art projects from my grade school days and I had good success with it.
I would try good quality crayons and be sure that the wax melts. Hope that helps!
suzy
Hi Suzie, I found your tutorial and was excited to try this. I work at a community art studio and wanted to use this with a group of cognitively impaired young adults. I tried it today in the studio in preparation for the workshop next week and I was extremely disappointed. I wonder if it matters what kind of crayons are used because there were large areas under the crayon wax which did not get any color. The crayons were a large bag of broken crayons of various brands you could tell by the size and shapes. Many of them didn’t even melt in the tins that sat on the outer edge of the fry pan. All them made for a rather thin watery liquid once melted. Is there a particular brand of crayon I should use for this? Or maybe there is something I forgot to do that would have made a difference?
Karen
I used your tutorial to make a pair of butterfly wings for my daughter. They turned out beautifully. Thanks for an excellent tutorial.
You are very welcome!
Thank you so much for this über cool idea!!! Im on it this weekend, will let you know how it went!!!
Mil gracias Suzy! desde Chile un abrazo para ti! te encontre por Pinterest, he visto muchas paginas con tutoriales, pero la tuya la lleva lejos como la mejor!, en cuanto haga un batik te enviare fotos!! amo la artesania y las manualidades!!…mil abrazoss!!!
Suzy thankyou so much ..
It’s very great tutorial coz I can share n teach d women Prisson
And they can make money to sell n an Idea when they’re free outside.
Thanks again GOD BLESS U
Hi Pamela!
What a great idea! I will definitely try that next time. It would save a ton of time at the finishing step.
suzy
When I was a youth we ironed out as much wax as possible and then sent finished batik fabrics to the dry cleaner and they removed the residual wax in the fabric. This is a nice idea, thank you!
You are very welcome! I would love to see what you come up with!
suzy
Thank you so much for this! I have been wanting to dye a true blue violet and haven’t been able to get the right mix with Jacquard dyes. This is perfect to make a beautiful batik with my blue violet crayons!
Hi Irma!
The best way to get out the extra wax is to keep ironing them and using newspaper. You will be surprised at how much wax the fabric can hold. My finished pieces are not as soft as they were originally before the wax, but they did fine for pillows. Hope that helps. Would love to see what you come up with!
suzy
This is great! I made 2 pieces and want to make them into pillows but the fabric is too hard for pillows. Maybe I used too much wax?? Is there a way to make the fabric softer? I’ve washed it in cold water…still rather hard for pillows. Any ideas are appreciated!!
Thank you!!
Hi!
I’m not sure if oil pastels would work or not. I don’t think they would dry. But you could definitely try it and let me know how it comes out!
suzy
We made a similar project when we were young. We colored directly onto the fabric. Then die an a contrasting color and iron. It was fun and did not create the mess and safety issue that melted wax provides.
now i know how stupid am i who still searching the right tools for creating my own batik when i had crayons … (anyway can i use oil pastel crayons? seems like it wont work…)
Pretty sure it is just optional. To add the cracked, vintage look.
No, I have not tried it with coffee or tea. I’m not sure the contrast would be what I’m looking for.
suzy
Did you even use coffee of tea as a stain with this instead of the water based ink?
Can you tell me the purpose of the fabric spray? Amazon do not deliver this to Australia.
Try using textile ink, it heat sets onto fabric and you can paint it on!!
A great activity. I used a cheap pop cake maker to melt the crayons. Was awesome.
Thanks for such a wonderful tutorial.Its highly creative and beautiful. Best to you
Hi Deanna!
Black acrylic may work in place of dye. Keep in mind that you would need to wash in cold water only to keep your colors vibrant. I would love to see what you come up with!
suzy
What wonderful pictures those of you have shared thus far. I’ve always wanted to do this, but have yet to do so. My husband is from Sri Lanka and has done this many years ago. I think I need to catch . I too am wondering if there is something else I could use instead of dye, what types of paints, acrylic, water color, washable markers, I believe I need to experiment. I’ve found dye very messy for myself. With snow still on the ground going outdoors and spraying is not an option just yet! But I can prepare the pictures and do it later. Thank you for all the insperation! I love this website.
Hi Kelley,
Since linen is made from flax which is plant product, then I would assume that this would work fine on it. I would experiment with a small piece first though. Would love to see what you come up with!
suzy
Is it possible to use linen for this process?
Soooo much fun!!! It’s incredible how it transforms some of my blobby brush strokes of melted crayon into something beautiful!!!
Thank you so much for stopping by! I’m so glad I was able to inspire!
suzy
I somehow found this post through a post on Hometalk – and I am so happy that I did! This is a great tutorial with awesome results! thank you for the inspiration! I will be following you from now on 🙂
Thanks, Kristie! If you decide to try it, would love to see what you come up with!
suzy
This is a very creative idea, way better than the traditional batik process and more colors to choose from with Crayola’s as opposed to dyes which are harder to mix and get the colors just right.
We just did this project as well. I’ve been saving it for months and finally got to it. I’m thinking probably your wax wasn’t hot enough. We painted for awhile with just melted wax, and it worked not too bad, but when we turned up the heat in our electric frying pan so the water was almost boiling, the wax got way hotter and stayed liquid on our brushes. Then when we put it on our fabric, it immediately soaked through. I ironed mine a little before putting it in the dye and that melted the wax into the fabric where it hadn’t soaked in, so mine turned out ok, but I’m afraid my kids’ might be all black. Too bad after all the work they went to. Oh well. We said it was an experiment, and I’m so enthused about it, we’re gonna do more! And, in the end after ironing mine I ended up boiling it for a few minutes and the color really showed up then. Wow! Maybe made the black a little fainter, but it’s pretty cute, I think.
Thanks for the inspiration Suzy!
Hi Melissa!
It sounds like your hot plate is not getting the crayons hot enough. It needs to be very liquid when you are working with it so that the fabric absorbs the wax. If the fabric does not absorb it properly, the dye will bleed through the crayons. You don’t want your wax steaming (that is too hot), but it needs to be thoroughly melted so that you have plenty of time to move it from the pan to the fabric.
Also- be sure to use 100% cotton fabric – it absorbs the wax well. This particular project may not be suited for little kids due to the fact that the wax does need to be hot. If you color directly onto the fabric, just make sure you color thickly, then put the fabric between newspapers and iron it. This will melt the crayon into the fabric.
Hope that helps!!
suzy
I should say it “cooled” pretty quickly on the brush, not melted! Thank you for your help!
I love this idea, but I have had a problem and was wondering if you can resolve it 🙂 I melted the wax in a deep dish griddle, but by the time I got it on my fabric it had melted pretty quickly on the brush. This left for it to be incredibly hard to work with. I am working in my basement studio which is a little cooler and I am not sure if this is the issue? Do you have a solution for this? I am currently working on just trying to color directly onto the fabric per another suggestion that I read on here for little kids, but I am worried that the crayons are not going to make enough cracks to get the “batik” look. I am waiting for the fabric dye to dry right now! I am hoping to do this project with little kids (ages 6-9) Thanks so much for the wonderful idea!
What type of fabric did you use? 100% Cotton works best. The fabric needs to soak up the crayon wax. If it soaks it up, the dye shouldn’t penetrate. Wax is a common resist used in all batik making, but the fabric needs to soak it up. That may also explain why the color is only faint.
Let me know…
suzy
The batik project did not work for us! Painting went well..the electric skillet to keep the paint tins hot worked great. The black dye went on fine and rinsed out ok but it stained the backside of the fabric too. When I ironed off the crayons, the crayon color was very faint and even covered in some places by the dye that seeped through the back of the fabric….. Any suggestions?
Oh wow. I would love to see what you come up with! Thanks so much for stopping by!
suzy
Oh I am SO IN LOVE with this activity!!! I found your site via a link on a blog and am SO happy I did. I’ve been trying to figure out what to do for an art piece above my fireplace and I’ll be doing something using this technique. THANK YOU!!! (From the bottom of my heart!!!) ~Michelle
I’m the Editorial Assistant for Fun Family Crafts and I wanted to let you know that we have featured your project! You can see it here:
http://funfamilycrafts.com/batik-fabric-crayons/
If you have other kid-friendly crafts, we’d love it if you would submit them. If you would like to display a featured button on your site, you can grab one from the right side bar of your post above. Thanks for a neat idea!
Or you can have the younger ones use sandpaper to draw on and then place on the fabric, colored side down, and then iron. The rough surface of the sandpaper holds more of the crayon than regular paper. Used to do this with my kids and we used a medium grade sandpaper and it worked well.
Hi Tina!
For the younger ones, I would suggest having them color directly onto the fabric, then use newspapers and an iron to melt the crayon into the fabric. Would love to see what you come up with!
suzy
Love the elephant!
This is so neat! I wanted to ask – would it be possible to use wax pencils or something instead of using hot melted wax? I’m thinking there is such a thing & then I would still melt it using an iron….. I would be doing something similar to this with a 4 & 6 & 8 year old. I’m not worried about the 8 year old but the younger kiddos – I’m not sure if I’m comfortable having them use hot crayon wax.
Thoughts? Suggestions?
Wonderful tutorial! I do traditional Batik with my high school art classes, and limit the colors. I will try this in a couple of weeks! Thank you!
Thanks for sharing the wonderful tutorial. I have seen the batik being boiled out with hot water. I have’nt tried it but will be giving it a go with this tutorial I think.
I believe the ironing process sets the color into the fabric. When washing, I would recommend cold water only so that you do not fade the colors. Let me know if you decide to try it. I would love to see your finished project!
Wow I love this tutorial!
I fear I’m being silly but is it the dying or the ironing process that sets the colour so the fabric can be washed afterwards?
I’ve been trying to work out how to make a skirt that looks like the melted crayon art that’s been around on pinterest recently….perhaps I will try something along these lines and see what happens!
Hi!
It should work fine on T-shirts! The fabric that I used was 100% cotton too. Would love to see your projects when they are complete!
suzy
Hi!
I LOVE this project! I’d like to try this with my friends (we get together for crafting sessions all the time!), and want to know if it’ll work on plain white t-shirts? 100% cotton.
Hi Susan,
I know this is an old blog post, but I just found it via Pinterest. Always late to the party, me!
Anyway, I tried it, and it turned out way better than I thought it would! Here is a link to the pics, if you’d like to see what your post inspired:
http://www.flickr.com/photos/summerset/9093898024/in/set-72157603076135865
and
http://www.flickr.com/photos/summerset/9093898786/in/set-72157603076135865/
Thanks so much for your tutorial, I really enjoyed the project!
Terri
Hi Lalitha,
Most of the black dye sits on top of the crayon, so when you iron it, it will come off onto the newspapers, leaving only the small lines of dye on the fabric as permanent. Remember that lots of ironing is involved. 🙂
Hope that helps. Would love to see your finished projects!
Great idea! I would like to try this out as a summer camp project with 9 – 12 year old children but have a question – how do you get the black dye out finally? Do you have to wash it out, or does it come off when you iron it? Please let me know. Thanks.
Thank you very much for your kind words and encouragement. Now that I think about it I am sure I would have to use fabric paints to do batik on fabric.
But I will continue batik on the rice paper.
Blessings,
Janis
Love the turtle! You do amazing work!! In fact, I would love to feature you sometime!
I’m not sure how watercolor and fabric might work together. You may have to experiment. The pillows that I made are definitely washable, but cold water wash is best otherwise the colors fade.
Let me know if you decide to experiment!
That was a very interesting tutorial. I do watercolour batik on batik rice paper and really like working with it. You can find some of my paintings here http://www.janiscox.com/gallery-for-janis-cox/
I would love to try this on fabric. I wonder if I used my watercolour paints, and then the wax – would the wax protect the fabric or would it melt off? I assume that your batik pillow cushions are not washable?
Blesssings and great to meet you. Found you on PInterest.
Janis
I first made this project in my high school art class. I’ve made many since and taught this technique to my own art students. We used griddles and simply placed a muffin tin on them – then put your crayons in the muffin tin cups. The griddle keeps the crayons melted while you paint – easy peasy. We used India ink for the black lines. We also used newspapers for the ironing part, but found that the ink from the paper will get on your fabric, so we kept cheap newsprint paper next to the fabric to keep our fabric clean. This project is always a big hit! Love your projects.
I watched a batiker work at a show once and she had her muffin tins in an electric skillet on a low heat to keep thing liquid
Hi Marilyn!
Thanks for the freezer tip! I am planning on revisiting this project in the near future. I purchased a deep griddle that I can add water to, use as a double boiler, and keep my tin of crayons melted while I work.
Let me know if you decide to try it, and be sure to send me a picture! I’d love to see it!
The batik looks wonderful! I’ve been on a quilting and fabric hiatus for the oh…last eight years or so but just.bought more fabric today!!!
I know there are crayons that are intended for fabrics wondering bout giving those a try-also to get wax outta the tins just try putting it in the freezer!
Will have to try your methods!thanks
In school our tins were kept warm in an electric skillet, with a 1/2 inch of water…not good for little children, but fine for the older & the “grown ups” 🙂 Your batik ideas are really fun!
I wonder if after you melted the crayons in the muffin tin, couldn’t you keep it warm or melted on a heating pad set on the hottest setting? Just an idea. Thanks for sharing. Really great idea.
Just saw your batik fabric on Pinterest. These are so beautiful! Thank you for the tutorial!
you can also use a heating pad
I love these batiks. The finished effect is fantastic. On the subject of the crayons, however, I recently repinned someone’s tutorial (sorry – can’t remember their name!) on melting smashed up crayons in SILICONE muffin moulds. With this method, the silicone has 2 really good advantages: it can withstand really high temperatures, and is also bendy – so it’s really easy to get the wax out once it’s set. (The original idea was to make your own heart-shaped ‘rainbow’ crayons, as a heart-shaped muffin mould was used with different coloured crayon pieces put into each individual mould. I did wonder if you could turn them into candles, too, if you put a wick in the bottom. I intend to try this, too!)
This is just awesome.. Making batik fabric from crayons.. Creative idea.. I would love to try that.. thanks for sharing this awesome informations
What a creative idea about making batik craft for kids.. It’s just beautiful. Thanks for sharing..
Holy Crayola .. I love this, I am an artist, this is a new “medium” I can’t wait to try it. Thank you for “teaching”. iliil
Hi Laura!
I’d love to see photos when you do! I bet you will get some awesome art. Regarding melting the crayons, I have since discovered that it is much easier to use a deep griddle, large enough to fit your muffin tin in. Simply add water to the griddle creating a double boiler, and float your muffin tin. Keep the water at a simmer and the crayons will melt quickly and stay melted while you work with them.
Let me know how it goes!
suzy
holymoly. this is awesome! I am going to do this with my MS and HS art classes this year! FULLY AWESOME. Thanks for the tutorial.
Love, love this! On my “gotta make” list!
WOW, I really enjoyed reading your post, this is something pretty cool and I will surely try it out. Thanks for sharing such an interesting idea.
xoxo 🙂
That’s what I use for such projects- a griddle. I actually found one for less than $20. at the grocery store! I’ve never done this batik project though. It’s beautiful! I’m color crazy so this caught my eye immediately! Thanks so much for sharing it. I’m happy to have found your wonderful blog! I feel like I found a treasure chest!
These are just amazing! Can’t wait to try this batik technique. Really appreciate your honesty as you went thru the steps!
Wow. I love your batik and will try this with my groups. Thanks 🙂
I did this in my highschool art class and it was a blast. I was trying to remember the process and you captured it just the way I remember. The only note I would add is that we used one of those plug in double burner units and put a metal rectular cake pan with water on top and then put the muffin tin on top of that with the little cup parts down in the water to heat to the wax. This way it stays hot while you work. I know it could be impractical to to buy this if you are just doing one project, but it might work on some stove tops too if you can work close to the stove.
Hi Alex!
The cold water dye is to create the fine black lines that make it look batik. Yes, the crayons dye the fabric and that is what creates the bright colors. I have had a couple readers use crayons only and had great results, but theirs did not have the crackle effect. It is all in what you want it to look like. Thanks so much for stopping by!!
I have the same question as Kathleen; do you need the cold water dye? Don’t the crayons provide the dye when you remove the wax from them?
Hi Anna! I used Tulip Brand Spray Fabric Paint. I bought it at our local craft store called, Michael’s. You can get it on line at places like Amazon.com. http://www.google.com/products/catalog?hl=en&q=tulip+spray+fabric+paint&psj=1&bav=on.2,or.r_gc.r_pw.r_cp.r_qf.,cf.osb&biw=1280&bih=681&um=1&ie=UTF-8&tbm=shop&cid=4660910668518753844&sa=X&ei=3vm8T8OvIcmZgwfYw_iIDw&ved=0CMABEPMCMAE
Hope that helps! Let me know how your project turns out!
suzy
where did you find the spray cold water fabrik dye? i live in canada, and cannot find a dye in my town. what brand did you use and can i order it online?
thanks, Anna
If your sheer curtains are a natural (like cotton) material, it should work. Polyester doesn’t dye well, so I don’t think it will.
I did use the electric skillet and it worked out well. I lined the muffin tins with aluminum cupcake liners. I think the best temp to keep the wax melted was about 250. This thing looked so terrible when I was working on it that I really had my doubts. (I am not a talented artist…) They turned out really nicely. My daughter used yellow and orange for an elephant and it looked more vibrant and lovely than the one I made. I made a green octopus in a blue ocean and it turned out well, but I would choose more bright/contrasting colors in the future.
I did this in high school and used an electric skillet with water in it and mason jars. In fact I still have mason jars full of dried wax in my art box. But it keeps the wax all melted and allows for easy peasy cleanup. Try it!
This is so cool! I really want to try this.
Hi Kelly,
I’m about to try this project again and using a griddle is on my list. Thanks!
suzy
What about using a griddle to keep the crayon paint warm?
My daughter (age 9) and I just had a go at this tutorial. Fantastic.
Looking good so far… just got to break out the newspaper.
I’m impressed. I was just going to add an idea. If using the muffin tin, set it down inside a 13×9 baking pan with water in the bottom before heating. It will take longer to heat in the beginning but the it will stay hot and melted longer.
WOW!!!! Do you think this would work on sheers? I have a bay window that the sun shines through, and do not want to completely block the sun.
thanks
Absolutely beautiful!! I’ve gotta try this. Thanks for the tut.
This is just wonderful. I just found your blog and am amazed at all the great ideas and tutorials! Do you think watered down paint would work as well as the dye?
I absolutely LOOOOVE this project, Suzy (just like I love all your projects)! It turned out so well and you've inspired me to make one of my own! I also wanted to tell you that I featured you over at my blog here. Please feel free to grab a featured button if you want!
-Mel the Crafty Scientist
These are so bright and colourful and look really effective. I can't wait to have a go. Thanks for sharing your instructions.
Hi Mooshoo,
Yes you can, but be sure to use cold water. Hot water will fade the bright colors.
suzy
this looks like fun!!
my only question:
can you wash the material after this in a regular cycle?
I love these.
I am featuring you and your wonderful crayon idea on my blog today! Feel free to check it out!
http://anisfavoritethings.blogspot.com
Thanks for such a great idea!
Your pillows turned out beautifully. I am wondering if you have to use the black dye or can you just iron out the wax? I have a project in mind and I might give your technique a try.
MARAVILLOSO
Just dropping by to tell you that I featured you!
http://allawesomelinks.blogspot.com/2011/06/making-recycled-cryaon-batik.html
Super Awesome! Love the post!
If you happen to have an old hot plate or warming tray you can set your muffin tin on it and the wax will stay melted.
I finally got a chance to give it a go. The end result can be seen here if you're interested: http://poddleblog.blogspot.com/2011/05/wax-crayon-batik.html
Thanks again!
Oh wow. I've done various versions of batik before but as another lover of bold colours, this takes the biscuit. I can't wait to try it!
Your batik is beautiful, I just love it…I must bust out those old broken crayons. I have a suggestion for keeping them at the right melted temperature. I would use my electric frying pan. I often use it as a double boiler this way. Place a sheet of aluminum foil in the bottom to protect it, and add about an inch of water. Place your muffin pan or aluminum foil cups in the water. It is easy to keep it at the right temp. thanks for sharing this great tutorial!
This is gorgeous! Love this work. Thanks for posting it.
Suzy-
Thanks for linking to Creative Juice! Hope to see you back this week!
This is very creative! I like the city scene you made. Thanks for sharing this week! Sharing this idea on Twitter!
Super cute! Thanks so much for linkin up. Can't wait to see what you have for next week.
I have always loved batik and now you have made it accessable to me in this great project, I just can hardly wait to get to the dollor store tomorrow to get some crayons! Thanks so much for a great idea, This is my first time here and I'm looking forward to seeing much more from you, I'll be stopping by regularly now! Louella
Wow! You are a feerless crafter! These are FANTASTIC! Great job!
Thanks for linking up to Making It With Allie! I can't wait to see what you have for next week!
AllieMakes.Blogspot.com
Wow, what amazing results–love them! Thanks so much for linking up to Beyond The Picket Fence.
This is amazing! Thank you for sharing! 🙂
I love how this looks and I don't even generally like batik prints 🙂 I wonder if you could do this on top of a griddle like they do here with paper http://hubpages.com/hub/meltedcrayonart then you could just draw with the crayons and you wouldn't have to keep melting them or need paint brushes.
saw this on life in the micro! love it. I'm going to follow you now. Have a great weekend!
Michelle
http://www.heartfeltbalancehandmadelife.blogspot.com
Holy cow! That is one of the coolest things I have ever seen! I am featuring it over on my blog at http://iamonly1woman.blogspot.com today. I hope you don't mind!
Oh Suzy these are so beautiful…I remember making these with my art students ! thanks for sharing ! xo
Lucy
you come up with some really fun ideas!! Great!
Thanks so much for linking to "20 Below Thursday"! 🙂
This is so awesome, Suzy! I featured this, this week. Thanks for linking it up! I can't wait to try it with Han.
http://thespeckleddog.blogspot.com/2011/04/favorite-things-friday-no-18.html
Super cute nope not cute…BEAUTIFUL!! I was wondering if u could use a plug-in skillet (not the techniqical term sorry), to help keep ur crayons to stay warm while u paint?
They are so beautiful! The best way I've found to work with wax safely and keep it warm is to put small pyrex custard cups in an electric skillet, pour in boiling water and turn on the skillet to top heat to melt the wax, then turn down to keep the wax warm, just be sure to keep the water level up.
beautiful! thank you for this fabulous idea!
That is really fun! Thanks for sharing over at Tuesday Tell All!
Melissa
MyCraftieLife.Blogspot.com
Wow!
Beautiful, I've done regular batik with less vivid results. I'd love to try this.
thanks!
I knew there was a reason I saved all my children's crayons. They had to be good for something other than coloring books. I love the deep color the crayons leave. The black dye really bumps the color and sophistication up.
stunning!! i am love with the look of this fabric. we have two extra boxes of crayolas sitting on top of our fridge…..
These are gorgeous. Batiks are my favorite too!
Hi Annie,
Actually someone earlier suggested candle melting plates which would probably work better to keep them melted while painting.
As for the oven, I supervised mine carefully and found that it only took about 3 minutes or so to melt the crayons.
suzy
This project is amazing…I'm so glad you shared it!Just my type of thing to do…
found you via FPTFY 🙂
I'm your newest follower. My girls did something similar at Art lessons. I have wanted to do something similar since. Thanks for the instructions.
WOW! That is really neat!
Visiting from Tea Rose Home!
That is beautiful! Here from WFMW. It makes me want to make a project like this.
These are beautiful! Art pieces for sure. Another thiing to add to my to-do list for someday.
This is absolutely stunning. I found you via Someday Crafts. I am going to send this link to my sister who is a Fine Arts teacher as well. HAve a great day!
Looks great! Your talent amazes me. I really think you could conquer any crafting project!
Mountain rose- That is an excellent idea! I will be doing this again and I definitely will try that!
suzy
why not get a couple of candle melting plates and either tin pans like a pot pie comes in or small glass jars to melt your crayons in? would still give you the melted wax you want.
Beautiful! This is like the third or fourth project you've posted that's wonderful and right up my alley. I am a new follower! I will bookmark this, because I probably won't get to it right away, but the Christmas scene sounds like lots of fun, or perhaps several seasonal pillows. :)Thanks again for another great tutorial.
I just love this! I managed to go around and look at more of your tutorials and i have to tell you , you have some of the best! Very clear and easy to understand. I do wonder , at the end how do you know its time to change to another piece of newspaper??
Just Gorgeous!!!
I'm definitely going to be sharing this with all my quilting buddies. Thanks for the inspiration!
-Mrs. Turkey: http://www.turkeylists.blogspot.com
That's just…wow…so amazing! And beautiful! I love it so much. What a method you used! You're smart. 🙂
This is great! I love how different it is. I'm having a giveaway at my blog. So if you are interested in joining please stop by.
Wow, I have never seen anything like this ever before. This would be such cool artwork to have up on the walls even. Love it.
Marianne @ piecesofmymind-marianne.blogspot.com
My mom is an art teacher and taught me this as a kid but I totally forgot about it! your city looks great. domesticdeadline.blogspot.com
How fabulous! They look great, and it sounds like fun to try too!
Thanks for linking to a Round Tuit!
Hope you have a great week!
Jill @ Creating my way to Success
http://www.jembellish.blogspot.com/
incredibly amazing! too much work for me, plus I can't paint worth a hoot. However, I loved the tute and how fabulous your pillows turned out.
gail
I will defiantly give this a try! Thank you so much for sharing.
How very cool! I found you on Amaze me Monday and you did amaze me! I just got back from a surface design retreat and we did all sorts of fun stuff and this is right up that alley. Thanks for sharing all the details! I think I will totally have to try this (someday).
Wow!!! very impressive!
These are A-mazing! I've had an idea running around in my head for months now making a stained glass style pillow. I was thinking of using fabric markers and fabric scraps but this looks so stunning I may have to scrap the original idea.
This is SUPER awesome~!!!! I am going out to get the supplies to try this today!!! I am your newest follower!! Love all your stuff!!
Libby from mondellofam.blogspot.com
This is amazing!
Beautiful! I love these! Thanks for sharing!
This is so very cool! Found you @ CRAFT. I'm going to have to bookmark this for a summer project!
I remember doing a batik project in high school, but I wasn't as creative as you were. Those turned out beautifully!
I love it!! My mom used to sew with batiks when I was little I have a certain fondness for them in my own sewing 🙂
wow, you never cease to amaze me! I've always loved batik, and love how your project came out…..gotta try it sometime myself. Thanks so very much for sharing on Craft Schooling Sunday, great to have you!
These are great…well done!
So, I am about to begin the newspaper portion of this venture. I must say that I am not a fan of painting with melted crayons. I guess you never know till you try! I will keep you posted…
Blessings…
Saved By Love Creations
I remember making a Batik in my high school art class and have had the urge to do it again in the last year. The mess, time and expense of the dyes and tools have been discouraging me. Your method solves all those problems!!! Thank you so much for sharing!
Gorgeous work! And such a neat idea – now my hands are itching to do this with my kid!
Thank you so much for sharing this tutorial! I'm bookmarking this one for sure. I just love it.
xo,
Sena
Little Treasures- they wash up fine. I would use a cold water wash simply to preserve the color, but as long as the wax has all been removed, it is just another piece of hand dyed fabric.
suzy
This is sooo neat! I would love to tray to do this! 🙂
This looks fantastic but I have a question. What happens when you wash them?
That looks incredible! I hope to give it a try someday soon.
Laura@ ComeTogetherKids
Wow, wow, wow….this is fabulous! Thanks so much for sharing your very funny tutorial…I was giggling all the way through, we could be twins, except your a bit more talented!
~Pam
pamspaintparlor.typepad.com
Amazing, fun and playful. I love this idea! I've wanted to try batik for a while and now I know how! Thanks 🙂
Such a cool technique to learn! I am featuring this at somedaycrafts.blogspot.com.
What a fabulous idea! I still have about a million old crayons from when the kids were little, and I love the look of batik! I'm going to highlight this on my Lit and Laundry facebook page. Thanks for linking up to Finished for Friday!
hiya , i came visiting from catch as catch can and i am so glad i did x i am lovin this site this batik tut , is fab and i will try it out x i am also your newest follower and i will be linky up with you on thursday x oh and i ave your button too (sarge..lol) hope you will visit me too x
xmaggiex
so amazing. what a suspensful post. I wondered how you were going to get that wax out!
megan
craftycpa.blogspot.com
These are wickedly cool! I think they would make an awesome house warming gift for me when I get to the new (old) house in PA. I should be there by Wednesday! Let me know if you want the address so you can send them! lol This idea is so on my to do list.
Awesome. Shared this on my blog too {;0)
http://themanyfacesofsarahhankins.blogspot.com/2011/04/something-to-share.html
Wow – this turned out great! Love the colors. I've been trying to figure out how to melt crayons through a glue gun, but can't get it to work. I never thought of using a paint brush to paint on melt wax – duh! Awesome!
How fun. Such a talent. Something I have never tried. It turned out beautiful. Thanks for sharing.
How interesting…and cute pillows! 🙂
Tnx for linking up this weekend!
Fabulous results! Love, love, love this!
Love the finished result! I don't think I would have the patience that you do. Another great project – and something I've never seen before.
waw!!!!!!!!!!!!!
I love it!!! So cool. Bookmarking this. Genius.
Blessings…
Saved By Love Creations
This looks fabulous! I remember doing this with my first grade class ages ago- we used ink for the dye part I think – and it looked great. The drawing were much simpler that yours of course, but still, it was cute. Thank you for posting this, and bringing this great technique back to me.
WHAAAAAAAAAT?!?!! I would never have thought that's y how this was done! Love it! Those colors are amazing. Mmhhhhhh I gotta try this, though I don't know how much patience I'd have for ironing out the wax. I *HATE* ironing!
WOW what amazing work, love it!
Paula
Using crayons to do Batik is a cool idea..(ya I understand about the melting part being a headache..)…but I just love the bright colored street houses
I really really really really really like this. Too bad you weren't doing all this when we were doing our craft meetings, he he he
now that is something i've definitely never seen! super cool!!
Its super cute idea..i have done so many batik work during my Textile Designing Degree..i did batik with,different types of wax & glue,but this is unique..love this idea..
if you would like to check my batik work,see here;
http://creativemind-zeshuregi.blogspot.com/2010/04/batik-work-wall-hanging.html
Thanks