We are right in the middle of summer, and you probably aren’t thinking a lot about quilting. But I have a quilt pattern for you that would be perfect for the beginning quilter. A quilt that you can piece in one afternoon! Have any young teens sitting around without much to do? Now is the time to teach them something new! And create a wonderful keepsake that you can look back on for years to come.

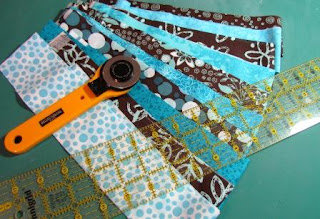
For this pattern I want to present to you a simple quilting tutorial using pre-cut strip fabric called Jelly Rolls. A Jelly Roll consists of 10 carefully selected fabrics in light, medium and dark values-in this case 5 Brown fabrics, and 5 Teal/Turquoise fabrics . Each strip is die cut for pinpoint accuracy, 2.5” x width of the fabric or 42/44” approximate.
Want to know how to make it?
In the next four weeks, I will be posting a series of tutorials that will walk you through the process of creating this quilt. All you need is the fabric!
Lesson 1- Summer Jewels Quilt (Piecing the Blocks)
 You will need:
 - One Jelly Roll pack (20 strips of 2.5” wide fabric) 20 strips will make approximately 45 blocks. You will need 42 blocks for this pattern.
- Rotary Cutter
- Ruler
- Sewing Machine and thread
- Iron
Start by separating out your colors. My jelly roll contains 10 teal strips and 10 brown strips. For this project, half the block is teal and half is brown. Select two teal strips and two brown strips.
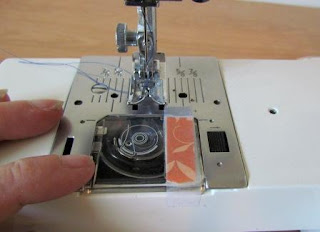

You will be sewing 1/4″ seams. In order to get even seams, I suggest that you place a marker on your sewing machine. I used a strip of paper and taped it down 1/4″ to the right of the needle. If you follow this marker as you sew, you should have perfect 1/4″ seams.
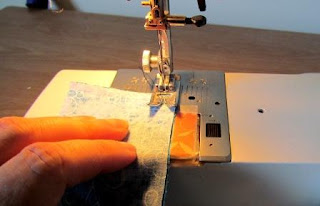

Take your two teal strips and place them right sides together and sew along the entire length.

Press your strips, pressing the seam to one side. Sew the two brown strips together (right sides together) and then press them.
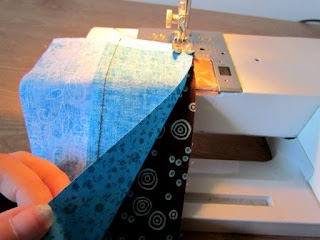

Now place the two teal strips over the two brown strips (right sides together) and sew a 1/4″ seam down the length of one side, sewing the brown to the teal

Then flip it over and sew another 1/4″ seam down the other side, creating a tube.

Lay your ruler at an angle so that the 5 1/2″ mark is at the top seam and the 0 mark is at the bottom seam.

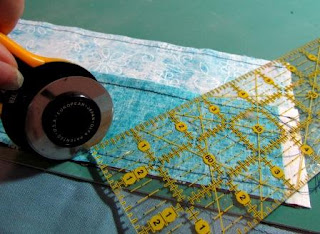
Use the rotary cutter to cut along the angle of the ruler. Then place the ruler with the 0 mark at the top seam and the 5 1/2″ mark at the bottom seam and using the rotary cutter, cut along that angle.

Open it up, and you have a perfect 5 1/2″ block!
Continue cutting the rest of the length of your tube, alternating the ruler as shown above to create additional blocks. You should be able to get at least 9 blocks out of one set of strips.
Sew another set of four strips together as shown at the beginning of this tutorial and repeat the process. For this quilt, you will need to make 42 blocks. You will use a total of 20 strips. Press all blocks when completed.
Lesson Two (Sewing the Top Together) can be foundhere.
Lesson Three (Quilting) can be found here.
Lesson Four (Binding the Edges) can be found here.
Be sure to check out some of my other quilt patterns!

Grandma’s Garden Sew Along- CLICK HERE!
Retro Flash Sew Along- CLICK HERE!