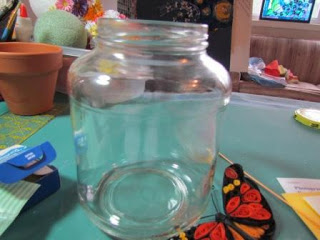
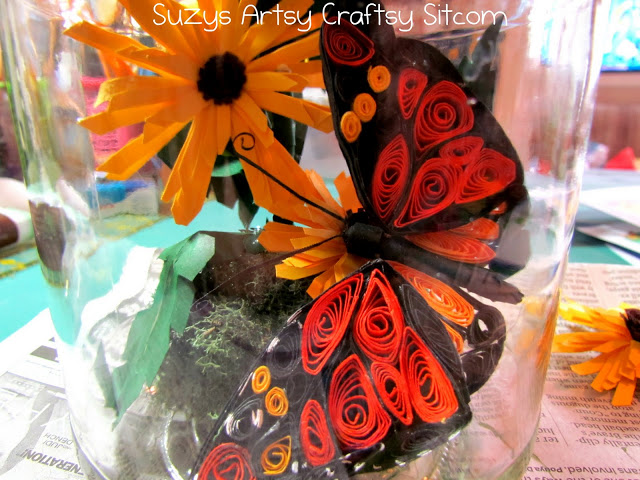
Try your hand at paper crafts! This beautiful butterfly in a jar not only is a great way to recycle, but makes a fabulous conversation piece. Paper quilling with colored cardstock and a recycled jar!

So I have this thing about throwing perfectly good things away. Like pickle jars. I love those huge kosher dill pickles. I snack on them all the time. And they come in nice sized glass jars. Of course, I certainly cannot throw them away, so I’ve accumulated at least 20 of them in the back of my kitchen cupboard. This week, I decided to put one of them to good use. I created a quilled butterfly in a jar. The perfect pet. No back-talking, no poopy on the kitchen floor, no begging at the table.
For this project I used:

One pickle jar
Assorted colored sheets of card stock
Quilling tool
3″ styrofoam ball
Moss
about 4″ of wood dowel (I actually cut up a wooden skewer)
Aleene’s Tacky glue
Hot Glue
Acrylic paint
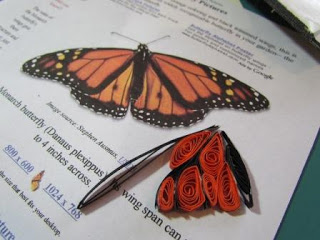
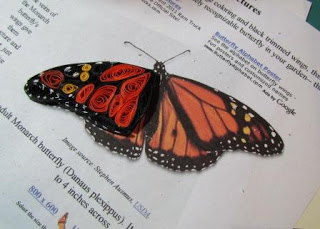
I wanted to create a Monarch butterfly from my quilling paper, so I pulled a photo off of the internet for reference. I then cut my cardstock in 1/8″ strips. For the butterfly, I used black, dark orange, light orange, and yellow. Using the quilling tool, I then coiled the strips, dabbed a bit of tacky glue on the end to hold it, and pinched the end to create teardrop shapes.


Using the butterfly photo, I laid these shapes out over the image and adjusted them to fit. Paper is a very versatile medium, so with a bit of adjustment, pinching and twisting, you can pretty much get any shape you want. I did one wing at a time and then the two lower wings.For basic quilling instructions, look
here and
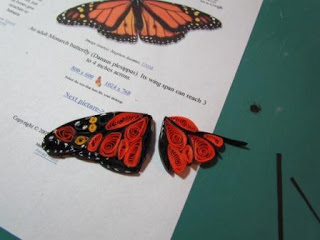
here. I backed each upper wing with a sheet of black cardstock, trimming it to the edges of the wing- to bring out the colors a little better. Final touch on the upper wings was to add dots of white acrylic paint. Now before a million folks point it out, I want you to know that I noticed after the fact that I forgot to add the white dots to the second wing. I will be touching that up later. Sigh…
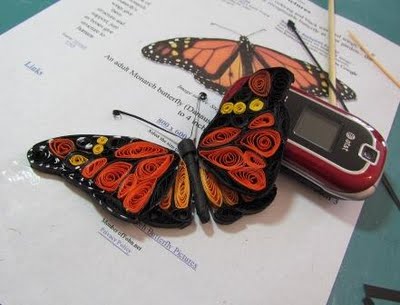
I created the body of the butterfly by coiling a 1/4″ strip of black paper around a 1″ piece of dowel, gluing it down with tacky glue. The head is another piece of coiled paper glued to the top of the dowel, and the antennas are made from very thin strips of black, twisted at the ends and then glued onto the head. I then glued the body together with the wings, using my handy-dandy cell phone to support it while it dries. You know that phone makes a much better butterfly support than a cell phone.
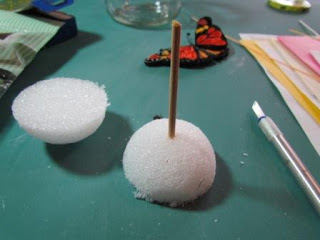
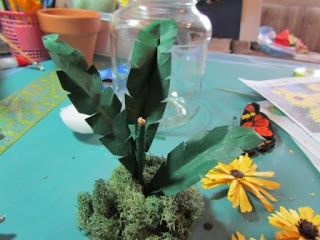
Now that the butterfly is complete, I needed a place for it to love. How about some black-eyed Susans? For some reason, I am partial to them. Ha! Anyway, to create them, I started by cutting a 3″ styrofoam ball in half to use as the base. I then cut a length of dowel to help support the flowers. About 3 – 4 inches long is more than sufficient.
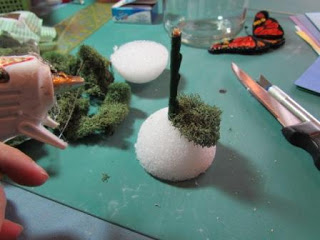
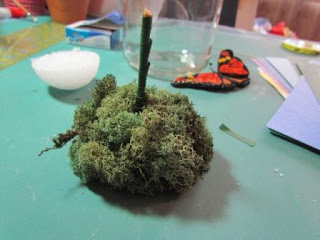
I wrapped the dowel with a strip of green cardstock, gluing it down with tacky glue. I then punched the dowel into the styrofoam and then hot glued moss over the entire top of the styrofoam.
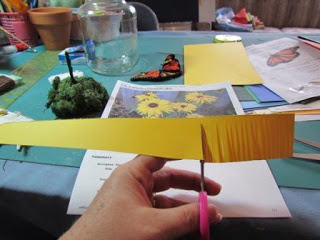
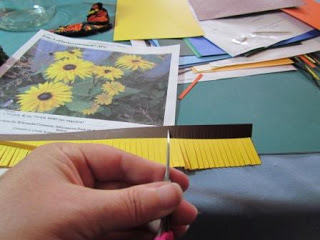
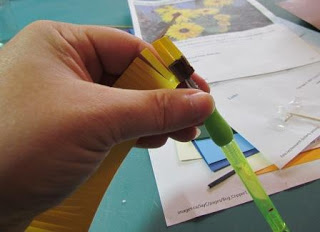
To create a flower, cut a strip of yellow cardstock about 11″ long x 2″ on one end, narrowing down to about 3/4″ on the other. Take your scissors and clip it creating a fringe along the entire length of the strip. Cut a 11″ x 1/4″ strip of dark brown cardstock. Clip a 4″ long fringe into it on one end.
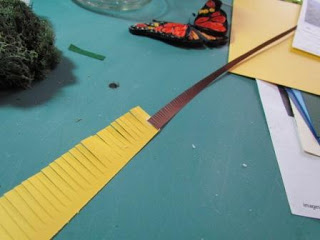
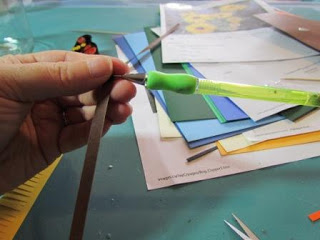
Use the tacky glue to glue your brown strip to your yellow strip. Be sure the fringe sides are facing the same direction. After it has dried, begin coiling it, starting on the end of the brown strip, adding touches of glue along the strip as you go.
I then glued the body together with the wings, using my handy-dandy cell phone to support it while it dries. You know that phone makes a much better butterfly support than a cell phone.
Now that the butterfly is complete, I needed a place for it to love. How about some black-eyed Susans? For some reason, I am partial to them. Ha! Anyway, to create them, I started by cutting a 3″ styrofoam ball in half to use as the base. I then cut a length of dowel to help support the flowers. About 3 – 4 inches long is more than sufficient.
I wrapped the dowel with a strip of green cardstock, gluing it down with tacky glue. I then punched the dowel into the styrofoam and then hot glued moss over the entire top of the styrofoam.
To create a flower, cut a strip of yellow cardstock about 11″ long x 2″ on one end, narrowing down to about 3/4″ on the other. Take your scissors and clip it creating a fringe along the entire length of the strip. Cut a 11″ x 1/4″ strip of dark brown cardstock. Clip a 4″ long fringe into it on one end.
Use the tacky glue to glue your brown strip to your yellow strip. Be sure the fringe sides are facing the same direction. After it has dried, begin coiling it, starting on the end of the brown strip, adding touches of glue along the strip as you go.
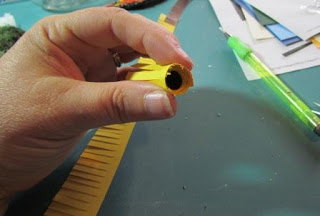
 Continue to coil until you get to the end of the yellow, tack it down with tacky glue and then remove your quilling tool. Allow it to dry.
 Now fold open your flower, spreading the fringe edges. You need to “manhandle” your flower too. Move your petals where you like them and then clip the squared edges to create more pointed petals.
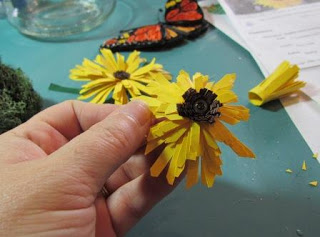
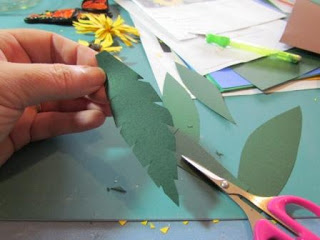
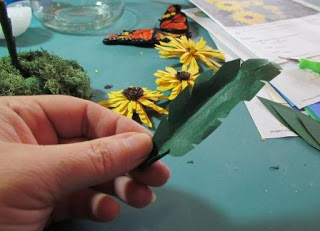
 To create the leaves, I cut basic long leaf shapes out of the green cardstock. Then clipped small v’s in each side. Fold the leaf lengthwise to create the vein. And then “man-handle” the leaf to give it texture and curl. You don’t want it to look perfect. Glue the leaves on in an interesting manner, holding one aside for later.
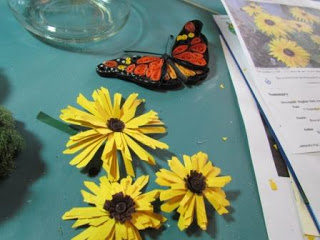
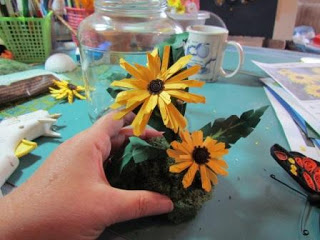
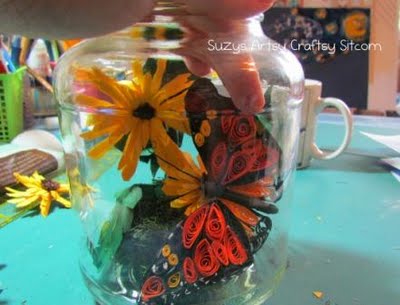
Now you are ready to assemble. Glue two of the flowers to the leaf/coil base and then add hot glue to the bottom of the styrofoam base and carefully push it into the jar, positioning it towards the back of the jar so that the butterfly will have a bit of room. Then add a touch of hot glue to the butterfly and position it in the jar.
I painted the lid of the jar with acrylic paint and then added the final leaf and flower to the jar lid as a finishing touch.
To create the leaves, I cut basic long leaf shapes out of the green cardstock. Then clipped small v’s in each side. Fold the leaf lengthwise to create the vein. And then “man-handle” the leaf to give it texture and curl. You don’t want it to look perfect. Glue the leaves on in an interesting manner, holding one aside for later.
Now you are ready to assemble. Glue two of the flowers to the leaf/coil base and then add hot glue to the bottom of the styrofoam base and carefully push it into the jar, positioning it towards the back of the jar so that the butterfly will have a bit of room. Then add a touch of hot glue to the butterfly and position it in the jar.
I painted the lid of the jar with acrylic paint and then added the final leaf and flower to the jar lid as a finishing touch.

And there you have it. Bug in a jar. It looks very pretty on my windowsill.
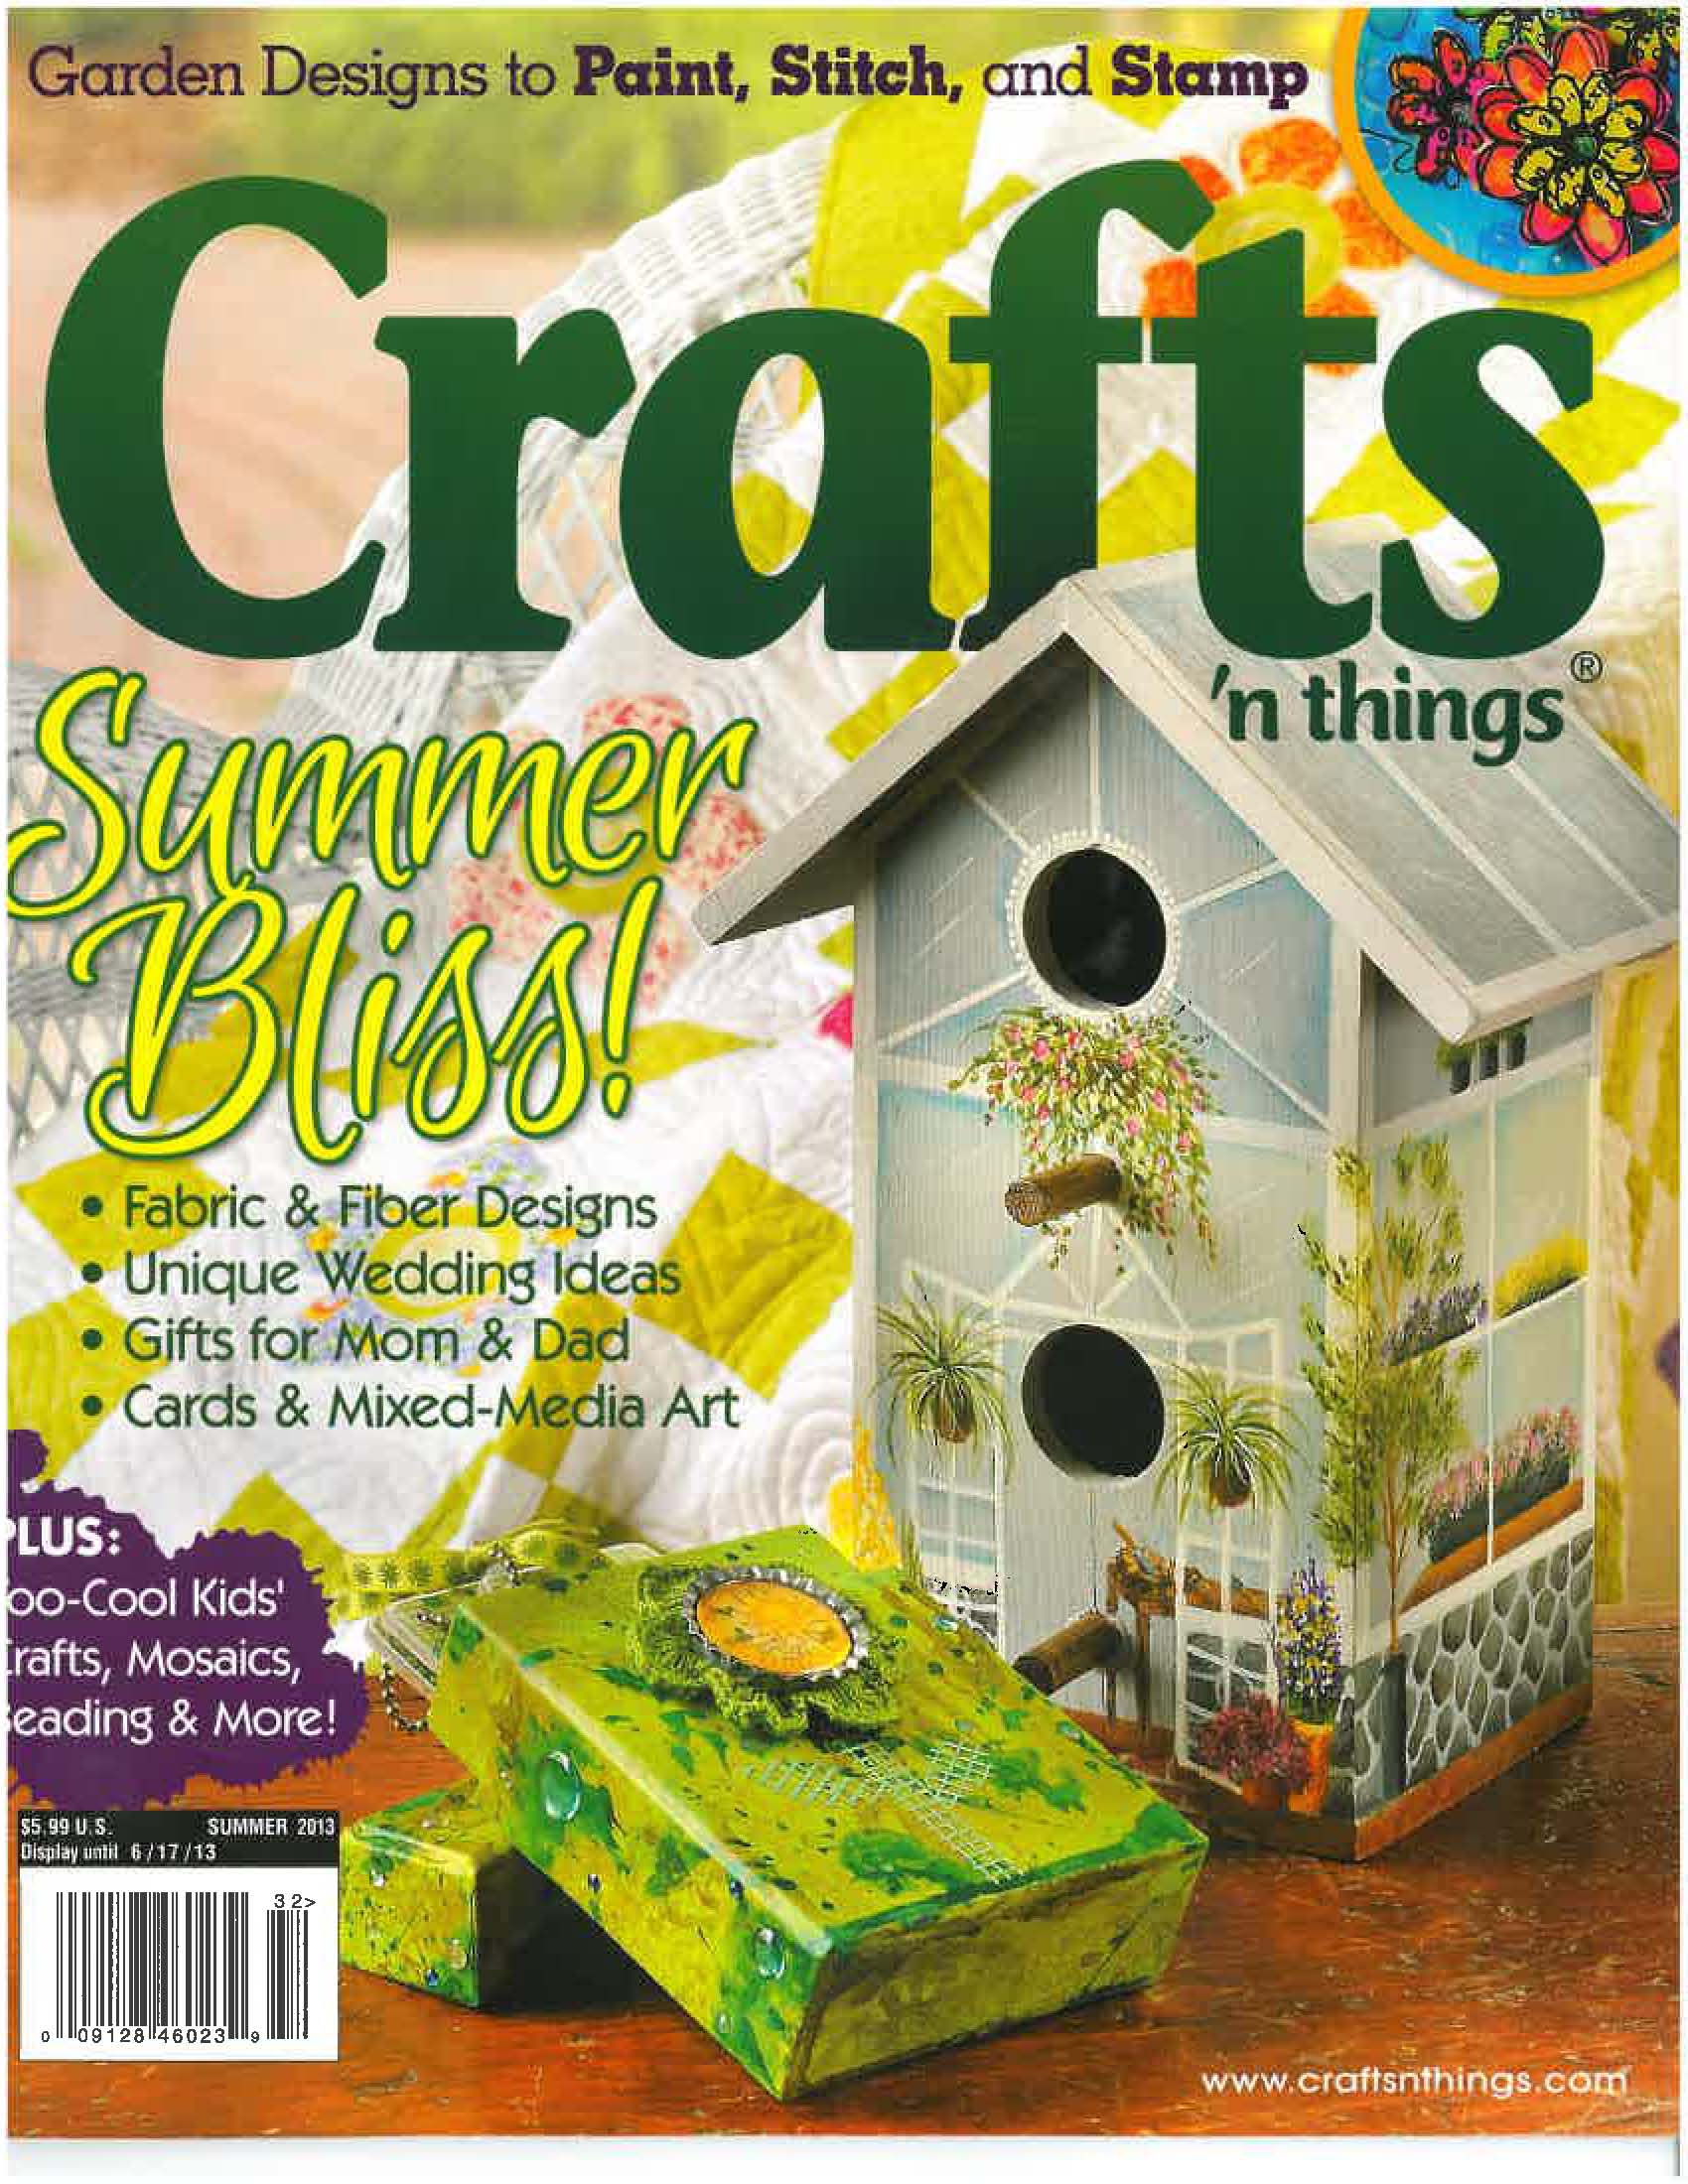
 This project was featured in the Spring 2013 edition of Crafts ‘n Things Magazine!If you enjoyed this tutorial, you might enjoy some of my other paper craft tutorials:Quilled Summer Blooms Frame
Quilled Paisley Monogram
Quilled Starry Night
Quilled Topiaries
Faux Metal Wall Art


I wish I had one out could sale them.
hi im iranian can’t verywell speak english jast i say your idea is very good
Wow! This is so pretty! I don’t think I have the patience to make it. Maybe one day! Thanks for linking up at the #HomeMattersParty. We hope to see you next week.
Here from #HomeMattersParty
Absolutely stunning!
I have a aunt who would drool over this!
Loved this cute project. I am featuring it on Brag About It Link Party tonight.
http://sksartell.blogspot.com/
Thanks for sharing. sk
Your quilling designs are beautiful. Thank you for linking up with us on Idea Box link party!
This is so cool! You are truly crafty! Thank you for sharing at the Home Matters Linky party. Hope you come again!
This is so pretty! The jar display is such a great idea.
So beautiful. I love it. Pinned.
how adorable and so realistic looking 🙂 tfs
A great craft, might give this a try. Thanks for sharing your work it is really appreciated
BEAUTIFUL!! Soothing to the soul!
Terrific tutorial, Suzy! I love seeing your quilling projects.
wooow this is beautiful, you’re really talented. Like it that you have made a completely tiny landscape in a jar of it. very cute and lovely.
And thank you for the sharing and the tute.
it’s helping to understand how you did this master piece, i’m always fond of paper work . Some people are telling that all the dutch love paper work or art. I don’t know, but this is one of my fave!!!!
It’s so amazing! And really realistic… Wonderful :)))
It’s really amazing!!! And so realistic… Wonderful :)))
Maravilhoso teu trabalho! Ficou lindo! Gostaria muito de fazer um, mas acho que é muito difícil! Parabéns!
I love this!!!! It would be great for my daughter-in-law. And I love to quill. For me it's quite relaxing and fun to make things other than from a kit. This would be a great gift and would look great sitting by their next butterfly project in the spring.
Featuring this wonderful post on my "Walk Around Blog-Land" today!
http://estherscardcreations.blogspot.com/2011/07/walk-around-blog-land-8_18.html
Now that is uber cool. So glad you shared it on Motivated Monday at BeColorful.
Pam
I saw your project on Make It Monday, wow, it's beautiful and so creative,
Sandy
Hey, I wanted to let you know I featured your link on SewHappyGeek's Feature Friday! Thanks so much for linking up, and if you want, go grab a button! 🙂
What a fantastic creation! You are super talented. Such a clever idea and very pretty too. I saw your link on Make it Monday.
Sarah-Jane xx
super cute!
This is truley amazing…just as you think you have seen everything someone else comes up trumps with more stunning creations…very well done.
I popped over from MIM linky party but i am now a follower….
indie:) x
That is a great idea! I had to wait for a real butterfly to die in my yard so that I could display it!! But this is great and I can't wait to do something like it for my daughter's room. Thanks for linking this up to my Simply Creative Blog Party! By the way, here's a link to the hard way to do this project… ie. waiting for a butterfly to die!
http://365days2simplicity.blogspot.com/2011/06/shadowbox-butterfly-display.html
WOW. Like, really: WOW
Love this, Suzy! I used to do quite a bit of quilling, but have gotten away from it in past years… thanks for the inspiration to begin again!
Wow! So gorgeous!
What a great way to bring Summer into the Winter months! Thank you for linking to Handy Man, Crafty Woman Wicked Awesome Wednesday!
Quilling is such a zen thing, isn't it? So cool. Found you over @ GingerSnap Crafts.
Wow! Your quilled butterfly is perfect… Love the way you have put it in a glass jar … And those yellow flowers look lovely… perfect combination… Love the idea of putting a flower on the top of the lid too… This would make a perfect gift… !!!
P.S : I too have linked something similar (using glass jars 😉 😉 ) in the wednesday link party… 😉 … 😉 … !!
This is so awesome!!! I am going to make one today! I have been wanting to do a quilling project but couldn't decide. Thanks for this.
BTW, just found your blog – LOVE IT! I'm a new follower.
WOW amazing so creative and clever your quilling is enviable in the extreme. Saw on Make it Monday 'a quilled bug in a jar' that is such an understatement. XOXO Zoe
The Creative Bloggers' Party & Hop became the coolest party on the block because of your participation. Thank you!
Just gorgeous! I wonder what it would look like as a kids project… may have to try this! 🙂 THanks ofr the inspiration!
What a lovely idea!
Beautiful stunning work, I'm saving this picture to show my grandaughters, they love butterflies.
Luv CHRISSYxx
I so love this I can remember butterfly hunting with my sisters as a kid and we would put just a bit of something for them to eat in the jar just like your jar come see what I shared at http://shopannies.blogspot.com
wow.. how lovely.. I saw your project on Make It Monday and had to see the larger pic.. This is incredible.. I don't think I would have the patience to paper quill like this.. you have done a fantastic job.. thanks for sharing.
-anne-
so neato. I love bugs that aren't buggy! You really had your thinkin' cap on! Maria
http://caribbeanmissionarywife.blogspot.com/
Oh wow….this is just amazing…..and love all the photos that you have shared as you created this. Visiting from Make it Monday.
Just wanted to let you know I featured this as part of my BFF Open House Wrap Up! Feel free to grab a featured button from my sidebar if you like!
This is so pretty! I am so fascinated by quilling but have yet to try it.
I LOVE the quilled butterfly!!! The fact that you made a little home for it is the icing on the cake! Amazing! 😀
This is sooooo beautiful! What an amazing job you did!
Oh Wow!!! This takes quilling to a whole new level I think! Beautiful job — love the idea…saving to my inspiration file!
I love this! I took a quiling class last winter. You are very good!
HI Suzy
WOW!! This is amazing!! You are so incredibly talented. I love how you used the printed picture for reference, yours came up looking the real deal.
Thanks for sharing with us at Make It Monday this week.
Michelle :o)
What a wonderful project, and thankyou for the step by step tutorial.
Thanks for sharing your creation with Make It Monday.
Don't forget……… if you leave a comment on another entry, mention that you saw their card on "Make It Monday" for a chance at second prize. The more entries you comment on the more chance you have of winning second prize.
This is absolutely beautiful Suzy! I'd love one of those on my outdoor table! Might have to try sometime!
Thanks for linking to a Round Tuit!
Hope you have a great week!
Jill @ Creating my way to Success
http://www.jembellish.blogspot.com/
you are just too funny! love that butterfly, gorgeous! and this is certainly a great way to preserve your art! thanks for sharing on Craft Schooling Sunday!
OOOH, this is so pretty! Love it! Your butterfly is gorgeous and the flowers look real! Very inspiring!!
This is beautiful…YOU ARE AMAZING!
Olá Suzi que idéias lindas para decorarmos nossas casas.
Obrigada por dividir o tutorial
fique com Deus
Dolly
Hi Suzi, I tweeted a link to this post and someone following me has published your tutorial link to thier daily. http://paper.li/mushroom_whimsy/1302621339
have a blessed day
this is beautiful! i really want to give this a try! i hope mine will come out as lovely as yours!! thank you for sharing.
Stinkin' precious!
this is darling:) i love the new use for the jar!!
http://jaysonandashley.blogspot.com/
This is so beautiful! I LOVE pickles, but this is a much cuter use for the jar! Thanks for sharing!
Oh um, by the way, in case you were wondering, I like purple butterflies with my daisy's, hehe
Ummm, you know, it is July and there may be a birthday at the end of the month….I really like blue butterflies, and I like just about any flower –didn't you say you had 19 jars left???? Not that you have to make me one or anything.
Needless to say. I think these are amazing! Great job on both the creativity AND repurposing!
It is amazing that you can do this! The patience and attention to detail… geez!
You are so amazing! This is another awesome craft! Totally cute!
great tutorial… i love it 🙂
Looks amazing! Nice job!
OMG! I have a um….birthday….coming up in oh uh…..7 months, hehehe hint hint hint oh and um. my favorite flower is the daisy, hehehe just in case you were wondering. 😉
You are multi talented and I love it! Great tutorial!
What a great idea for the jar, the butterfly is gorgeous,it's all beautiful!!. Nice tutorial!
Paula
absolutely fabulous
What a great idea! That is so beautiful. I will have to come over sometime and maybe you could help me make one. Hint, Hint.
Hey sweety.i really Love Love Love this easy peasy & beautiful decoration..Paper quilling is always a FUNNN..& you know i did quilling without using any tool..hmmm..you can check my posts about quilling tutorials 🙂