Fun to make Doggie Advent Calendar!
I love my dogs. And I love the holidays. So naturally, I love to combine the two. I mean, my dogs are part of the family, right? While they may not understand the holiday season, or our crazy traditions that we carry on from year to year, it is fun to include them in the celebration. So this year, I decided to create their very own Doggie Advent Calendar and fill it with their favorite snacks!
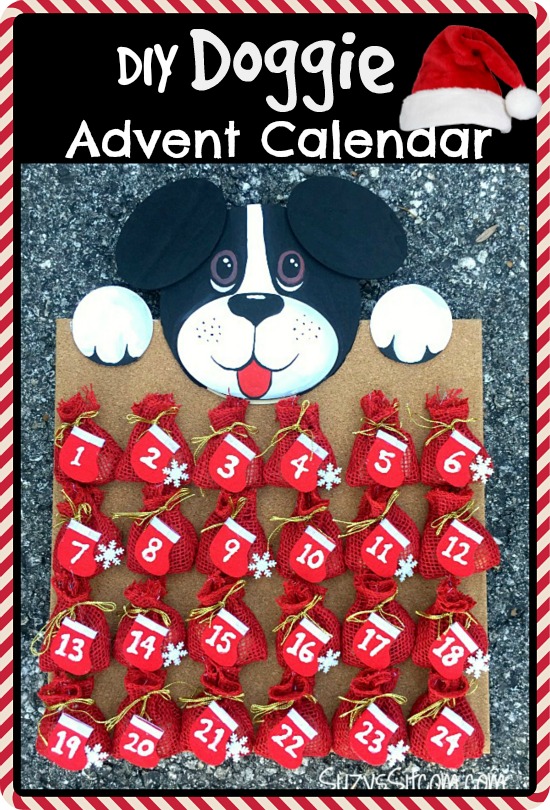
I created 24 little burlap bags, filled them with treats and thumb tacked them onto a cute little cork board that I found at Walmart. Oh, and added a little doggie to the top too! It will be fun counting down to Christmas this year with my Santa Advent Calendar filled with scratch off lottery tickets for the hubby, and the Doggie Advent full of snacks for the dogs.
Want to know how to make this cute little advent calendar?
For this project I used:
14″ x 14″ cork board (I found mine at Walmart)
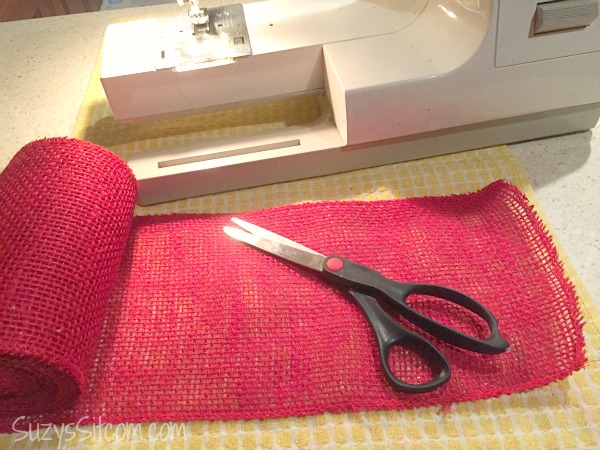
6″ wide red burlap ribbon
(1) 6.5″ wooden circle
(1) 5.5″ x 3.5″ wooden oval
(2) 4.5″ x 3″ wooden ovals
(2) 2.75″ wooden circles
(24) miniature felt stockings
gold ribbon wire
white puff paint
Assorted snowflake charms
Acrylic paint in white, black, brown and red
Hot glue
Thumb tacks
Roll out some of the burlap ribbon and begin cutting 3.5″ wide pieces.
You will need 24 of these 3.5″ x 6″ burlap pieces for the little bags.
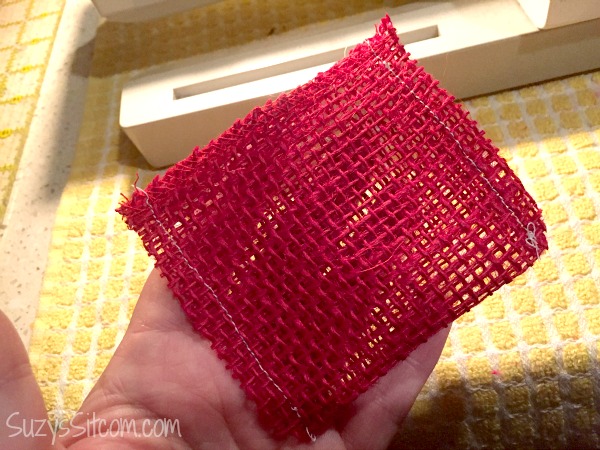
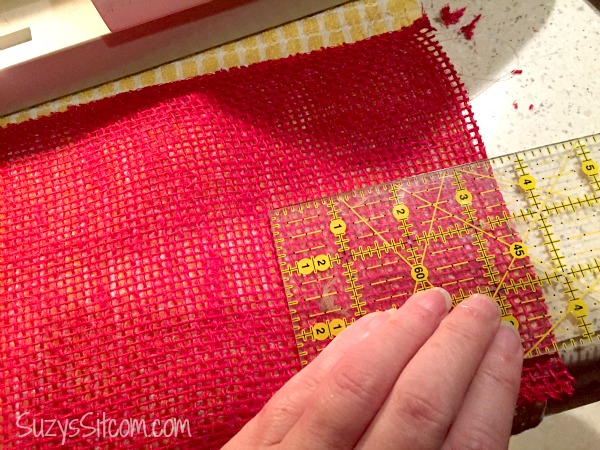
Fold each one in half with the finished edges towards the top and sew a 1/4″ seam in each side.

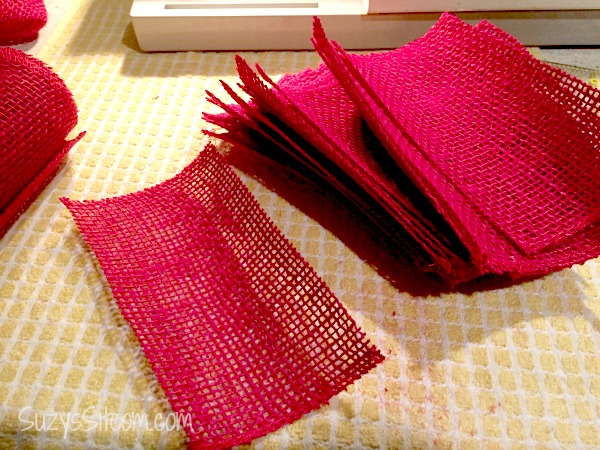
Turn the bags inside out. You will now have 24 little burlap sacks!
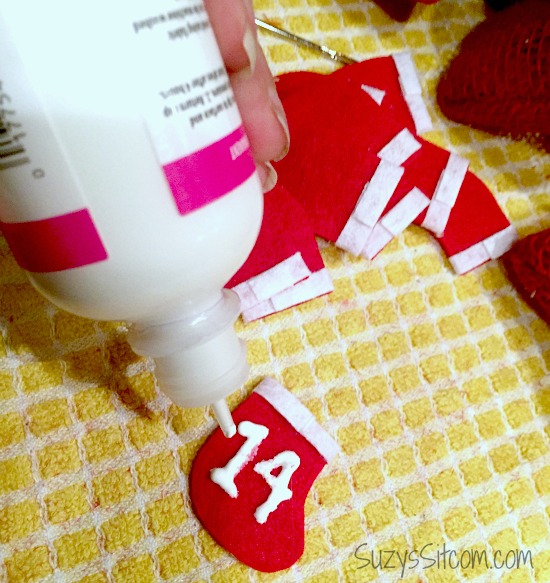
I used miniature felt stockings for this project that I found at my local craft store. You could always cut your own out of felt if you cannot find them.
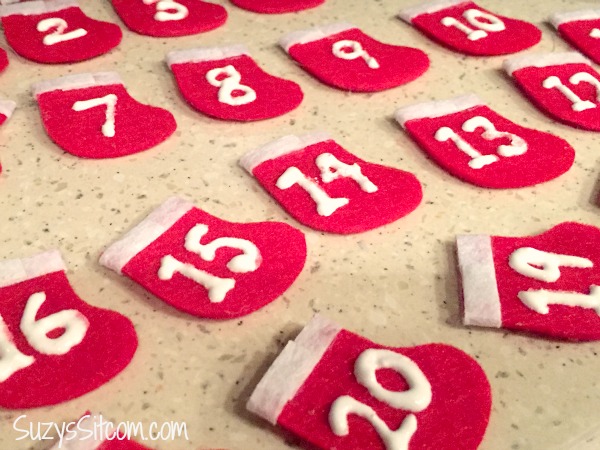
Use white puff paint to paint in the numbers 1 through 24 on each stocking. Allow to dry thoroughly.
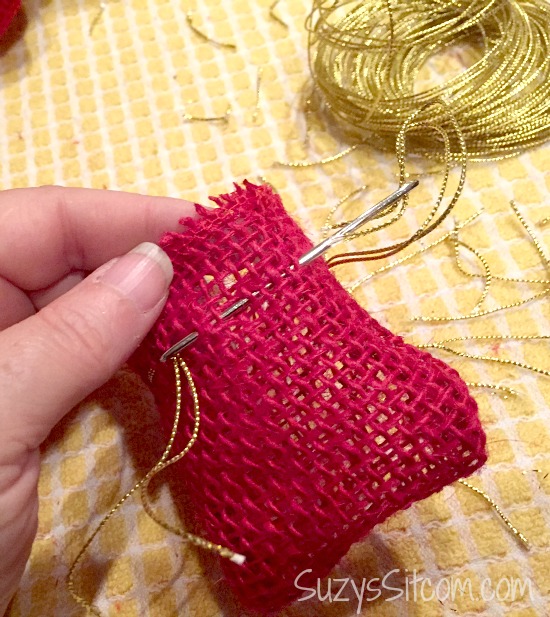
Cut two strands of gold ribbon wire about 10″ long. Use a tapestry needle and starting from the center of the front of the bag about 1/4″ from the top use a long basting stitch to thread the gold ribbon wire through the top of the sack, ending at the front. The will create a draw string to close the bags once it is filled.
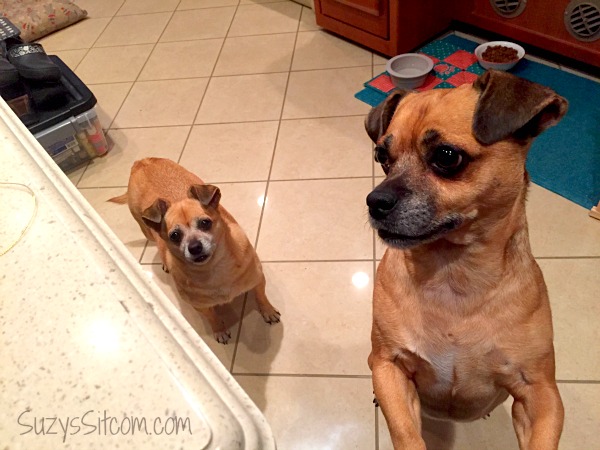
Umm….Ralph and Faith just noticed that I’m working with their favorite treats…
Patience, guys! Christmas is right around the corner!

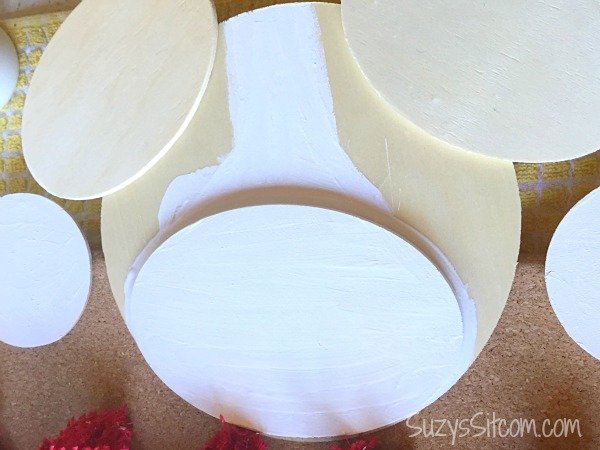
Let’s start working on the little dog! Gather your wooden pieces and the cork board.

Assemble the wooden pieces as shown at the top of the cork board and hot glue into place.

Add a dot of hot glue to the front of each bag and glue on one of the numbered stockings. I also glued on a few snowflakes here and there for extra glitz.
Place several treats in the bag and tie it shut, gathering the top with a tied bow. Then thumb tack each individual bag in place onto the cork board as shown.
To paint the dog, begin with a base coat of white as shown above.
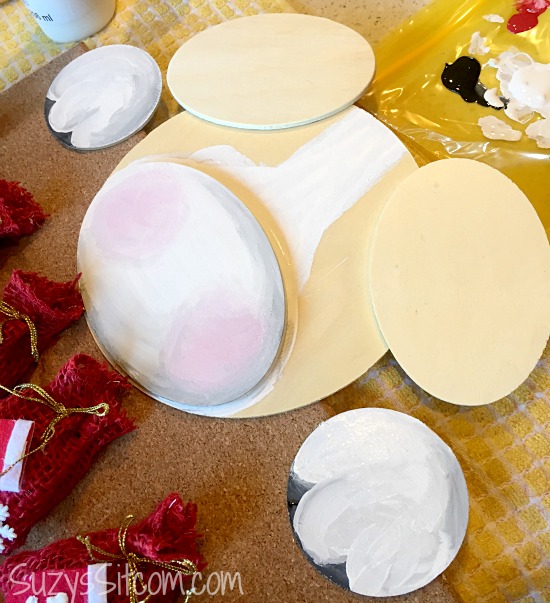
While the white is still wet, add a touch of red for the cheeks and blend in. Add a touch of black to shade the paws and muzzle and blend in. Use black to outline the toes as shown above.

Once the white is dry, use black to paint in the ears, head and nose as shown above. Outline the toes.
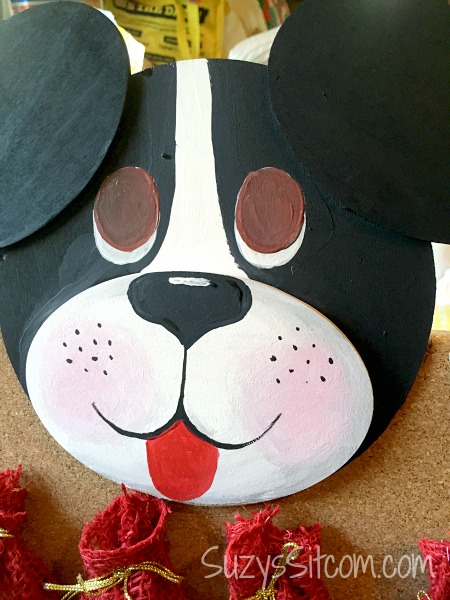
Use black to draw in the smile, and dots on the cheeks. Use red to paint in the tongue. Paint in two white ovals for the eyes as shown above. Once they are dry, use the brown to paint in the eyes.
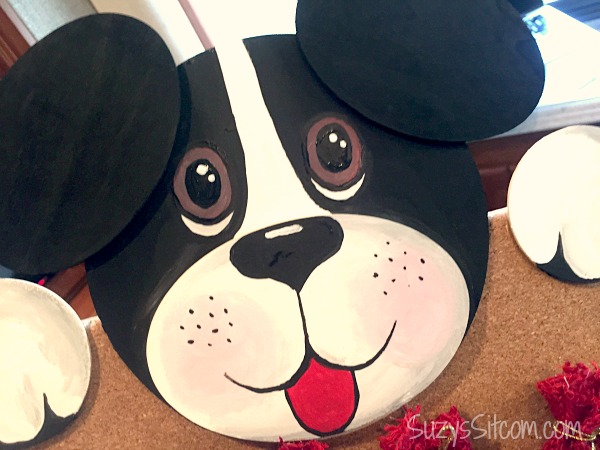
Final touches include outlining the eyes and tongue in black, adding in the pupils in black and adding white highlights on the nose and eyes.
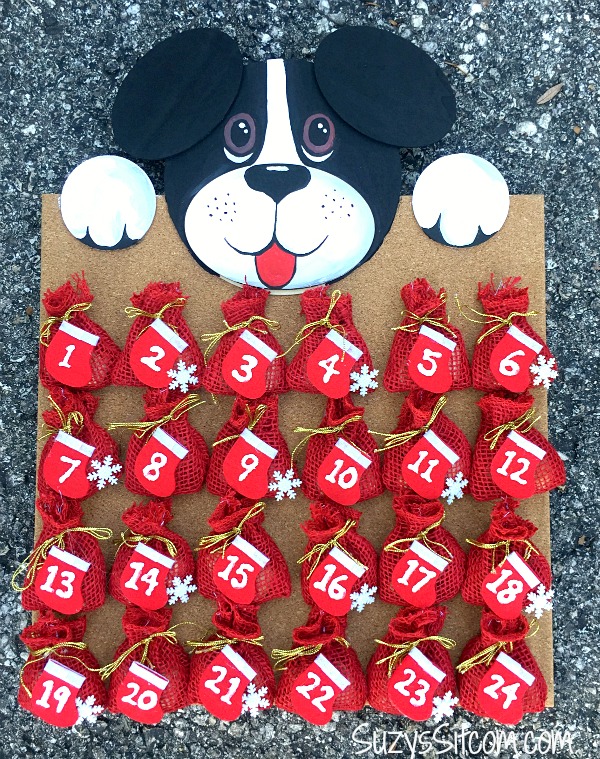
And there you have it! A perfect way to count down to Christmas for your dogs! Because, really, what can you get the dog that has everything? Right?
Be sure to check out more great gift ideas for pets. I’d love to hear about a favorite pet you will be giving treats to this holiday season!

Are you new to the Sitcom? Be sure to check out my Frequently Asked Questions Page!
For over 200 crafty tutorials for all ages, visit my Tutorial Page!

That’s really cute!! Love the picture of Ralph and Faith.
We have a little dog and this would be fun to get the kids involved to help assemble and full the treats in the bags. Love it! (client)
LOL you think of all the family Suzy. I love this. Many thanks