Never-ending Flower Pillow Crochet Pattern
I’m always looking for ways to add a touch of color to my RV. You see, it is basically white and wood. Of course, there is nothing wrong with that; it makes the place look much bigger than it’s 400 square feet. But it could definitely use a pop of color or two. So when I ran across a fun crochet pattern for the Neverending Flower, I decided to create some vibrant pillows to spice up the place.
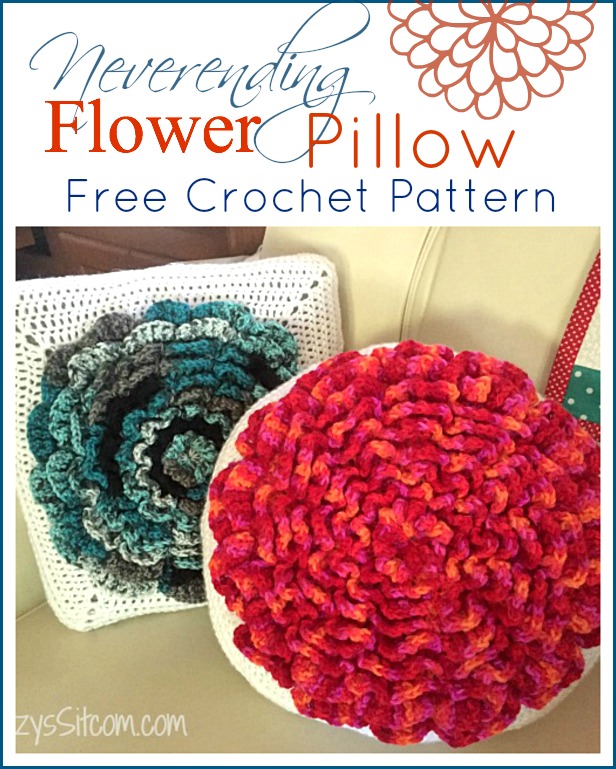
Oooh, reds and teals! My favorite color combination! This project is simple to create. If you are a beginner crocheter, you simply need to master the double crochet. Nothing fancy here. Even though it certainly looks like it.
Affiliate links below:

Need a crochet refresher course?
Don’t miss the online video crochet classes offered by Craftsy! You can watch them at anytime, and refer back to them when you need them! Perfect for those of us that learn by watching!

For this project I used:
One Skein Craft Smart Fiesta yarn
One Skein Craft Smart Ombre yarn
2 Skeins white 4-ply yarn
Size H Crochet Hook

Crochet directions are like a foreign language to me, but it sure does produce a beautiful end product. Thanks for sharing your pillow craft on Merry Monday.
Hi Carol!
On my website, I direct you to this link for the actual flower: http://littlemonkeyscrochet.com/the-never-ending-wildflower/
My tutorial is for how to turn it into a pillow. Hope that helps.
suzy
i’m so lost.
with the square flower pillow i see rounds 10 – 16 but don’t see rounds 1 – 9. i see the same thing with the round flower pillow.
did i miss something? where would i find the first 9 rounds please, my grandmother used to have these and want to make some for my kids.
thanks!!
Hi Gail,
I followed these last two rounds until the flower was the size that I wanted it to be.
Round 5 (BLO): SL ST to 1st back loop of Round 4. CH1. 2DC in same ST, DC in each of the next 3 STS. (2DC in next ST, DC in each of the next 3 STS) around. Join with a SL ST to first DC. (60)
5th Round of Petals (FLO): CH2. DC in same ST. 2TR in each of the next 3 STS. In next ST, DC, CH2, SL ST. (SL ST to next ST, CH2, DC in same ST. 2TR in each of the next 3 STS. In next ST, DC, CH2, SL ST) around. SL ST to base of 1st CH2. (12 petals)
Fasten off and weave in ends, or keep adding increase rounds and petal rounds to make it even bigger! I used an entire skein of yarn on each one.
suzy
I don’t know how to continue after row 5… can you please tell me how.
Thanks,
Gail
Hi!
I know it has been a long time coming, but I should have the completed project out next month!
suzy
I am curious how you turned it into a square pillow.
Hi Rhonda,
I’m not sure if it would become weather proof or not. If you decide to take it outside, I would seal it in multiple coats of clear sealant just to be sure.
suzy
The faux stained glass, the sealant u use at the end does that make it weather proof so u could hang them outside
These are fantastic! What a beautiful throw pillow idea. Thanks for sharing with us at Merry Monday this week!
I’m so anxious to get started on this. Those flowers are so beautiful.